I love making cake and cupcakes, but sometimes I’m running low on eggs, butter, and milk. Sometimes I want cake, but I’m in a hurry. Enter the two-ingredient cake!
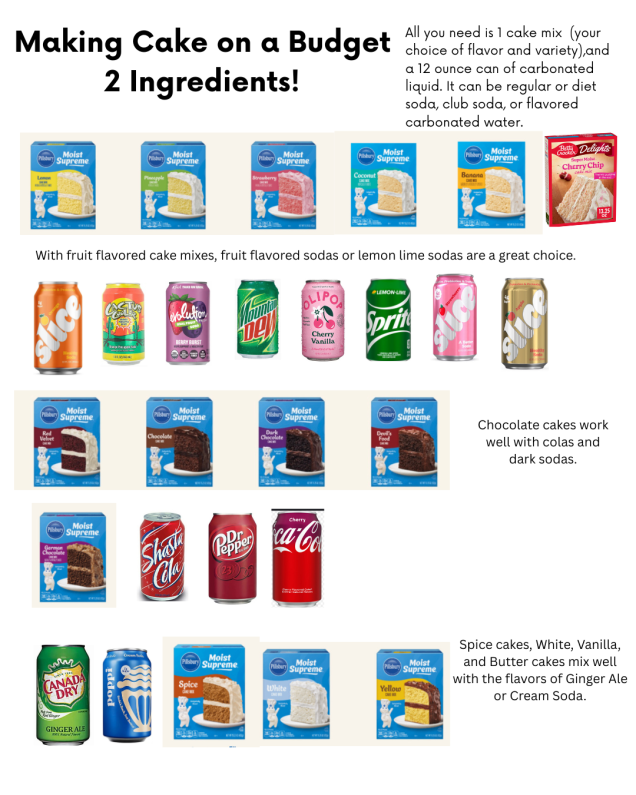
Any cake mix and any carbonated beverage- Soda (diet or regular) or carbonated water/club soda.
Above is an infographic I made with some options. My favorite combinations include Ginger Ale and Spice Cake, and Cream Soda and Yellow Cake.
Have you ever tried this before? It’s simple, easy, and if you are on a low sugar diet, this works well with lower sugar cake mixes and diet soda
Unlike most of my other recipes, I will not be providing any sort of dietary alternatives. I’m not sure this recipe would come out the same if it was vegan/vegetarian.
Chicken Bruschetta Stew with Orzo
1 lb chicken cut of your choice, diced into bite-size
One bag, onions, and pepper strips defrosted and chopped into bite sides pieces
2 tablespoons olive oil or your favorite cooking oil
1-quart chicken broth or stock
1 14.5-ounce can of petite diced tomatoes with oregano and basil
One small jar (about 6-ish oz), red pepper, and artichoke bruschetta (I bought mine at Aldi’s.)
1 1/2 cups dried orzo pasta (it is rice shaped)
2 tablespoons Italian seasoning
1 tablespoon onion powder
1 tablespoon garlic powder
Salt and pepper to taste
Topping:
2 cups Italian cheese blend, divided
Directions:
In a large stock pot, heat oil. Add in bite-size pieces of chicken and cook over medium heat frequently until chicken is no longer pink about 5 to 7 minutes.
Add in onions and peppers, cooking over medium heat. Stir occasionally, about 5 to 7 minutes until the onions are no longer white, and the peppers are fragrant.
Pour in a quart of broth and a can of tomatoes. Stir to combine, allow to simmer for about 15 minutes.
Add an entire jar of bruschetta (approx. 6-ish ounces) to stock pot. Stir to incorporate, and add in orzo and all seasonings.
Cover pot with lid, turn the stove down to low and allow soup to slowly simmer and orzo to cook for about 15+ minutes. Adjust seasonings as needed, and add salt and pepper as desired.
soup can be served at this time, or it can be left to simmer on low as needed.
To serve: ladle soup into a bowl and top with approximately one to 2 ounces of cheese as desired. Serve with garlic bread or hot, crusty buttered bread. Well with a mixed green salad
And as always, the soup is better the next day. This recipe makes 6 to 8 servings and can be frozen.
This is an easy, decadent recipe that impresses guests.
Inspired by a friend’s brownie recipe that once fetched $100 at an auction, this dessert will disappear before your eyes. These brownies are so rich, so don’t forget the milk or cuppa Joe.
$100 Brownies
Ingredients
1 brownie mix
Milk
Eggs
Melted butter
1/2 cup peanut butter (your favorite variety)
1/2 bag (about 6 ounces) semi-sweet chocolate chips
Directions:
Mix up the brownie recipe per directions in the box. Substitute milk for water, and melted butter for oil in the directions. Use eggs as directed on the box.
Bake brownies as directed.
As soon as they are down, remove them from the oven and immediately top with peanut butter and chocolate chips.
Allow PB and chips to melt atop the hot brownies, about 5-10 minutes.
Using a silicone spatula, carefully mix and spread PB and melted chips to form and even layer a top the brownies.
Once brownies have cooled to room temp, store them in the fridge for at least 1 hour prior to serving.
Makes 18 small brownies- these are very rich, and a little goes a long way.
Substitutions:
If you are Gluten Free, substitute your favorite GF brownie mix.
I don’t really like Cracker Barrel, and there isn’t one close to us, but these potatoes are delish. In some places, these are called Funeral Potatoes. While doing my weekly meal prep this morning, I realized I had all the ingredients and decided to make a pan. It’s a great side dish for any holiday event. I improved it a bit as well.
I’ve included substitutions to make it vegan below.
Cheesy Hashbrown Casserole
Serves 6-10
Ingredients:
1 large bag frozen hashbrowns, defrosted
1 can condensed cream of soup (I used cream of mushroom because I have a vegetarian in the house, other people use cream of chicken)
8oz sour cream
2 cups shredded cheese (I used cheddar, but Colby jack is good too), divided
1 small onion, chopped
1T. butter
Salt and pepper to taste
After being baked. It was..sampled.
Directions:
Preheat over to 350 degrees, Spray a 9×11 baking dish with spray release.
In a small pan, saute onions in butter until translucent- about 5-10 minutes.
In a large mixing bowl, combine soup, sour cream, 1 cup cheese, hashbrowns, and sauteed onions.
Pour mixture into a greased baking dish, top with remaining cheese.
Bake for 60-70 minutes.
Serves 6 as a main dish or up to 10 as a side dish.
This casserole is great reheated and is good for up to 3 days in the fridge, but it won’t last that long.
Vegan substitutions: In lieu of dairy sour cream and cheddar cheese, use your favorite vegan brand. In place of soup, use your favorite white sauce and 1/4 cup diced mushrooms. Saute onion in your favorite spread or oil. If you need a good white sauce recipe, there are directions in this recipe.
About 10 years ago I was gifted a beautiful set of glass dishes from a friend. They were painted with my SCA device/badge (they are blue and white with blue and white Fleur de Lis). I still have them, what I love about them is they look like they were made from stained glass.
The person who gave them to me used Gallery Glass, which is a glass paint that looks like stained glass once it dries.
I have played around with this medium myself over the past few years, and recently I wanted to decorate the kid’s windows, a mirror, and make some window clings/fake stain glass for some friends.
Before we start this DIY, all of the items that you need to make these projects, as well as some more kid-friendly sun catchers can be found here in my Amazon storefront.
I do earn a small commission when you purchase items through my Amazon links, Think about it as buying me a cup of coffee, or a taco.
Using Gallery Glass is very simple. If you have ever used puffy paint or fabric paint, you can use gallery glass. You can paint on glass, you can paint on mirrors, or any sort of clear glass dish/cup/bowl, or you can make window clings like I will be showing you below.
Find an image that you wish to make into a window cling. I’ve done Celtic Knot Bears, prehistoric fish, unicorns, mandalas. Whatever speaks to you!
Slip the printout/drawing of what you want to make into the page protector. You’re going to use the faux leading (if you run out of this and can’t find more in town, sometimes in a pinch I will use black fabric/puffy paint). If your image is all straight lines, you can use the peel and stick leading (found here).
For this project, I used white puffy paint on a glass picture frame. The black leading wouldn’t have “popped” as much, and the white gave me the detail I wanted.
You will outline your image with the faux leading, and allow it to dry. Depending on the weather/humidity it can be as little as a few hours, or it can take overnight to dry properly.
Finished project- Gift for my dad
Once the leading has dried, select your colors of gallery glass and fill in the leaded “panes“ and allow your creation to dry. I usually let them sit for 24 to 48 hours to dry all the way, and cure a little bit so they’re not tacky. Once that time has elapsed you can make it a permanent window cling by gently peeling your creation off of the page protector and applying it to the window/glass as needed.
If you want something you can move around, then you will remove the paper from the inside of the page protector, and cut the image out of the page protector. And then place the creation on the window. The side with the page protector adhered to it will be facing outwards/not against the glass.
If you were looking for ideas for different art styles or creations for your stained glass/window cling project, check out my Pinterest board here. This is a project that anyone can do. It is a fun project, it is not necessarily good for small children, but I would say anyone probably ages 10 and up can handle it. It does take a lot of patience. And a fairly steady hand. This is why I tend to get Suncatcher painting kits for the little kid to do while I work on these. She can sit and do her “Stainglass“ craft while I do mine. These make great gifts. And they are absolutely beautiful.
The supplies can be a little expensive, but once you have them, a bottle of gallery glass will last you between 5 to 10 projects, depending on what size, and how many other colors you’re using in your project. Some local craft stores sell gallery glass products in their stores, so before you buy them on Amazon, you might try your local craft store.
My next big project is a Pride Flag for my nibling. I’ll be using a piece of clear acrylic (18×24) and the peel and stick leading, since it’s all straight lines.
On Wednesday, I found myself with a bunch of very ripe berries.
2 cups of strawberries
2 cups of blackberries
1 cup of raspberries
1/2 cup of blueberries
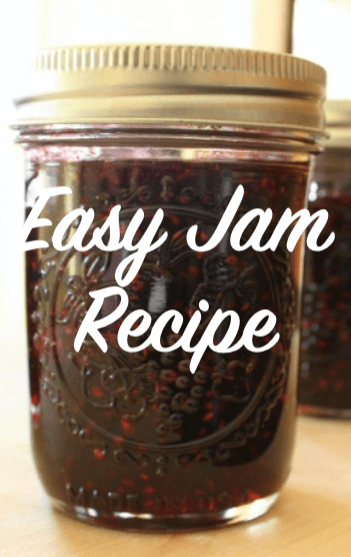
Ok, so that’s a weird amount of berries, and seeing as how there were dead ripe, the only thing I could do besides freeze them is to cook them up and make jam!
Making “freezer jam” as it’s usually known is pretty easy. No pectin needed, no jars, no canning. It’s dead simple.
Ready?
Ingredients
Equal parts chopped ripe fruit and white sugar (or you can use Splenda for baking)
Directions
In a large pot (like this one) coot fruit over medium/low heat, stirring frequently, until the fruit breaks down, about 20-ish minutes
Add sugar/sweetener, and stir until it has melted and the mixture is glossy and thick.
Pour into a refrigerator safe container with a lid. Once the mixture is room temp, store in the fridge for up to 3 weeks, or in the freezer for up to 4 months.
Spread the jam on anything!
After it cooked down, it made about 2 1/2 cups of jam
And for those who are wondering, this is easy enough that kids can help make this, but I don’t recommend that kids do it alone. Molten fruit and sugar can cause a very painful burn on the skin.
This is my great-grandmother’s recipe. I’m not sure why it’s called Alaska meatloaf. My mom made it a lot when we were kids. It’s quick, easy, and everyone likes it!
Alaska Meatloaf
Serves 6-8
Ingredients:
1 lb ground beef (you can use ground turkey is you prefer)
1 egg
1 small can tomato sauce
1 tsp Italian seasoning
1/2 cup bread crumbs
3 cups cooked rice (I like basmati)
1 jar chili sauce (the stuff that’s like cocktail sauce)
2 cups shredded cheese
Directions:
Preheat oven to 350 degrees.
Mix ground meat, egg, tomato sauce, seasoning and bread crumbs.
Pat into a greased 9″ pie plate, making a meat pie “crust”.
Bake for 20 minutes.
In the meantime, mix cooked rice, chili sauce, and half the cheese.
Heap onto the meatloaf crust and sprinkle with remaining cheese.
Continue to bake until the meatloaf is done and the cheese is melted about 15-20 minutes.
Serve with a green salad or steamed veggies.
One Dish Option: You can add 1-2 cups of chopped veggies to the rice mixture. We like carrots, celery, bell peppers, etc.
Brussels Sprouts have a bad rap… Stinky, weird texture, gross. All of these things can be true if you boil them whole.
I’ve got a great recipe to share than turns our poor, stinky, vilified veggie into a tasty side dish! I made these for Thanksgiving and they were a HIT!
Brussels Sprouts with Caramelized Onions and Bacon
Serves 6-8
Ingredients:
2 1/2 lbs yellow or white onions, thinly sliced
4T. Butter
1/4 c water or white wine
2 lbs cleaned and chopped Brussels Sprouts
1 lb bacon, cooked, drained, and chopped
Salt and Pepper as needed
1/4 C shaved parmesan cheese (optional)
Directions:
Cook the bacon- I bake mine at 350 degrees for 10-15 minutes. Then I drain it on paper towels. Once it has cooled, I take my super sharp knife and chop it up.
Caramelize the onions. Cook onions in butter on low for several hours, stirring occasionally. Scrape the yummy brown bits off the bottom of the pan, adding water or wine to help loosen the brown bits.
Once the onions turn a lovely brown (about 3-4 hours on low), add in the cooked chopped bacon and combine.
Add in the chopped Brussels Sprouts and cook on medium for about 10-15 minutes. Season with Salt and pepper as needed. Pour into a serving dish and top with cheese.
We had this for Thanksgiving, but it also is great any time. If you end up with leftovers, it’s also great on a homemade pizza crust, topped with some extra mozzarella and parm baked at 450 for about 10-15 minutes.
 This soup was easy to make, flavorful, and a big hit.
 Directions:
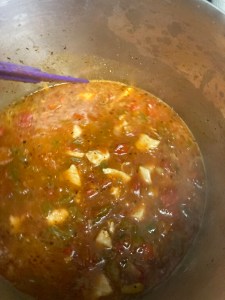 To serve: ladle soup into a bowl and top with approximately one to 2 ounces of cheese as desired. Serve with garlic bread or hot, crusty buttered bread. Well with a mixed green salad
 This is an easy, decadent recipe that impresses guests.
 Ingredients:

 About 10 years ago I was gifted a beautiful set of glass dishes from a friend. They were painted with my SCA device/badge (they are blue and white with blue and white Fleur de Lis). I still have them, what I love about them is they look like they were made from stained glass.

 For the window clings, I start with a high-quality

 On Wednesday, I found myself with a bunch of very ripe berries.


 Brussels Sprouts have a bad rap… Stinky, weird texture, gross. All of these things can be true if you boil them whole.
 Cook the bacon- I bake mine at 350 degrees for 10-15 minutes. Then I drain it on paper towels. Once it has cooled, I take my super sharp knife and chop it up.
 Caramelize the onions. Cook onions in butter on low for several hours, stirring occasionally. Scrape the yummy brown bits off the bottom of the pan, adding water or wine to help loosen the brown bits.
 Add in the chopped Brussels Sprouts and cook on medium for about 10-15 minutes. Season with Salt and pepper as needed. Pour into a serving dish and top with cheese.
