Pinecone Research is my favorite survey company! Right now they are looking for new panelists! Sign up to take surveys and earn $3 per survey from Pinecone Research. They only send you surveys you qualify for- no wasting time doing lengthy qualifiers.
I earned about $70 last year just from Pinecone Research!
Pinecone will send you an email notification when you have a survey available. Complete the survey and earn points to be redeemed for either cash or prizes. Occasionally, they will send you a product to test, too.
Yummy soup made with my favorite Seasoning Blend from Penzey’s
I love making chicken soup from scratch. The cook time is lengthy, but, you don’t have to pay a lot of attention to the soup for most of the cook time.
You can use whatever kind of spices/herbs you fancy. I love Penzey’s Arizona Dreaming, it’s a great smoky, rich compliment to the veggies in the soup.
Speaking of veggies, I use carrots, onions, celery, Italian squash/zucchini, but you can use whatever is in your fridge. Good additions would also be diced bell peppers, diced fresh tomatoes (or canned diced tomatoes).
You can omit the noodles/macaroni is you don’t care for them or are GF/low carb.
Ingredients:
5 lbs of chicken parts, bone-in or a rotisserie chicken with some of the meat removed and set aside
2 cups of carrots chopped, divided
2 cups of celery chopped, divided
3 cups sweet onion diced, divided
2 cloves garlic diced, divided
1 large shallot diced, divided
1T. cooking oil, your choice. I’ve been using grapeseed oil lately
12 cups of water
bay leaf
salt & pepper
2 cups Italian squash/zucchini, cut into bite-sized pieces
1 14-ish ounce can of diced tomatoes with juice, or 2 cups diced fresh tomatoes (optional)
other herbs/spices as desired
1 cup uncooked pasta/noodles/rice (your choice)
After cooking all day! Yummy Chicken Stock!
Directions:
If starting with 5 lbs of raw chicken, place 1/2 of the carrots, onions, and celery into a large stock pot with the cooking oil.
Cook on medium until veggies are soft, and onions are clear.
Add 1/2 of the garlic and shallots, and cook until fragrant.
Add raw chicken, and cook for about 10 minutes, until chicken browns.
Turn stove down to low, add 12 coups of water, bay leaf, salt & pepper, and cover. Cook stock on low for about 4-6 hours- you can cook it for up to 12 hours in your crockpot if you wish instead). Pull out a few pieces of chicken, pull off the cooked meat and set aside (you want about 2 cups of chopped cooked meat). Put bones back into the pot. Cook for another 20-30 minutes.
Take the stock off the heat, and once cool, strain off the solids, and discard. The remaining liquid is your chicken stock. While you start with 12 cups of water, after cooking the stock down, you may end up with 6-8 cups of rich, velvety stock.
Place chicken stock on the stove in a large pot, add in chopped chicken, remaining veggies, and any herbs/spices.
Once veggies have started to soften/cook, add noodles/macaroni/rice if desired. Salt and pepper to taste.
Mire Poix- Aka carrots, celery, and onions with a bayleaf, garlic and shallots. The perfect start to any soup!
As soon as noodles/macaroni/rice is cooked, remove soup from heat. Serve with hot bread (and butter).
*If you are starting with a rotisserie chicken, pull off 2 cups of meat, and add the carcass after the veggies are cooked and fragrant. proceed with remainder of recipe.
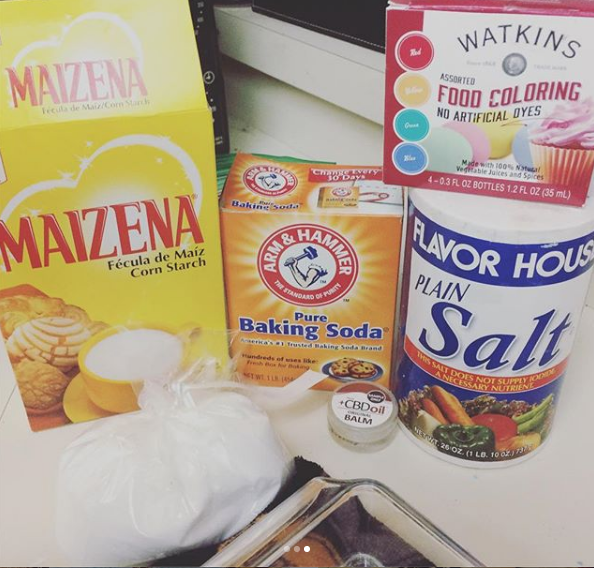
In my goodie bag from Wow Summit a few months ago, we all received CBD oil balm from +CBDOil, and I wasn’t really sure what to do with it. It has a coconut oil base, so for me it was too greasy to use as a topical pain relief (I hate having greasy skin, and stuff like Tiger Balm and Ben Gay make my skin crawl). I had been using it as lip balm, but really, I didn’t need that much lip balm.
I have a few books on making your own beauty products, so I looked for a recipe for bath balms, as I seemed to recall that they called for oil to bind the other ingredients. I also did a quick internet search. I took 5 recipes and sort of Frankensteined together a really good recipe.
Most of these ingredients you have in your pantry already. Citric Acid (also called sour salt) can be purchased at Sprouts or whole foods in the bulk section, or in a grocery store with a large Jewish Food section. Or, of course… There is Amazon.
I weighed my dry ingredients using a food scale, so these measurements are by weight.
Ingredients:
4 ounces (by weight) Baking Soda
2 ounces (by weight) Corn Starch
2 ounces (by weight) Citric Acid
2 ounces (by weight) Salt (You can use Epsom salt, table salt, or Kosher salt)
2 T. Water (more or less make be needed depending on the weather conditions at the time you make the bath bombs)
1 T. +CBDOil Balm (it has peppermint oil in it, so I opted to add no additional essential oil)
Optional (but fun): natural food coloring. I used Watkins. Start with a few drops and add more until you get the color you want.
Directions:
In a glass bowl, mix all dry ingredients together.
Add balm, and stir until it starts to clump.
Slowly add water, 1 tablespoon at a time.
Add food coloring and stir.
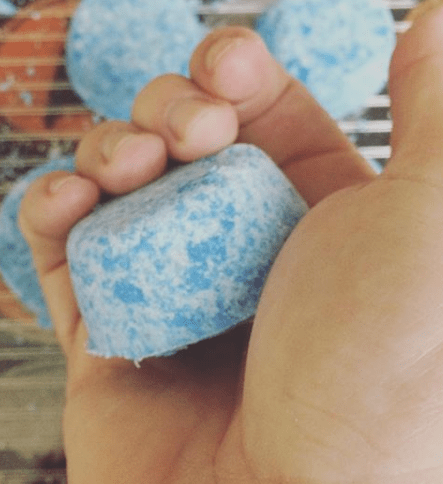
You can either use bath bomb molds like these, but I used a 1/3 cup measuring cup. I packed the cup, let it sit for a few minutes, invert, and gently tap the bottom of the cup until the bomb releases.
Let them sit overnight before using.
The Finished product, waiting to cure overnight.
This recipe makes 4-6 bath bombs, depending on how big you make them.
If you don’t want to use CBD Oil, you can substitute coconut oil, and add in 10-15 drops of your favorite essential oil.
A few of my favorite Essential Oil Combinations include:
Lavender and Vanilla
Orange and Clove
Rose and Almond
Talk Back: Have you ever made bath bombs? Did you like it?
This is a great deal for those of us with SDG&E as our utility provider. If you use OhmConnect, but you are not and SDG&E customer, check with your utility to see if this offer exists.
Check out this sweet deal:
SDG&E’s Energy Efficiency Rebate: Get $75 off instantly when you purchase an eligible energy-efficient thermostat.
SDG&E’s Automated Demand Response Rebate: Get another $50 via a rebate after installing your new thermostat and connecting it to a program like OhmConnect. Click here for instructions.
OhmConnect Connection Incentive: Buy a Nest device from the our store, connect it to your account, and receive an additional $45. There is no application, just connect your device!
That’s $170 in rebates- SCORE. In addition to getting these sweet rebates, you’ll also be saving money on your utility bills.
It’s finally winter in San Diego! It’s rainy, cool, and we even had an awesome thunderstorm this afternoon. Cooler weather means that I can turn on the oven and get cooking!
That’s a lot of cookie dough!
I made these cookies for the first time last weekend for a Cast Party. They were so well-received (read, I think only 3 came home, out of the 3 dozen I made) that I knew I had to make them again.
So why Kitchen Sink Chip? You can use whatever kind of chips or candy you’ve got. Everything but the Kitchen Sink. The first time I used peanut butter chips, butterscotch chips, and M&M’s. This time, I used butterscotch chips, semi-sweet chocolate chips, and M&M’s to accommodate a friends peanut allergy. Additionally, you could use white chocolate chips, dark chocolate chips, milk chocolate, speciality holiday chips, M&M’s (of any variety), or any yummy candy- I got Andes Mints pieces to put in my next batch. Whatever sounds good to you.
Ingredients:
4C. AP Flour
2t. Baking Soda
1t. Salt (I use pink salt)
4 eggs
2C. softened butter or shortening or coconut oil (or some combination of two or more- I use half butter and half shortening)
1C. white sugar
1C. brown sugar, packed
2T. Vanilla
1.5C Chocolate Chips (or whatever kind you like)
1.5C. Butterscotch Chips (or whatever kind you like)
3 oz box M&M’s- movie theatre sized box (or whatever kind of candy you like)
Directions:
In a medium bowl combine flour, soda, and salt. Set aside.
In a large mixing bowl, cream butter and sugars.
Add eggs, one at a time.
Add vanilla.
Using mixer on low, slowly add dry mixture to wet mixture.
Once two mixtures are completely combined, add chips/candy one variety at a time and mix well.
Drop spoonfuls of dough on greased cookie sheets or cookie sheets lined with silicone baking pads.
Cook in a 350 degree oven. You can adjust the size and baking time, depending on the size cookie you want. I used rounded tablespoons and it took about 12-15 minutes in a 350 degree oven. If you make them smaller, adjust cooking down to 8-10 minutes.
Tablespoons: 2 dozen large cookies
Teaspoons: 4 dozen smaller cookies.
These cookies are dead simple to make. You can make adjustments as needed: 1 for 1 gluten free flour for AP flour, Sola or Splenda for white sugar. I like that these cookies are not overly sweet. They use approximately 1/2 cup less white and brown sugar than other cookie recipes. I think that and the salt help the flavors of the chips/candy pop.
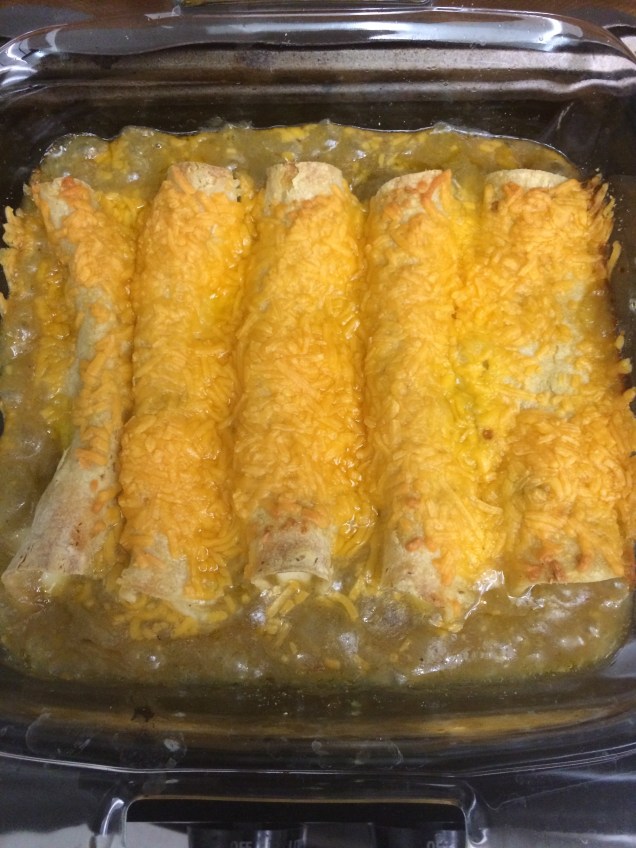
I love enchiladas. I seldom get them when we get Mexican take-away because they aren’t baked, so the cheese isn’t melty. And really, life is primarily about melty, gooey cheese.
The other night, I had a hankering for melty cheese, so I rifled through the cupboard and discovered that we had all the fixins’ for cheese enchiladas. I added caramelized onions, because… why not?
This recipe is easy to make, vegetarian, gluten-free, and can be made vegan if you use dairy-free cheese.
Ingredients:
1 medium white onion, chopped
1T. butter or olive oil
12 corn tortillas
1 can enchilada sauce, approx 24 -26 oz (I prefer green) Las Palmas is my favorite brand
12 pepper jack cheese sticks
1/2 c. shredded cheese (I used cheddar, but Mexican cheese blend works great)
Directions:
In a pan, cook onion in butter/oil on medium low for 10-15 minutes, stirring frequently.once onions are golden brown, remove from heat and set aside.
Once onions are cool, add to enchilada sauce. Pour 1/2 of sauce into the bottom of a baking dish. Sprinkle with 1/2 of shredded cheese.
Place 1 cheese stick at the edge of a corn tortilla and roll the tortilla around the cheese. Place in the baking dish, flap side down.
Continue until the baking dish is full. I do one layer, but depending on how many people you need to fee, you might do two layers.
Pour remaining sauce on top of enchiladas, top with remaining shredded cheese.
Bake at 350 for 20-30 minutes, until cheese is bubbly and edges of tortillas are crisp.
I serve with beans, rice, and Mexican Cesar salad. They make great leftovers too- not that it will last.
This is a very hearty dish! Perfect for cold winter nights!
On Sunday, we made dinner for a friend. She’s a vegetarian, and we wanted to make something hearty, filling and nutritious. After searching for a few stuffed squash recipes, and hitting up the grocery store, I picked up a butternut squash. Originally I wanted a acorn squash, but most of the stores were wiped out from Thanksgiving.
Fruits and veggies cooking in stock. Juicy Gems add a nice tart aspect to the dish.The Chopped Squash “guts”
We chose ingredients that were healthy and worked well together. This recipe is naturally vegan and Gluten free. There is an option to top the squash with poached eggs, if you want a little more protein.
This recipe is a little more work than my usual fare, but it’s really tasty and makes A LOT. To save time I used one of the bags of Mirepoix (pronounced meer pwah)I had prepped and froze last week. If you don’t do prep cooking, check your local grocery store freezer case for frozen mirepoix.
I get all of my spices from Penzey’s. They have 67 stores across the country, and you can order from their website too. They frequently have coupon codes for free samples or shipping when you place an order- It’s worth a google search!
You can serve this as a main dish or a side.
Stuffed Squash
Ingredients:
1 large butternut squash
1 T. Olive Oil
2 cups vegetable broth
2 T. Butter
2 small Granny Smith Apples, cored and chopped
1 cup carrots, diced
1 cup celery, diced
2 cups onion, diced (I used a sweet onion)
1 can garbanzo beans, drained and rinsed (15 ounce can approx.)
Cut Squash in half, remove seeds/membrane. Brush with oil, salt and pepper.
Bake at 425 for 30-45 minutes, until squash is fork tender.
While squash is cooking, In a large pan, melt butter, and saute fruit, veggies, and spices/herbs. Cook over low heat for about 20-30 minutes. Add garbanzo beans, arils, and broth. Cook for another 20-30 minutes or so, or until broth is mostly absorbed and garbanzos are tender.
As the stuffing cooks, once the squash is cool enough to handle, scoop out about 1/3 of the squash. You want to create a cavity for the stuffing. Set the “guts” aside- You can chop it up and add it to the stuffing, or serve it on the side (I just ate it with butter while the stuffed squash cooked).
Place the squash halves on a baking sheet, and fill the cavities with the veggie stuffing. Top with more salt and pepper, as needed.
Bake at 350 for 20-30 minutes. Serves 4 as a main dish, 6-8 as a side dish. For added protein when served as a main dish, top each portion with a poached egg. Not sure how to poach an egg? Alton Brown has a great tutorial here.
In October, I was offered a sample meal box from Hen in a Hurry. It arrived towards the end of the month, and I was stoked. We’ve been making our way through the meals.
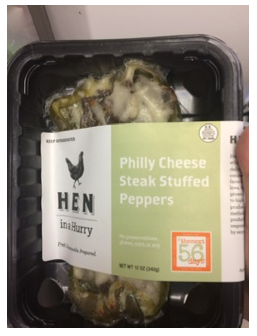
Hen in a Hurry is an awesome new frozen family meal Delivery service. Hen in a Hurry was created in the small kitchen of the popular Greensboro, North Carolina eatery, Iron Hen Cafe. By customer request, the idea of Hen in a Hurry came to be. They love organic and locally grown, but make exceptions for some farmers and producers. Meals are precooked and flash frozen so all you have to do is heat it up. All subscriptions are no commitment – pause or cancel at whenever you want!
We Received 4 meals to try out:
-Chicken Fettuccini Alfredo with Fire Roasted Vegetables -Pesto Zucchini Noodles with Fire Roasted Vegetables -Philly Cheesesteak Stuffed Pepper with Loaded Cauliflower -Fresh Garlic and Turkey Meatloaf with Grilled Green Beans
The meals arrived frozen in a large styrofoam box. They were packed with dry ice, and when they arrived, most of the dry ice had evaporated, but the food was frozen like a rock!
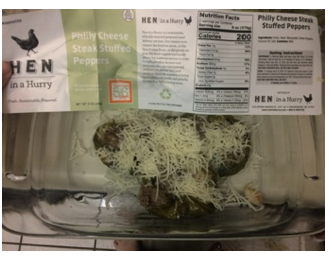
You can never have enough cheese!
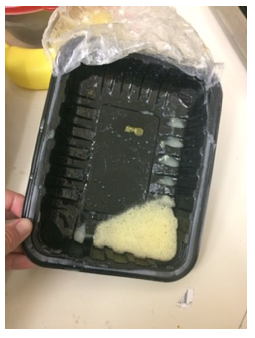
Do Not Microwave!
Dinner is Served!
We had the Philly Cheesesteak Stuffed Pepper with Loaded Cauliflower first. The directions give you the option to cook them in the microwave or the oven. I microwaved the peppers, which was a mistake. All of the cheese melted and turned into a puddle of fat in the bottom of the tray. No problem! I put the peppers into a baking dish and sprinkled some Italian cheese blend on the top and put them under the broiler for 3 minutes. Dinner was saved. The only thing that was missing was there were no onions in ours, so I had to grill some up separately and add them to the top before serving.
And I’ve got a coupon code and deal to share with you! You can chose which plan works best for your family. And this makes a great gift!
(30) Individual Meals – Subscription for a month – Regular Price: $315.00 – Deal: 45% off ($141.75 off) 1st months subscription Use Code: 45offFamilyGuide
(7) Individual Meals – Subscription for a week – Regular Price: $99.00 – Deal: $40 Off 1st week’s subscription Use Code: 40offFamilyGuide
(4) 4 days a week- Family Meals – Includes a side and entree for a family of 4 (16 total meals) – Regular Price $96 – Deal: $25 Off 1st week’s subscription Use Code: 25offFamilyGuide
(6) 6 days a week – Family Meals – Includes a side and entree for a family of 4 (24 total meals) – Regular Price $132 – Deal: $35 Off 1st week’s subscription Use Code: 35offFamilyGuide
To get started:
Visit Hen in a Hurry and pick one of the advertised subscriptions. During checkout set up your account and then enter in the promo code associated with the deal you choose. Easy peasy!
USE CODE “SHIP4FREE” TO GET FREE SHIPPING ON ORDERS OVER $100.
And remember, all subscriptions are no commitment – pause or cancel any time. Orders placed by 12 Noon EST on Thursday will be shipped the following Monday afternoon.
I received these meals in order to facilitate this review, I received no financial compensation and all honest opinions are my own. Thanks to US Family Guide and Hen in a Hurry for this opportunity.
We love Ice Cream! But, it can be expensive, a carton that’s not a half gallon can run upwards of $5.00 around these parts. Most cartons of ice cream are 1.5 to 1.75 quarts, that’s a decrease from 2 quarts or a half gallon just 10 years ago. Same price (or more) and less product. No thanks.
And honestly, there are a lot of weird ingredients in store bought ice cream. Food stabilizers, thickeners (like seaweed), and artificial flavors/colors. No thanks!
After meeting with a nutritionist recently regarding my big kids food issues stemming from sensory issues related to ASD, she recommended more full fat dairy products to help make sure he was getting enough fats in his diet. A kid can only drink so much milk, so I decided to make some ice cream from scratch.
I borrowed my parents Cuisinart Ice Cream Maker, which you can buy on Amazon, or probably at your local Bed Bath and Beyond. It makes 2 quarts at a time. It comes with a great cook book full of all kinds of great recipes and ideas.
After looking through that cook book, as well as looking through several of my own, and a quick internet search, I came up with several ideas on how to concoct some tasty ice cream. I asked the kids for flavor suggestions. Two choices were the big winners:
Peanut butter ice cream with chocolate chips- I opted to use PB Fit instead of blending peanut butter into the milk/cream/sugar mixture- so it would have a better texture. I was also worried that the extra fat from the peanut butter would mess with the fat ratio and inhibit the hardening of the mixture.
Chocolate Malt- I used the basic recipe below, but added 1/4 c malt powder. I buy a huge container of malt powder on Amazon every quarter, but you can get smaller sized containers at Walmart or in the grocery store.
Making Ice Cream is easy. If you’ve got an ice cream maker, you just mix up your ingredients, pour into the drum of the maker, put the lid on, flip the switch and 15-20 minutes, you’ll have a pretty soft ice cream. Scoop it into an airtight container with a lid (like Tupperware), and freeze it for about 2 hours. Then it’ll be hard enough to eat.
If you don’t have an ice cream maker, don’t fret, you can use two coffee cans (cleaned out of course), some ice, salt, and duct tape and make it at home- This is the method we used when I was a kid. You can read all about it here along with a true and funny story about making ice cream with kids. This is also a fun thing to do while camping- You can pre-mix the ingredients and take it in your cooler.
Here is the basic recipe I use. Please note that the ingredients used are chosen specifically for their fat content so the ice cream will be creamy. If you alter the ingredients at all, the ice cream will be gritty, grainy, or have ice crystals in it.
Ice Cream Base (makes about 1.5 quarts)
2 cups Heavy Whipping Cream- DO NOT USE half and half, fat free half and half or non-dairy creamer).
1 cup whole milk- You have to use whole milk or you’ll get ice crystals
3/4 c sweetener (I used white sugar, you can also use brown sugar, or 1 for 1 Splenda)
1 T Vanilla extract
pinch of salt
Directions:
Prepare Ice Cream maker as machine instruction call for, or set up your Coffee Can ice cream maker.
Place all ingredients into chilled mixing bowl, and mix with hand mixer until all ingredients are well blended,
Pour into cream cream maker.
Turn on ice cream maker, or start rolling your coffee cans!
Variations:
If you want to make my PB Fit ice cream, add 3/4 c PB Fit and 1/2 c. semi-sweet chocolate chips in step two.
Chocolate Malt ice cream is the base recipe with 3/4 cup cocoa powder, 1/4 c malt powder, and an additional 1/2 c brown sugar.
Now onto the economics: Is making your own ice cream cheaper? Usually, yes. We used flavorings that we already have on hand, and I recommend that you do the same- You know what flavors you like, and you probably already have some flavorings on hand.
32 oz. Whipping cream- $4.99
1 qt. Whole Milk .99
That’s enough cream to make 2 2-quart batches of ice cream.
You can watch a video of the ice cream maker going here, and don’t forget to follow me on Instagram too! I post all kinds of fun stuff there!
Disclaimer: I have linked to items on Amazon. If you click through and make a purchase, I may receive a small commission. Monies earned through commissions are used to offset the costs associated with running the blog (and the occasional cup of coffee).
Talk Back: What is your favorite flavor of Ice Cream? Have you ever made Ice Cream at home before?


 I love enchiladas. I seldom get them when we get Mexican take-away because they aren’t baked, so the cheese isn’t melty. And really, life is primarily about melty, gooey cheese.