Recipe: Butternut Squash Bisque (GF, Vegan)

This recipe is super simple, and I’ve included some steps to shave off more time to get the soup in your belly faster!

Butternut Squash Bisque

Ingredients

  • 1 T. Avocado Oil
  • 1/2 Large onion, diced
  • 3 cups butternut squash, peeled and cubed (You can save time by buying it in the frozen foods section)
  • 1 large carrot, peeled and chopped
  • 1 Quart Vegetable Stock
  • 2 cups Hazelnut Milk
  • 1t. Rubbed Sage
  • Salt and Pepper to taste

Directions:

  1. In a large stockpot, heat oil. Add onions, and cook for 5-10 minutes, until clear and fragrant.
  2. Add squash and carrot. Cook approx 10 minutes until softened.
  3. Add vegetable stock, and simmer until veggies are tender/soft.
  4. Remove from heat, add hazelnut milk.
  5. Blend soup with a stick blender until smooth.
  6. Add salt and pepper to taste.

Serve this luscious, velvety soup with hot, crusty bread and a crisp green salad.  It freezes well, in case of leftovers.

Recipe: Beef Stew

Thick, rich, and ready to get in my belly!

I love a good, hearty beef stew. It can take a little effort, but oh, man is it worth it.

I made this last week, and I started off by looking at How To Cook Everything by Mark Bittman, which is a great cookbook if you are looking for something beyond the basics of Betty Crocker or Better Homes and Gardens. Each recipe has tons of variations and substitution suggestions to make each dish your own.

This recipe is an amalgamation of Mr. Bittman’s recipe and several additions that give a rich, thick, hearty stew.

Ingredients

  • 2.5-3 pounds of beef stew meat, cut into bite-size pieces
  • 2 T. cooking oil (I used avocado)
  • 2T butter
  • 2 sweet onions, chopped
  • 4 cups beef stock
  • 3 potatoes, peeled and cut into bite-size pieces
  • 3-4 carrots, peeled and cut into coins
  • 1/2t. dried thyme
  • 2 cloves garlic, minced
  • Kosher salt
  • fresh cracked pepper
  • 1/2c red wine
  • 2T. Tomato Paste
  • 3T. All-purpose flour

Directions

  1.  In a large stockpot, heat oil, and cook the beef in batches to brown. If your pot is large, there may not be a need to cook in batches.
  2. After the beef is browned, add the onions, and cook until clear and tender.
  3. Sprinkle flour over the meat and onions, and stir to combine.
  4. Brown the flour gently, this may take a few minutes. Stir frequently to avoid burning. the flour will stick to the meat and onions- this is ok. While string, you may notice the flour forming a paste that browns- this is what you want.
  5. Add garlic and cook until fragrant.
  6. Add beef stock and thyme, and stir to combine and continue to stir as the mixture thickens.
  7. As the stock thickens, add wine, tomato paste. Allow the stew to cook on low for 20-30 minutes.
  8. Add potatoes and carrots and cook soup on low for 20-30 minutes with the lid on the stockpot.
  9. Taste and add salt and pepper as needed.
  10. Continue to simmer as desired, if you want thinner stew, add more stock. If you like a thicker stew, remove the lid and allow the stew to simmer for 10-20 minutes until the stew reaches your desired thickness.

Some notes: I add wine and tomato paste because the acid in both helps break down the collagen in the meat, making it more tender, and giving the stew broth a more luscious mouthfeel. You can do without one or the other if you prefer.

I don’t like peas, so I omit them from my stew. If you like them, add 1/2-1 cup frozen peas about 10 minutes before serving. This keeps them from getting mushy or falling apart.

If you like more of a French-style beef stew, add 1/2-1 cup chopped mushrooms when you add the other veggies.

This recipe makes about 8-10 servings of stew. I like to serve the stew with crusty french bread, or sourdough toast, and of course SALAD. I like a peppery arugula (or rocket) salad with beets, goat cheese, and a simple vinaigrette. That combination really pairs well with the richness of the stew.

And of course, this stew freezes well and tastes better the next day.

Holiday Recipe Round Up!

Most of us are home for the holidays, and that means that we are at home cooking.

If you are looking for some new recipes to tempt your taste buds, here are a few of our family’s favorite holiday recipes:


Cheesy Bacon Meatloaf Recipe

I’ve been making this for years. It’s easy, tasty, and there are never leftovers!

Ingredients:

  • 1.5 pounds ground beef (70/30 is preferred)
  • 1/2 cup cooked bacon pieces (I like the Kirkland brand)
  • 2 egg
  • 1 cup seasoned bread crumbs
  • 2T dehydrated toasted onions (Penzey’s has the best)
  • 2 cups shredded cheese (I like cheddar)
  • Pepper as needed (No extra salt is needed as it is in the seasoned breadcrumbs and bacon)

Directions:

  1. pre-heat the oven to 350 degrees
  2. Spray a loaf pan (or a meatloaf pan) with spray release.
  3. In a large mixing bowl, combine all of the ingredients, except the cheese and mix well. You may need to get in there with your hands. You want all of the ingredients well combined.
  4. Pack half of the mixture into the bottom of the pan.
  5. Sprinkle cheese over the bottom half of the meat mixture.
  6. Top the cheese with the rest of the meat mixture, make sure that all of the cheese is covered.
  7. Bake at 350 degrees for 40-50 minutes.
  8. I like to top this meatloaf with Barbeque sauce, but it does have a little heat.

Serve with baked potatoes, salad, and a glass of milk for that wholesome 1960’s dinner. This makes approximately 6-8 servings.

SUBSTITUTIONS: Some people like to use Turkey, chicken, or pork instead of red meat. My mom uses half ground beef and half ground pork. Whatever makes you happy.

Use gluten-free breadcrumbs if you are gluten-free.

Unfortunately, this cannot be made vegetarian or vegan.

Family Recipe: Potato Cheese Soup

When I was a kid there was a local restaurant called Piret’s. They served delicious, fresh French food that was unpretentious. One of my favorite dishes to order was their Potato Cheese Soup. They published a cookbook, which my mom bought, and while she cooked a lot of things from the cookbook, the one that was most often made was their Potato Cheese Soup. In fact, to this day when you place the book on the counter, it opens to that recipe.

Today I present my take on Potato Cheese Soup. It’s easy to make, it’s filling, and it tastes sooooo good. Like most soups, it’s better the next day. It freezes well.

You can make it vegetarian by using veggie broth/stock. I do not recommend making it with non-dairy cheese (sorry vegans). You can make it Gluten Free by using GF 1-for-1 flour.

Potato Cheese Soup

Ingredients:

  • 8-10 cups chicken broth or stock (I recommend using stock-homemade is best, but I’m being extra)
  • 2 large yellow or sweet onions, peeled and diced
  • 4 Tablespoons butter, divided in half
  • 1/4 cup white wine (dry- don’t use sweet or cooking wine)
  • 4 large potatoes, peeled and diced
  • 2 Tablespoons AP flour
  • 1.5 cups whole milk
  • 4 cups cheese (I like medium cheddar, but you could use colby, or a sharper cheddar)
  • 2 bay leaves
  • salt and pepper to taste

Directions

  1. In a large stockpot, melt 2 Tablespoons of butter and saute onions until clear and slightly browned.
  2. Add potatoes and cook for 5-10 minutes until potatoes are slightly translucent.
  3. Deglaze the pan with white wine, make sure to scrape off all the yummy brown bits from the bottom of the pan.
  4. Add all of the chicken broth/stock and bay leaves. Cover pot and cook on low for 20-30 minutes, until potatoes are cooked through.
  5. In a smaller pot, melt remaining 2 T. of butter. Sprinkle melted butter with AP flour and stir until a paste forms over a low heat. The paste should brown slightly- DON’T BURN IT!
  6. Pour milk into the flour/butter paste and whisk briskly. You do not want lumps. Cook over low heat until the mixture thickens. This may take a few minutes. As the mixture thickens and there are no lumps, add the cheese slowly, about 1/2 cup at a time, until it is incorporated/melted into the sauce. Once the sauce with complete, remove from heat.
  7. Add the cheese sauce to the soup mixture slowly, stirring constantly. Once it is fully mixed, remove the bay leaves, season with salt and pepper to taste.
  8. This step is optional but recommended. Remove from heat. Using an immersion blender (like this one) puree the soup. Put back on the heat, and allow to simmer without the lid for another 20-30 minutes. This will give the soup some time to thicken up.
  9. Serve Soup hot with crusty French bread. Resist the urge not to eat it all in one sitting.

Makes 6-8 Servings

Healthy Swap Recipe: PB Chocolate Malts!

This is a family favorite, and I’ve been making this shake recipe for almost 10 years.

I’m linking to most of the items on Amazon, so if you don’t want to leave home to try this recipe, you won’t have to. As a reminder: As an Amazon Associate, I earn from qualifying purchases.

This recipe all started back when I was doing medically supervised weight loss and we had to drink 5-9 shakes per day, so adding in low-calorie flavor options was a must. A few of the “approved” options were peanut butter powder, malt powder, and in phase 2, frozen fruit (in the case of this recipe, frozen bananas). Now that I’m no longer on the program, I still have a shake once a day, usually to curb cravings for sweets.

Feel free to use whatever type of protein powder you like. I use the HMR brand. My kids love these shakes. In fact, the big kiddo has one a few times per week for breakfast.

I use a Calphalon Active Sense Blender, but any blender or immersion/stick blender will work.

Mrs. Bear Special –  PB Chocolate Malt

serves 1 grown-up, or two kiddos

Ingredients:

  • 1 Scoop Chocolate protein powder
  • 2 tablespoons peanut butter powder
  • 2 tablespoons malt powder
  • 1 frozen banana, cut into bite-size pieces
  • 1-2 handfuls of ice
  • 8-12 ounces of water (If you want it creamier or are not calorie conscious, you can use fat-free or plant milk)

Directions:

  1. Place all ingredients into the blender.
  2. Blend on smoothie or ice breaker mode until smooth.
  3. Serve with a milkshake straw.


Depending on your protein powder, the completed shake will have 25-30 grams of protein per shake.


Family Recipe: Bean, Rice, & Cheese Bowls

You may have noticed that BRC Bowls is a regular item on our weekly meal plan posts.

Beans and Rice are pantry staples in our home. You can do a lot with both, but the BRC bowl is a quick, easy, and healthy meal that everyone in our home can agree on. If I’ve got more time, I can add roasted veggies too.

We use vegetarian, fat-free refried beans because a lot of commercially made refried beans contain lard, and since I’ve got a small vegetarian in the house, I gotta keep meals vegetarian as often as possible.

It’s also a great recipe to make extra servings of and store in the fridge for lunches throughout the week.

Here is the basic recipe:

Bean, Rice, & Cheese Bowls

Ingredients

  • 1 large can refried beans– approx. 28 ounces (or make your own from scratch), heated per package directions. Sometimes we use Ranch-style Beans instead.
  • Rice (I usually make 2 cups rice with 4 cups veggie broth so we have lots of leftovers)- The variety of rice is up to you, but we love jasmine or basmati rice. Did you know that you can freeze cooked rice in portions?
  • Cheese- your choice of variety. I really like the Mexican blend, which generally consists of a blend of Monterey Jack Cheese, Cheddar Cheese, Queso Quesadilla, And Asadero Cheese.
  • Roasted vegetables (optional, but I recommend). I like to roast onions, garlic, bell peppers, potatoes, broccoli, and carrots. Cut them up into bite-size pieces, toss in avocado oil, sprinkle with kosher salt and freshly cracked pepper. Roast in the oven on a baking sheet for 30-ish minutes at 450 degrees. You can also add 2 T. of fresh lime juice for some zest.

Directions

Once all ingredients are cooked, assemble individual bowls as follows (from the bottom up):

  1. Rice
  2. Roasted veggies
  3. Beans
  4. Cheese

You can do it in whatever amount each person wants. Kids don’t like cheese? Skip it. Watching your carbs? Go easy on the rice.

As I said before I make a few extra servings in leftover containers and stash them into the fridge for lunches later in the week. The girl kiddo loves rice with butter for lunch, so I always make extra rice for her.

New Recipe: Baked Tortellini

00169 (1).jpgThis recipe is dead simple. Make it as complicated as you want. Use jarred sauce, make your own from scratch, or take a jar of sauce and church it up yourself. Whatever.

Frozen pasta, fresh pasta, heck, you can even use the shell stable/dried tortellini. You could use ravioli if you wanted.

You can make this Vegetarian, Vegan, Chock Full o’ Meat, Gluten-Free, it’s up to you.

This is one of those recipes that’s a big hit at potlucks too. It’s pretty inexpensive, and we always have the ingredients in one form or another to make a batch.

Baked Tortellini

Ingredients:

  • 6-8 cups of Red Pasta Sauce.  I usually make a big batch of this sauce and portion some out just for this recipe. If you use jarred sauce, I recommend  you add 3-4 cups of veggies (carrots, onions, celery, bell peppers, zucchini, chopped/diced tomatoes, etc.)
  • 22-30 ounces of Tortellini/Ravioli, cooked per the package directions (this will probably take a couple packages)
  • 2 Cups Italian Cheese blend

Directions:

  1. Cook the pasta per the package directions. Drain.
  2. Pour pasta sauce into a baking dish (I use a 9×13), toss cooked pasta in sauce.
  3. Sprinkle cheese on top.
  4. Bake at 350 degrees for 30-ish minutes until food is bubbly, and cheese is brown and delicious looking.
  5. Serve with hot French Bread or Garlic Bread and a green salad.

This serves 8-10 people as a main.


If you are vegan, substitute in filled pasta and cheese that works for you.

Recipe: Refreshing Cranberry Kale Salad

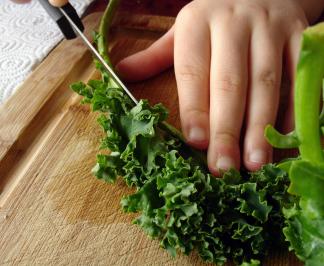
kalecutI know, KALE. It’s weird and has that super crunchy stem. It’s really good for you, but it gets a bad rap.

This salad recipe is dead simple and is so good that you will fight over the leftovers (if there are any).

I like making this in the morning and letting it sit in the fridge all day. That gives the ACV in the dressing time to mellow out and all the flavors to mingle.

I like starting with a bag of triple-washed chopped kale, since it’s usually the same price as whole kale, and it saves me time, but you do what works best for your family and budget.

Ingredients:

  • 1 package triple-washed chopped kale, or 6 cups of kale, washed and chopped into bite sized pieces.
  • 1/4 cup Apple Cide Vinegar, with the mother (I like Bragg’s)
  • 1/4 cup of your favorite oil, we prefer avocado oil (like this one)
  • 1 t. honey or agave
  • dash kosher salt
  • a few grinds of black pepper
  • 1 T. fresh, chopped rosemary, or 2 t. dried rosemary (whichever you have)
  • 1/2 c. crumbled herbed feta or goat cheese (your choice)
  • 1/3 cup dried cranberries
  • 1/2 cup chopped almonds (you could substitute sliced almonds or almond slivers if you prefer)

Directions:

  1. In a small bowl, mix oil, vinegar, honey, rosemary, salt and pepper. set aside.
  2. In a large salad/mixing bowl, add kale, cheese, almonds, and cranberries. Dizzle over oil/vinegar dressing and toss gently.
  3. Store in Fridge 4-6 hours minimum before serving.
  4. This is great as a side dish, or top with a grilled chicken breast or steak for a great main dish.
kalechips
Yum!  Kale!

Serves 6-8 as a side or 3-4 as a main dish.

If you are vegan, substitute honey for agave and use vegan cheese crumbles of your choice.

What I’ve Been Up To…

_DSC2099As some of you may have noticed, I haven’t been posting a lot lately, either here or on Social Media. I’ve been busy. Distance learning is coming to a close for the year, so we’ve been doing a lot of meetings and paperwork (I’ll be glad when the mountains of homework packets stop).

In addition to supervising all of the learning (for both kiddos), I’ve also been taking a more active role in helping my big kiddo find behavioral therapies that will work well on his journey through life. My big kid is on the Autism spectrum (ASD) and that means that we do behavioral therapy a few times a week in addition talk therapy. So lots of time helping process feelings and emotions, and that leaves this mama bear feeling tired.

I (try to) get up early about 6:30 each morning, make coffee, do emails, and work on getting stuff set up for the day before the kiddos wake up. Sometimes I’m super successful and get it done. Sometimes I’m lucky if I get a shower.

Successes for the days are measured so much differently now. Did we make it through a day without tears? Missing friends, regular routines, going to the gym, extracurricular activities- all of these weigh heavy on the kids, and grown-ups.

We’ve also been trying to get our home more organized, and we’ve been getting some help from a family friend who is a Konmari guru. We’re about halfway through the process, and it’s been super liberating to get rid of stuff that no longer serves us. We sold all of the DVD’s/video games that we no longer wanted, and raised over $200, that we’ll put towards family fun (maybe sock it away for a 2021 vacation?). Thankfully our local thrift shops are accepting donations at this time. We’ve been loading up the back of my car weekly to donate goods.

In an attempt to wear the kids out physically, I’ve been taking them out for a walk a few times a week with my parents at a local park. Social distancing and masking occur- Also a liberal application of mosquito repellant is applied- The kids and I are very tasty according to the local ‘squito population. We also picked up a small pool for the patio- We are on our second. The first was not heavy-duty enough. This is the one I recommend. We also put tarps under it to protect it from the textured decking. I also use this solar fountain to keep the water moving all day, and we cover it with a tarp at night. I usually dump the water and refill it 2-3 times per week.

downloadSaving money has been a challenge as of late- There aren’t as many deals as supplies aren’t being delivered to stores regularly, less staff to stock shelves, etc. And really, who has been shopping lately for fun? Not many of us. I’ve been using coupons when I can find them, but what I have really found useful is Honey. Honey is a browser extension that helps you find coupon codes and sale prices on items that you are shopping for online. I used it to save over $145 when we bought the big kids new bed a few weeks back.

And I’ve been making masks for family and friends- I made some especially for the kids this week too.
kalecutI’m here y’all! I’m up to my eyeballs, but I’m here. And of course, I’m doing the Always Eat After 7pm program, so I’ll be posting about that. There are so many good recipes I am excited to try (dark chocolate dipped PB cookies, uh, yeah). and I’ll be posting some recipes this weekend- I’ve got a killer Kale Salad recipe that is so tasty and easy (and it keeps in the fridge for a few days too).

I’ll be hosting an Amazon Gift Card Giveaway soon! I want to spread the love with you!


Talk Back: What have you been doing lately?