Family Recipe: Chicken Tetrazzini

046

My Dad made this for us a lot when my mom worked late. I love it because it’s got chicken, onions, cheese, and pasta in it.  Pretty much everything I like in life. AND when I was pregnant with Lil’ Man I had such horrible morning sickness round the clock, it was pretty much the only food I could eat. This is a great hot dish, perfect for a family dinner or make a bigger batch for a potluck. It’s a hit with kids and grown ups!

I try to make adaptations for many differing diets, but sadly, this recipe cannot be adapted for Vegans or be made gluten free (unless there is GF Cream of Mushroom soup I don’t know about).

Chicken Tetrazzini 

Ingredients

  • 1 onion, chopped
  • 1 t. butter
  • 1-2 c cooked shredded or cubed chicken (I usually cook a batch of chicken breasts in the crock pot and then portion it up for later use)
  • 1 can Cream of Chicken and Mushroom soup (if you can’t find it, stick with Cream of Chicken)
  • I can of water
  • 1 tablespoon Italian Seasoning
  • ½ cup cheese (you favorite kind- I like sharp cheddar!) You can use more cheese if you like.
  • 1 lb pasta, your choice

Directions

  1. Start a large pot of water on the stove and cook pasta as directed.
  2. While Pasta is cooking  In a saucepan, saute the onion in butter, until the onions are clear, about 10 minutes.
  3. To the onions, add chicken, soup, water, Italian seasoning. Cook until bubbly, stirring to combine ingredients.
  4. Add cheese and stir until smooth.
  5. Add pasta and stir to combine.
  6. If you want to make this a one pot dish,  add 1-2 cups steamed veggies, such as broccoli, peas, or asparagus.

Serves 4-6.

Options:

  • You can use the vegetarian “chicken” pieces in place of the chicken. You can also use leftover Turkey or rotisserie chicken!
  • You can also add 1 cup sliced mushrooms and/or 1/2 cup celery while you are sautéing the onion.
  • My dad likes the dish topped with butter bread crumbs or slivered almonds.
  • To make this dish a little richer, stir in 1/2 cup sour cream (the real stuff, no imitation sour cream) when you add the cooked pasta.

Healthy Frozen treats!

My kids love popsicles. If given the choice, they’d eat them all day. So I figured, why try to fight it? I’m turning into the skid and embracing their love of frozen food on a stick.

screen-shot-2016-10-04-at-11-54-06-amRecently, I was sent this awesome Lebice Popsicle mold kit. Right now it’s on sale for about $8.00. Remember Amazon prices change frequently!

It makes 6 good sized frozen nummies, a stand to keep them upright while they freeze, a collapsible funnel, and a small brush to clean out all the nooks and crannies.

After I washed them, I pulled out the blender and whipped up strawberry banana breakfast popsicles (if they are going to demand popsicles in the morning, might as well make them healthy, right?). I keep over ripe bananas sliced in the freezer in ziploc bags for morning smoothies and protein shakes, as well as whatever berries are in season. I buy them on sale, and freeze them before they go bad. It’s a great way to keep fruit on hand!

Strawberry Banana Popsicles

Makes 6 popsicles

Ingredients

  • 1 1/2 cups Vanilla Greek Yogurt (or use whatever you have onhand, it doesn’t have to be Greek)
  • 1 cup frozen strawberries
  • 1 cup frozen banana slices
  • 1/4 milk

Directions

  1. Set up molds in stand.
  2. Blend all of the ingredients together, until smooth.
  3. Pour mixutre into mold, leaving about a 1/2 inch at the top.
  4. Snap lids/sticks on, stash in freezer for 6-8 hours.
  5. Remove from stand and run molds under warm water to loosen. Pop popsicles out of molds, and enjoy!

I also like making instant pudding (adding in frozen bananas or raspberries) and pouring that into popsicle molds too. That is a sweet and satisfying dessert!

I like that the stick and drip tray are attached and I’m not finding mystery popsicle sticks all over the house. The entire set is very sturdy and  I know we’ll be using it for years to come.

Thanks to Lebice and Tomoson for providing the awesome popsicle mold! I received no financial compensation for this post, and all opinions are my own!

Save with These Make Ahead Breakfasts!

file000369727419
Everyone loves something easy. And I like something healthy too. So when I can find food that’s easy to prep and healthy, I’m in! I love doing breakfast prep once a week. It keeps us out of the drive thru, and that helps our bottom line.

As part of the Pinterest Generation, I’ve seen and tried TONS of make ahead/batch cooked breakfasts. All with little success (not fails, really, but nothing that I’m super excited to try again or share). Here are two favorites at our house:

screen-shot-2016-09-29-at-10-22-04-pmIt seriously doesn’t get any easier!

Ingredients:

  • 2 packages of 8 count Sausage links (I used Farmer John)
  • 2 tubes 8 count biscuit dough (I scored a 2 pack at 99 Cents Only)

Directions:

  1. Cook and drain sausage links per package directions. Set aside.
  2. Preheat the oven to 350 degrees
  3. Open biscuit dough package and roll out biscuits until flat.
  4. Place sausage on flattened biscuit, roll up dough, encasing sausage.
  5. Bake for 12-15 minutes. Remove from oven and cool on wire baking rack.
  6. Once cool, store in zip top bag or container with a snap top lid. Can be stored in the fridge for up to a week, but really, they won’t last that long.

Makes 16 rolls.

Add a cuppa Joe and you’ve got a quick, filling breakfast.

And if you prefer to start your day with fruit and something rich and creamy, check out our parfait recipe (it’s seriously a no-brainer!)
screen-shot-2016-09-29-at-10-39-06-pm Inspired by my love of the McDonald’s parfaits.  I’m serious, since they changed over to Greek yogurt, my mouth waters every time I glance at the Golden Arches. You can make your own at home in just a few minutes!

I make a batch once a week! I use Ball canning jars (like these) that originally had home made jam in them (thanks Mom!), but you can use whatever jars or reusable containers you have on hand.

Ingredients:

  • 2-3 cups frozen fruit- I like berries, but feel free to use whatever is on sale or you have on hand. Skip melon, mango, banana, or pineapple- You may find them frozen, but they won’t taste very good or have a good texture in this recipe.
  • 1 large carton Vanilla Greek Yogurt (it’s about 4 cups)
  • Honey, if desired

Directions:

  1. In each container, pour in 1/4 cup yogurt.
  2. Top yogurt with 1/2 cup frozen fruit.
  3. Repeat layer of 1/4 cup yogurt. Drizzle with honey, if desired.
  4. place a few pieces of fruit on top, gently pressing down into the yogurt if needed.
  5. Screw on lid and refrigerate.

Makes 6-8, depending on sizes of jar and type of fruit used. If you need “crunchies” on your parfait, individually portion out 1 cup of cereal and stash them in the cupboard. I use the snack sized bags like these and portion out cereal, then put the portions in a tub like this one. It lives on the counter. No more cereal mysteriously being eaten in one sitting. Really, who is going to open a bunch of little bags into a big bowl and pig out?

Another tip I have for you is: Set up your coffee maker before you go to bed. For those with a classic coffee maker, it’ll just be a quick flip of the switch to get your coffee fix. We have two French Presses, I set them up at night, one I fill with cool water and steep over night to make iced coffee in the morning for myself. I prep the other with grounds and fill the Tea Kettle for a hot pot in the AM for the Mister.

I turn on the stove in the AM and in less than 10 minutes, he has a steaming cuppa Joe and I am already on my second iced coffee!


Talk back: What is your go-to frugal breakfast?

Recipe: Crockpot Shredded Chicken

Screen Shot 2016-09-02 at 1.51.25 PM
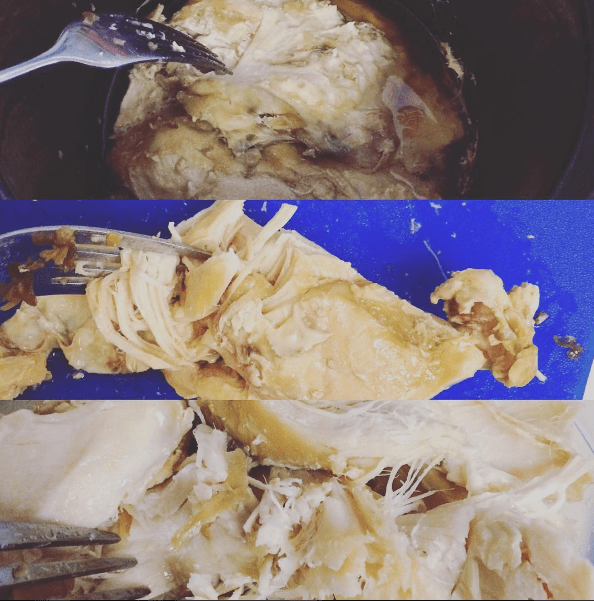
This is a total time saver! I do this twice a month. It really saves time when it’s time to cook dinner. And on those days when you are just going going going, it’s nice to know that you’ve got something easy and tasty waiting for you!

It’s so easy, All you need is a crockpot, a food scale, and two forks!

Ingredients:

  • 3 lbs of chicken, whatever is on sale (I used chicken breasts- bone-in with skin)
  • 1 c. broth or water
  • Seasoning to taste- I use a little dehydrated onion ( I like this one from Penzey’s), a little garlic powder, and a little pepper.

Directions:

  1. Cook in the crockpot on low 6-8 hours. Allow to cool.
  2. Shred it with a fork (removing bones and skin).
  3. Grab ziploc bags (I like the snack size ones), our Digital Kitchen Scale, and a glass bowl. I use a measuring cup to scoop the meat (and juices) into the glass bowl, but I am measuring by weight.  The measuring cup is just my scooping tool of choice.
  4. Place the glass bowl on the scale, then turn the scale on- I only want to weight the food, not the glass bowl.
  5. After I weigh the chicken (into 4 ounce portions), I pour it into a snack size ziploc bag, seal it (and squeeze out the air), and put them in the freezer.

Screen Shot 2016-09-02 at 1.55.43 PM Screen Shot 2016-09-02 at 1.55.58 PMThen when it’s time to make quesadillas, chef salad, or pretty much any time we want chicken (Hubs like to top his frozen entrees, like this one with a little bit of chicken for added protein), just grab a bag and defrost it in the microwave!

Frequently, I’ll get a larger Ziploc bag and measure out 2 cups- this is just enough for a casserole. Just defrost, mix in the other ingredients and cook!

I also like to make and portion out ground turkey cooked with black beans and fajita blend frozen veggies flavored with Taco Seasoning. It’s great on salads, quesadillas, or in chicken broth for a quick tortilla soup!


Frugal Recipe: Bachelor Mousse

This is a family fav, and it’s super easy to make. So easy, in fact, even kids can help with this recipe!
Screen Shot 2016-07-24 at 9.09.14 PM

It’s only three easy to get ingredients!

  • 1 Large Box Pudding (any flavor and brand, but I prefer Jello Brand Chocolate or Chocolate Fudge)
  • 1 1/2 cups cold dairy milk (use of soy or non-dairy milk means the pudding won’t set)
  • 1 large tub of whipped topping (aka cool whip)

Directions:

  1. In a large mixing bowl, mix milk and pudding until thick, about 2 minutes.
  2. Spoon whipped topping into pudding mixture, and fold together gently until combined.
  3. Pour mixture into container with lid. Chill in fridge for 2-3 hours before serving.

This is great poured into a graham cracker curst, or served with fresh fruit! This serves about 6-8 dessert sized portions, and you can make this entire dessert for less than $5!

This is def. a kid-approved dessert. Both of our kids devour this stuff!!


Bringing it Back: Meal Plan Monday!

DSC07997


It’s back! After a long hiatus, I’m back to meal planning! If you are new to meal planning, check out my article on how to get started here.

This week I’m starting off by doing a quick fridge and pantry inventory, and making a batch of cookies.

Monday:

  • D:Baked Ziti, steamed veggies

Tuesday:

  • D:  Indian food (Chicken Korma, steamed rice, steamed veggies)- I have a kit!

Weds:

  • D: breakfast for dinner (probably pancakes, eggs, and sausage) and fruit salad

Thursday:

  • D: Salsa Chicken with brown rice

Friday:

  • D: Bean and veggie enchiladas, green salad

Saturday:

  • D:Veggie and cheese egg bake

Sunday:

  • D: Leftovers

Lil’ Man has started eating a small toasted bagel with cream cheese for breakfast along with yogurt and fruit.  Mr. C has been eating Oatmeal (from a awesome recipe I found online and altered) every AM, and I usually have an HMR Protein Shake, or I’ll make myself a bagel too.

Lunches for Lil’ Man are usually a grilled cheese, yogurt, a granola bar, and fruit (cut up apple, orange, or banana).  I have leftovers or a frozen entree, and Mr. C usually a salad or leftovers or an HMR protein shake (He did  the program last year and really digs on the shakes), or he has a business lunch and opts for a salad and lean protein.

Now I’m off to make a big ol’ batch of cookies!!


Easy One Pot Meal: Salsa Chicken

01128This is one of the most popular recipes that I’ve ever cooked! It is a family favorite and is very popular for meal trains and freezer meal swaps!

I’m constantly tweaking and improving my recipe, so I wanted to share this recipe with you. I cook this all day in the crockpot and it makes the house smell sooooo good!

Ingredients:

  • 1-2 lbs of frozen boneless skinless chicken breasts (rule of thumb for this recipe 1/4 lb of meat per person, plus an extra 1/4 lb of meat for leftovers or seconds)
  • 3 cups of your favorite salsa
  • 1 bag frozen tri colored peppers and onions

Optional ingredients:

  • 1/2c. chicken broth
  • 1 cup rice or 1/2 cup quinoa
  • 1/2 C shredded cheese

Directions:

  1. In a crockpot, place the first four ingredients.
  2. Cook on low for 6-8 hours.
  3. (If you opt to add the last two ingredients) About an hour before serving add rice or quinoa to the crockpot along with the broth and turn crockpot up to medium or high. Meal is done once grain is done to your liking.
  4. Stir before serving.
  5. Ladle into bowls.
  6. Top with cheese (optional, but tasty) and serve.

Makes 6-8 servings. Sometimes I turn leftovers into quesadillas, or add more broth and some C&W Southwest veggie blend and it transforms into a hearty soup! It’s so versatile and easy to make!

Review: Freshly

Screen Shot 2016-04-11 at 11.02.14 AM

Have You heard of Freshly? It’s a gourmet fresh meal delivery subscription service. Every Freshly meal is free of gluten, wheat, refined sugars, peanuts, artificial colors & artificial flavors. And as a bonus, most of the meals are Paleo too!

Packed with veggies and lean proteins, these meals are low in calories too, especially when compared to other fresh meal delivery services. What I love about Freshly is their four company tenets:

Screen Shot 2016-04-11 at 11.04.53 AM

It’s nice that a company is concerned about what goes into it’s food!  We tried six meals, and here are the two I was able to photograph before they seemingly evaporated (into our tummies, that is).

Grilled Chicken Breast Fajita
Grilled Chicken Breast Fajita after heating for just 2 minutes
Grilled Chicken Breast Fajita


Chicken Rustica with Roasted Cauliflower

The Grilled Chicken Breast Fajita was very moist and juicy- and the chicken breast was HUGE! The rice with the sauce was super tasty!

Hubs gobbled down most of the Chicken Rustica with Roasted Cauliflower– The sauce was so rich and creamy!

They have breakfast entrees too!

While I love to cook, I know that some people don’t. And for those people who crave healthy food and either can’t or don’t cook, Freshly is a great option! They are a bit pricey compared to frozen entrees in the grocery store, but honestly, the portions with Freshly are 2-3 times bigger that that frozen entree in your freezer! And they are delivered FRESH to your door!  These entrees were perfect for the week when Hubs was working 14 hour days, between his day job and rehearsal for the play he is in.

To check out their current offering of entrees and any deals, visit their website at https://www.freshly.com.  I don’t have a coupon code to share with you, like I usually do with my reviews, but you may be able to find one with a quick google search.

Disclosure: I received six meals free from Freshly in order to facilitate this review. I received No financial compensation, and all opinions are my own.

Recipe: Honey Lemon Ginger Syrup

P1050863I’m no doctor, but I do know that when we don’t feel good, nothing is more soothing than lemon and honey.

IMG_3602I recently made a very soothing syrup, and I had to share it with you. I put 1/3 cup of the syrup in the bottom of a coffee mug and pour boiling water over it. I have been drinking a mug full twice a day.

It’s quick and easy to make!

Ingredients:

  • 2 C honey (real honey, none of that honey flavored syrup junk!)
  • Juice of 10-12 lemons (reserve two lemons and chop them up)
  • A Thumb sized knob of ginger, peeled and sliced

Directions:

  1. In a saucepan, combine the honey, juice, and ginger.
  2. In a jar with a screw on lid, pack in reserved chopped up lemon pieces.
  3. Cook on low for about 20 minutes. Do Not boil!
  4. Pour honey mixture over lemons.
  5. Screw lid on and let sit on counter until it reaches room temperature.
  6. Store in the fridge.
IMG_3603
Waiting for yummy syrup!
IMG_3601
Hunks of ginger

If you’re looking for the science behind all of this, Lemons contain a lot of vitamin C! Honey is very soothing and coats a sore throat. Remember that honey should not be consumed by anyone under 12 months of age. And ginger contains anti-oxidants.

Learn a new skill from Craftsy for free!!

Screen Shot 2016-02-26 at 7.05.01 AM

I love Craftsy! I love making stuff and being creative, but sometimes it’s hard to learn a new skill or hone one you already have on a budget. Craftsy to the rescue! They have awesome free classes where you can learn to do all kinds of cool stuff from cooking and baking to knitting!

The free mini classes can be viewed on any device, so you can learn anywhere! Right now there are 47 mini classes that are free. Mini-courses  feature student-led discussions and are shorter in length than regular courses. They are a perfect way to learn new skills and experience the Craftsy platform first-hand.

Here are just a few of the ones I’ve saved to watch and explore:

For the complete list, click here.

Which Mini-Classes are you going to take?