Easy Home Made Ice Cream Recipe!

Screen Shot 2018-10-01 at 11.10.53 AM
Yes, we made this at home!!

We love Ice Cream! But, it can be expensive, a carton that’s not a half gallon can run upwards of $5.00 around these parts. Most cartons of ice cream are 1.5 to 1.75 quarts, that’s a decrease from 2 quarts or a half gallon just 10 years ago. Same price (or more) and less product. No thanks.

And honestly, there are a lot of weird ingredients in store bought ice cream. Food stabilizers, thickeners (like seaweed), and artificial flavors/colors. No thanks!

After meeting with a nutritionist recently regarding my big kids food issues stemming from sensory issues related to ASD, she recommended more full fat dairy products to help make sure he was getting enough fats in his diet. A kid can only drink so much milk, so I decided to make some ice cream from scratch.

I borrowed my parents Cuisinart Ice Cream Maker, which you can buy on Amazon, or probably at your local Bed Bath and Beyond. It makes 2 quarts at a time. It comes with a great cook book full of all kinds of great recipes and ideas.

After looking through that cook book, as well as looking through several of my own, and a quick internet search, I came up with several ideas on how to concoct some tasty ice cream. I asked the kids for flavor suggestions.  Two choices were the big winners:

Peanut butter ice cream with chocolate chips- I opted to use PB Fit instead of blending peanut butter into the milk/cream/sugar mixture- so it would have a better texture. I was also worried that the extra fat from the peanut butter would mess with the fat ratio and inhibit the hardening of the mixture.


Chocolate Malt- I used the basic recipe below, but added 1/4 c malt powder. I buy a huge container of malt powder on Amazon every quarter, but you can get smaller sized containers at Walmart or in the grocery store.


Making Ice Cream is easy.  If you’ve got an ice cream maker, you just mix up your ingredients, pour into the drum of the maker, put the lid on, flip the switch and 15-20 minutes, you’ll have a pretty soft ice cream. Scoop it into an airtight container with a lid (like Tupperware), and freeze it for about 2 hours. Then it’ll be hard enough to eat.

If you don’t have an ice cream maker, don’t fret, you can use two coffee cans (cleaned out of course), some ice, salt, and duct tape and make it at home- This is the method we used when I was a kid. You can read all about it here along with a true and funny story about making ice cream with kids. This is also a fun thing to do while camping- You can pre-mix the ingredients and take it in your cooler.

Here is the basic recipe I use. Please note that the ingredients used are chosen specifically for their fat content so the ice cream will be creamy. If you alter the ingredients at all, the ice cream will be gritty, grainy, or have ice crystals in it.

Ice Cream Base (makes about 1.5 quarts)

  • 2 cups Heavy Whipping Cream- DO NOT USE half and half, fat free half and half or non-dairy creamer).
  • 1 cup whole milk- You have to use whole milk or you’ll get ice crystals
  • 3/4 c sweetener (I used white sugar, you can also use brown sugar, or 1 for 1 Splenda)
  • 1 T Vanilla extract
  • pinch of salt

Directions:

  1. Prepare Ice Cream maker as machine instruction call for, or set up your Coffee Can ice cream maker.
  2. Place all ingredients into chilled mixing bowl, and mix with hand mixer until all ingredients are well blended,
  3. Pour into cream cream maker.
  4. Turn on ice cream maker, or start rolling your coffee cans!

Variations:

If you want to make my PB Fit ice cream, add 3/4 c PB Fit and 1/2 c. semi-sweet chocolate chips in step two.

Chocolate Malt ice cream is the base recipe with 3/4 cup cocoa powder, 1/4 c malt powder, and an additional 1/2 c brown sugar.

Now onto the economics: Is making your own ice cream cheaper? Usually, yes. We used flavorings that we already have on hand, and I recommend that you do the same- You know what flavors you like, and you probably already have some flavorings on hand.

  • 32 oz. Whipping cream- $4.99
  • 1 qt. Whole Milk .99

That’s enough cream to make 2  2-quart batches of ice cream.

You can watch a video of the ice cream maker going here, and don’t forget to follow me on Instagram too! I post all kinds of fun stuff there!

Disclaimer: I have linked to items on Amazon. If you click through and make a purchase, I may receive a small commission. Monies earned through commissions are used to offset the costs associated with running the blog (and the occasional cup of coffee).

Talk Back: What is your favorite flavor of Ice Cream? Have you ever made Ice Cream at home before?

Weekly Meal Plan

stemarie_1650skitchen.JPG

This week, I’ve got a bunch of event planning and scheduling to do, so I’m trying to plan out some easy/quick meals that use what we’ve got on-hand.

Breakfasts are usually the same for us: Protein shakes for grown ups, and pancakes or something along those lines for the kids. We have plenty of protein shake fixins’- I bought a lot of very ripe bananas recently, chopped them up and froze them in individual bags along with other fruit to make “shake/smoothie sacks”.

Lunches are leftovers, salads, or a protein shake for me and the Mister, and The Big kid has a specially packed lunch of whatever he’s into at the time (which changes frequently). Bitty Bird eats whatever I’ll feed her.

I’m only posting our dinner plans, and links to recipes.

Monday: Pancakes and sausage with fruit (it’s our Group ABA night, so we don’t get home until late)

Tuesday:  Leftover Pizza with  a fresh green salad

Wednesday: Grilled Chicken and Roasted Veg

Thursday: Stir Fry- I picked up a bunch of new sauces recently, I’m pretty excited to try the mall!

Friday: Date Night!! WOO HOO!

Saturday: Tacos with the fixins, after all, it is Cinco de Mayo.

Sunday:  Probably Bean, Rice, and Cheese bowls. We’ll have leftovers from the night before!

I’d love to hear about what you’re having this week! What new recipes are you trying?

4/16/18 Weekly Meal Plan!

stemarie_1650skitchen.JPG

This week, I’ve got a bunch of event planning and scheduling to do, so I’m trying to plan out some easy/quick meals that use what we’ve got on-hand.

Breakfasts are usually the same for us: Protein shakes for grown ups, and pancakes or something along those lines for the kids. We have plenty of protein shake fixins’- I bought a lot of very ripe bananas recently, chopped them up and froze them in individual bags along with other fruit to make “shake/smoothie sacks”.

Lunches are leftovers, salads, or a protein shake for me and the Mister, and The Big kid has a specially packed lunch of whatever he’s into at the time (which changes frequently). Bitty Bird eats whatever I’ll feed her.

I’m only posting our dinner plans, and links to recipes.

Monday: Grilled cheese and soup (it’s our Group ABA night, so we don’t get home until late)

Tuesday: Chicken and Wild Rice (based on a recipe here, minor tweaks to the recipe have been made), steamed brocolli

Wednesday: Fritatta with whatever veggies I have in the fridge (probably onion, shallot, spinach, and brocolli), and cheese (of course!). Served with Fruit salad.

Thursday: We are having a friend over, so I’ll probably make Salsa Chicken, and I’ll add some black or cannelli beans. Served with green salad.

Friday: Date Night!! WOO HOO! We’re going to go see Infinity Wars. Not sure what we’ll have for dinner. The kids will probably have grilled cheese and fruit.

Saturday: I’ll bust out the crockpot and make BBQ chicken. We’ve got  some events that day, so I want a dinner that’s quick to serve. Probably brown rice, steamed vegg, and fruit salad.

Sunday: I’m thinking Pizza! Either we’ll make a batch of dough and do a DIY pizza night, or, we’ll order delivery. Either way, we’ll have leftover fruit salad to go with it.

What’s with my obsession with Fruit Salad? We eat a lot of fruit, and fruit salad is a quick, tasty food to prep, everyone likes it (which is saying a lot in this house). I can make one batch and it’s good for 2-3 meals, plus the occasional snack. For those who are curious, I’ll post my recipe later this week.

I’d love to hear about what you’re having this week! What new recipes are you trying?

Simple Sewing Project- Pillow Cases!

I love making Pillow Cases- They are quick, simple projects that you can make for a very small amount of money, and they really can tie together a room.

I tend to buy plain colored sheets for the kid’s beds. Then I make pillow cases with colors or characters they like. In the past I’ve made Batman pillow cases and Thomas the Tank Engine pillow cases for Henry, and floral print and eyelet lace trim for Margaret. Most of our blankets are either down comforters in plain colored duvets or handmade quits.

I found a bunch of 1 yard pieces of fabric this morning, so I decided that today for art for 100 days of art, I was going to make a pillow case or two. I’m doing 100 days of art and chronicling it on Instagram. I’ve done some pretty cool projects so far!

You only need a yard of 45 inch wide 100% cotton fabric, matching thread and about a half hour of time. Oh, and a sewing machine. If you are looking for a good, basic sewing machine, I like this one-  It’s similar to the one I use.

Pre-wash your fabric in hot water and dry on high. This gets all the sizing out of the fabric. There will be no further shrinkage.

IMG_8710Lay fabric out, right side facing up.

IMG_8711

Fold fabric in half so selvedges (the finished edges)are together.

IMG_8711.jpgUsing a straight stitch on your sewing machine and a 5/8 inch seam allowance around one skinny end, turn the corner and sew up the side with the selvedge. IMG_8713

My sewing machine has measured out and notated hash marks on the throat plate (that’s the silver part in this photo).

I use a 5/8 inch seam allowance. It’s what most commercial patterns use as well.


IMG_8715

Trim off any stray strings. Set your machine to zigzag stitch, and stitch over the free edge of the fabric. I recommend using matching thread, I used a contrasting thread, so you could see my stitches.


IMG_8717

Fold the open edge over twice, pin or press down. Stitch down the folded edge. Take care to open the pillow case and slip the arm (the part of the machine with the bobbin in it) into the pillow case so you don’t end up sewing your pillow case together.

img_8718.jpg

Clip off any stray threads, and turn the pillow case right side out. Pop your pillow inside the case and you are all set!

This is a great 1st sewing project for kids and adults. You can make your pillowcase a little fancy by adding lace or ribbon around the hem of the open side.

I’d love to see what kind of pillow cases you make!

10 Practical Self-Care Tips

63e975223d52308de0881c564b6f5a62.jpg

There are tons of articles about Self-Care on Pinterest and mommy blogs. Having read a bunch of them, I’m lead to believe that all of these people have kids that go to bed on time, never wake up for water, cry out in the night, or may possibly be robots.  Why? Because facials, manicures, pedicures, private yoga sessions, and taking a long quiet bath are usually recommended. I can seldom do any of these after my kids are in bed.

Remember, self-care is more than slapping on a mud masque and shotgunning wine from a can (yes, it exists) on Sunday night while you hide in the bathroom and pray the kids stay in bed. My top ten list is stuff that is practical that will help “refill your cup”- and not with wine from a can.

  1. Go to bed early. Like 9:30pm instead of 11:30pm. It’s all about baby steps.
  2. Drink a glass of water in the morning. Yeah, you are supposed to drink 7 more after that, but, you’ve got at least 10 more waking hours to get that accomplished.
  3. Take your vitamins. They are doing no good in your medicine cabinet. To remind yourself, get an “old person pill case“. My husband and I each have one, and so does Henry. I refill them on Saturday night. I’m such the party animal.
  4. When you are alone in the car each day, do some deep breathing.  I like the Alternate Nostril Breathing (I learned it in yoga- pre-kids). It’s easy to do and just two minutes of it can really help you relax. Bonus: It’s free.
  5. Indulge in a guilty pleasure. Take 30 minutes and do something that you wouldn’t Facebook about- Take a couple Buzzfeed Quizzes, Watch Dr. Pimplepopper videos on YouTube, watch the Kardashians on Hulu. Just disconnect and do something mindless.
  6. Color! I have a bunch of coloring books for adults, but I also like to print off coloring pages too. I have some pinned on my 100 Days of Art Pinterest Board.  Color with what you’ve got on-hand. Crayons, markers, colored pencils. Heck, it’s ok to steal your kids coloring books.
  7. Do a Social Media Purge. I did this at the beginning of January. I unfollowed/unfriended anyone that caused me stress, pain, anxiety, or jealousy. You don’t need to be surrounded with Keeping Up with the Joneses all the time. Your time and family are great the way they are.  Removing these emotions from your daily life will give you relief. It’s liberating.
  8. Enjoy something to eat or drink that brings you joy or is nostalgic. Bonus if it’s something that your kids don’t like/won’t eat. Then there will be no sharing.
  9. Go for a ten minute walk. Outside is best, but a few laps around your office building is ok too. If you are home, grab the kids, the dog, and go outside. Investigate your neighborhood. It doesn’t have to be an Instagram-worthy sunset walk, just get out and stretch your legs!
  10. Power Down- Put down your phone, tablet, turn off the computer for an hour and take a break/nap/shower/bath.

Most of these things can be done with little to no cost. Anyone can do them. How do you make sure that you get enough self-care?

1/15/18 Meal Plan Monday

dsc07997

I hope everyone enjoys their Martin Luther King Jr. Day Holiday! The kids and I are going to be spending the day getting out into nature, after we pick up some school supplies for his teacher (I like to buy new supplies mid-year). Rehearsals for the play Husband is directing starts tonight, so a lot of our meals will be stuff that tastes good reheated, or makes good leftovers. He will be home later than usual for the next few weeks.

I’m just posting dinners for our meal plan. The kiddos lately have been having protein pancakes (I like Kodiak Cakes mix- it’s yummy and very versatile) with butter and Peanut butter. Hubs likes Oatmeal (my recipe for an easy almost instant oatmeal mix can be found here) if he’s got time, otherwise he and I have protein shakes. We mix it up, and have different flavors and mix in all kinds of stuff into our shakes, so as not to get bored. Here area few of our favorite recipes.

Lunches for Lil’ Man are usually Peanut butter and crackers, fruit, milk, a protein muffin (aka a kid cupcake), and applesauce cup. He takes his lunch every day! Hubs usually has a protein shake or I pack him leftovers or a frozen entree.

Bitty Bird and I usually have leftovers from the night before, or soup, sandwiches, quesadillas. She eats almost anything!

Monday:

  • D: Cheese and veggie enchiladas

Tuesday:

  • D: Roast Pork & Roasted veggies

Weds:

  • D: Chef Salad

Thursday:

  • D: Soup and Salad (Probably a fruit salad)

Friday:

  • D:  Date Night (dinner out)

Saturday:

  • D:   Stir Fry with cauliflower rice

Sunday:

  • D:  Home Made Pizza

The menu may change, as  I pull stuff out of the pantry to rotate what we’ve got (I am trying to cut down on waste, and put the older stuff up front to get eaten first).  It’s cold and rainy here in San Diego right now, so we may end up having more soup and salads if I don’t feel like cooking or get busy doing other stuff.

Tie Dying: Family Fun!

57044378_10156933867666061_7331522905282445312_o.jpgI love to tie dye! It’s a great way to give clothes that may have been stained a new life. Since I get most of our clothes from clothing swaps, I often find really cute light colored kids clothes with minor stains.

Well, and when you’ve got kids, a lot of stuff ends up with stains, and not just their clothes, I have several shirts that I had to tie dye to cover little people stains from dirty hands and faces rubbing on my during hugs.

There are a lot of tie dye kits available at your local craft store, but what they don’t tell you is that the dye in those kits doesn’t last.  We used this kit last year and the remaining shirts we have have faded to very light pastels. So, if you want to do some awesome, vibrant tie dyes, I recommend using Procion Dyes like the ones Dharma Trading sells.

40623226_10156428898631061_5258544797995499520_n.jpg
Time to start mixing up dye!
40860476_10156428898646061_8892130797343997952_n.jpg
Safety First! Cover all tables and work areas. Don’t forget to wear gloves.

I also have cultivated an Amazon Store with all the stuff you will need, including a kit that contains Procion Dyes- All you need is a bag of Urea and the kit is ready to dye! Procion dyes are best for Cotton, ramie, hemp, rayon- Natural plant based fibers (not linen- that stuff is a bear to dye).  If you have blends with synthetic fibers (like polyester, acrylic, lycra), the color will not be as vibrant. Anything less than 50% natural fiber will end up being pastel.

Since Tie Dying can be a little intimidating, let’s break it down. In addition to your dyes and chemicals…

You will need:

  • A big open space (We use my parents backyard)
  • 2-3 6 foot tables covered in protective plastic (tarps or trash bags work well)
  • 1-2 Large Buckets (5 gallon buckets from Home Depot are great)
  • Access to warm water
  • Measuring cups and measuring spoons (I recommend plastic ones)
  • Plastic bags or plastic wrap (to cover up /wrap up garments after they have been dyed)

Here is my pinterest board with tons of great folding techniques and patterns. You are ready to fold and tie once you’ve selected your garments and laundered them without fabric softener. I love incorporating marbles, canning jar lids, clamps  to make tie dying more interesting.

Screen Shot 2017-11-26 at 8.19.02 PM.png
Folded, tied, and zip tied!

Once everything is folded/tied and secured (either with rubber bands, zip ties, or cotton string), it’s time to mix the washing soda and hot water. 1 cup of washing soda per gallon of water.  Mix together in the buckets, and soak the tied garments for 15 minutes-1 hour. The washing soda raises the pH of the garments allowing the dye to be more readily absorbed.

Washing Soda is NOT BAKING SODA.  Washing soda is caustic and will hurt you if you submerge your hands in it. Wear gloves when you handle it. Wring out the garments after soaking so they are damp, not dripping.  You can keep using the same water for your entire session.

40586919_10156428898611061_6925444721087086592_n.jpg
Our soaking bucket- it’s actually a plastic tote.

While your garments are soaking, mix up your dye.  The most dye will come directions, but remember to mix your water with Urea. 1/4C of urea to 1 quart warm water. Urea helps the dye dissolve and remain mixed. It also helps the colors stay vibrant.

TIME TO DYE! Once your soaked garments are wrung out, it’s time to apply the dye. If you aren’t sure which colors will look good together, Get a color wheel. It will help you with color placement too. When you tie dye, colors will run together, so using complementary colors will help your garments look better when they are finished.

Remember to apply dye all sides, and if your garment is bunched up a lot, you may need to squirt dye between the folds to make sure the dye penetrates all of the layers.

Screen Shot 2017-11-26 at 8.13.21 PM
Bags and bags of baby onsies!

After the garment is dyed, place it in a plastic bag, or wrap it up in plastic wrap. You want to lay the item flat.  Let the garments sit for 24 hours (or over night), rinse the garments one at a time under cool water until most of the water coming from our garment is clear or a very pale. Then remove the binding (rubber bands, zip ties, string).

Wash completed garments with Synthrapol. It’s laundry soap that binds the color molecules to the fabric and sheds the dye that is not bonded. Once you wash the finished garments with Synthrapol, the clothing won’t shed dye or rub off on you, you can use your regular detergent from then on out. I also throw a couple Color Catchers in the wash too for good measure.

Once your garments are dry, the are ready to wear! I use the word “garments”, but you can also dye fabric, bed sheets, even pillow cases.


Here is some of the most recent stuff I dyed:


Tie dye shirts make great gifts! You can also tie dye socks- That’s what Bitty Bird is getting in her Advent Calendar this year!

I have utilized Amazon links within this post, prices can change at any time, and I may receive a commission when you click the links to Amazon and purchase items linked. Commissions help cover the costs associated with blogging.

Good, Clean (House) Fun with Oh Goodness!

Screen Shot 2017-11-11 at 9.09.01 PM.pngDoes anyone really like to clean? I like when my house is clean, but I do not look forward to actually cleaning my house.

I don’t enjoy spraying who knows what surfactants, artificial fragrances (or worse, “natural” flavoring or scents like castoreum..eww), or harsh chemicals (the thought of bleach makes my eyes water). And yet, I’m not one who wants to spend hours mixing up my own house cleaning products.

IMG_0242.jpgSo when Annie from Oh Goodness contacted me to tell me about her awesome products, I was down to try their awesome DIY cleaning kits.

She sent me their Glowing Collection, which contains the reusable glass containers, ingredients and directions to make:

You Shine Dishwashing Powder (35-40 loads)

You Sparkle All Purpose Spray (16 ounces)

You’re Brilliant Scrub (8 ounces)

The one thing I like is that I know all of these ingredients. I use them all in other ways around the house. It’s all non-toxic (but that doesn’t mean you should eat it- DON’T EAT IT), it’s easy to make, and it actually cleans! I’m sure you’ve read online and seen all over Pinterest how you can clean your kitchen with peroxide, baking soda, vinegar, etc. Those are all great, but I’ve never had results with those ingredients like I have with my Oh Goodness kit.

IMG_0235
mix, mix, mix, mix and here are my finished products!

15 minutes after opening the box, reading the directions, (stopping to make a snack for the kids) and mixing, I was in business. I cook 90% of our meals, so my kitchen is always in need of some kind of cleaning.

I started with the kitchen sink. I have no before picture, but let’s just say it was.. icky.

A liberal scoop of You’re Brilliant Soft Scrub, and a quick scrub of the sink with a sponge and ta da:IMG_0236Can you hear the Angels singing? I can! I even scrubbed the black flange into the garbage disposal that keeps the whirling chunks of food from flying out of the garbage disposal.

The You Sparkle All Purpose Spray got my counters clean like whoah, and the entire house fills with the bright scent of lemons every time I run the dishwasher (which is seriously two times a day)..

I love that the containers are recyclable and reusable. The littler bottles the coconut soap and essential oil came in got a good scrubbing and the kids use them in their toy kitchen.

Oh Goodness wants to share their cleaning glory with two of my readers! Entering is easy.  Click here, or use the Rafflecopter link below.

a Rafflecopter giveaway

I’ll choose two winners on 11/20/17- Remember, you can’t win if you don’t enter!

BOGO Holiday Beverages are back at Starbucks (and a DIY Hack)

Screen Shot 2017-11-03 at 3.35.18 PM.png It’s back. Halloween is over and that means Starbucks is already to serve their holiday beverages!

November 9-13 from 2-5pm each day, you will get a holiday beverage free when you buy one at regular price.

The Starbucks Holiday Beverages include:

  • Peppermint Mocha
  • Gingerbread Latte
  • Egg Nog Latte
  • Caramel Brulee Latte
  • Holiday Spiced Flat White
  • Chestnut Praline Latte

And from November 12-16th from 2-5pm each day you can score one holiday favorite free when you buy one holiday favorite.

This deal is at participating locations only, so check with your fav. location beforehand.

If you can’t make it to your local ‘Bux in time to score one of these sweet deals, here is my holiday drink DIY:

Screen Shot 2017-11-03 at 3.54.04 PM.pngLocate your favorite mug.

Brew your favorite coffee double strength (because let’s face it, not everyone has an expresso machine at their disposal)

Screen Shot 2017-11-03 at 3.50.23 PM.pngHeat some milk (I prefer 2% or whole milk) and I use a frother like this one.  It makes the milk nice and frothy- just like the steamer at the coffee shop.

Pour coffee into your mug, add 2-4 pumps of syrup (I like my coffee less sweet, so I do 2 pumps), stir and then add your hot milk. Put a dollop of froth on top. Top with whipped cream (if desired, not needed).

If you are feeling fancy, you could always top your beverage with ground cinnamon, nutmeg, chocolate, or fancy sprinkles.

For syrups, I prefer Torani. Amazon has a bunch of different variety packs for holiday drinks, I like this one the best. If you live near a Cost Plus World Market, they usually have a great selection of flavors. Since I’m not a huge fan of single task anything, I also put Sugar free syrups in my protein shakes, and in my regular coffee each day. I’ve got a regular coffee shop set up in my kitchen. Ya know, except there is no bearded hipster.

If you are making a mocha, I use Nesquik. Really. I’ve got kids, so we always have it in the cupboard. But you could use your favorite cocoa mix.

Review: Colortime Crafts and Markers – Glow in the Dark Halloween Tote

Recently I wrote that I was going to receive a glow in the dark Trick or treating cotton tote bag and markers from Colortime Crafts.  It came last week and over the weekend, I gave it a spin. Henry was too busy cleaning his room and playing to color (his words, not mine), and Bitty Bird was napping.

Screen Shot 2017-10-10 at 12.58.23 PM 
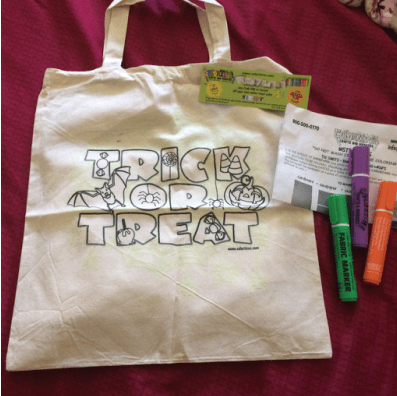
The bag is very sturdy and well put together.

I received three markers: Green, Purple, and Orange. We also have a stash of fabric markers, so I filled in with our stash as needed.

The directions instruct you to place a piece of cardboard between the layers of fabric to keep the markers from bleeding through.

Screen Shot 2017-10-10 at 12.58.30 PM

It turned out really cute, and we’ll be using it this weekend at a Halloween event. I’ll be posting photos on Instragram! Make sure to follow me!

Click here for the Latest Online Special offers and promo codes to Colortime Crafts and Markers
 

@usfg