I’m a day late– Bitty Bird is having super fun 2 year sleep regression and it’s making me loopy. No sleep for her means no sleep for Mommy!
I’m just posting dinners for our meal plan. The kiddos usually have a small toasted bagel with cream cheese for breakfast along with fruit. Hubs likes Oatmeal (my recipe for an easy almost instant oatmeal mix can be found here) if he’s got time, otherwise he and I have protein shakes with frozen bananas and PB2.
Lunches for Lil’ Man are usually Peanut butter and crackers, fruit, milk, a protein muffin (aka a kid cupcake), and applesauce cup. He takes his lunch every day! Hubs usually has a protein shake or I pack him leftovers or a frozen entree.
Bitty Bird and I usually have leftovers from the night before, or soup, sandwiches, quesadillas. She eats almost anything!
We’re pretty stocked up of food for the next week or so- We’ll need milk, cream cheese, and cheese. I’ll probably hit up Costco tomorrow.
Monday:
D: Colonial Chowder (I’ll post the recipe soon) and toast
Tuesday:
D: Chef Salads
Weds:
D: Frittata (Thanks to my friend Lizzy for the eggs!)
Thursday:
D: Frozen Entrees with veggies
Friday:
D: Date Night! (we go out)
Saturday:
D: Salsa chicken with quinoa and veggies
Sunday:
D: Leftover buffet
The menu may change, as I pull stuff out of the pantry to rotate what we’ve got (I am trying to cut down on waste, and put the older stuff up front to get eaten first).
We’ve got a busy week with ABA Therapy three times, doctor’s appointments, CSA pick up, and my 20th High School Reunion on Saturday!
Ok, so pictures with this post because I didn’t think about writing it down until after we had already eaten second helpings. I didn’t think you’d want to see a pic of an empty, dirty skillet.
This recipe is inspired by what I had in the cupboard. I really wanted tacos, but we didn’t have any of the usual fixins’, so I rummaged through the cupboard and the spice rack and here is what I came up with.
If you are wondering why didn’t I just go to the store, or send the Mister…. You mst be new here! I pride myself on being able to use it up, make do, or go without. But a woman should never be denied tacos, or a reasonable facsimile.
Beefy Taco Skillet (serves 6, maybe more)
Ingredients
1 lb ground meat (I used beef, but you could use your fav. ground meat)
1 can condensed tomato soup +1 can of water
1 small tin tomato paste
1 can beans, drained and rinsed (I used Sun’s Pinto beans with Jalapeños) Pintos, Kidneys, or black beans would all be good in this recipe
1 white onion, diced
1 bell pepper, dices (I used red)
1/2 cup mushrooms slices (I used fresh, but feel free to use canned, drained and rinsed)
2 cups cooked rice (I had leftover white rice in the fridge, but feel free to use brown if you like it better)
1 packet taco seasoning
2 cups shredded Mexican or Sharp Cheddar Cheese
Sour Cream (optional topping)
Directions
Brown meat over medium heat, breaking it apart as you cook.
Add chopped veggies. Cook until onions are clear.
Add beans, soup, tomato paste, and taco seasoning. Simmer 10 minutes, until well combined and bubbling.
Add rice and stir to coat rice and incorporate into mixture.
Top with cheese and turn to low. Cover skillet, allowing cheese to melt, about 5 minutes.
Top each portion with sour cream, as desired.
Serve with Tortillas and a green salad. Despite having a whole can of soup and water in it, it is not soupy at all. Cooking it on medium really tightens it up, especially once the rice is added.
When I make this again, I will be adding more veggies: 2 onions, 3 bell peppers (one red, one green, and once yellow), and 2 cups of corn kernels (probably frozen). I may also omit the can of water and add a can of salt-free diced tomatoes in their own juice. All of these changes will add bulk to the entree without adding too many more calories.
You could also top this with crushed tortilla chips and a little chopped cilantro (I am one of those people who can’t eat cilantro- it tastes like soap and makes my tummy urpy).
We’ve been blessed (?) with an abundance of yellow zucchini as of late. Friends with gardens and a CSA box have brought us literally 10 lbs of yellow zucchini…. That’s a lot. So after making lasagna, stir fry, and zoodles, We were still left with 6 of those little yellow bastards, staring me in the face.
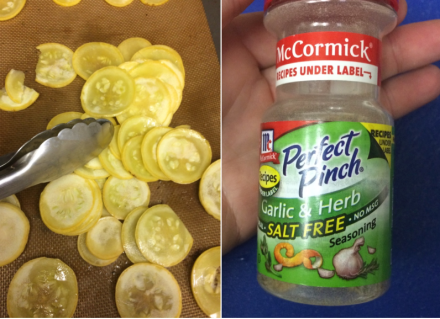
I googled “What to do with Yellow Zucchini” and the answers were shockingly, NSFW. However, deep in the recesses of Google were many recipes for baked chips. Figuring it had to be better than my kale chips debacle (5 lbs of burnt, greasy kale bits, no thanks), I set off to work.
The first batch was too greasy, so the batch that’s in the oven now has far less oil (only 2 tablespoons). Hubs said they were tasty (albeit greasy), and even Itty Bitty gobbled a bunch down today (after I blotted them with a paper towel).
Now, to wait…..
Feel free to sub in any herb or spice blend you like, I grabbed the first one off the spice rack.
Baked Yellow Zucchini Chips
Ingredients
2 lbs yellow (or green) zucchini
2 T. olive oil
2 T (or more), your favorite salt free herb or spice blend
salt, to taste
Directions
Thinly slice coins of zucchini- you can use a mandoline like this one, or a knife- whatever you’ve got.
Blot them dry between two paper towels. I let mine sit between two paper towels for about 30 minutes.
Toss with oil, and spread 1 layer on a cookie sheet topped with a sil pad (or you can use parchment paper- whatever you’ve got).
Sprinkle oiled slices with herbs or spices.
Bake at 225 degrees for a minimum of 2 hours. Check after 2 hours. Depending on how thick your chips are cut, it may take up to 2 1/2 hours.
After they are room temp, then sprinkle with salt to taste. Store in a sealed container on the counter. They stay good for 3-4 days, but they won’t last that long.
I’m just posting dinners for our meal plan. The kiddos usually have a small toasted bagel with cream cheese for breakfast along with fruit. Hubs likes Oatmeal (my recipe for an easy almost instant oatmeal mix can be found here) if he’s got time, otherwise he and I have protein shakes with frozen bananas and PB2.
Lunches for Lil’ Man are usually Peanut butter and crackers, fruit, milk, a protein muffin (aka a kid cupcake), and applesauce cup. He takes his lunch every day! Hubs usually has a protein shake or I pack him leftovers or a frozen entree.
Bitty Bird and I usually have leftovers from the night before, or soup, sandwiches, quesadillas. She eats almost anything!
We’re pretty stocked up of food for the next week or so- We’ll need milk, cream cheese, and cheese. I’ll probably hit up Costco tomorrow.
Monday:
D: Steak (it was a gift!), roasted broccoli, green salad, cheese toast. The kids don’t like steak, so they’ll probably have grilled cheese sandwiches on cheese toast (Lil’ Man discovered them not long ago and he told me it’s the “fancy” way to make grilled cheese).
Tuesday:
D: Bean, Rice, and cheese bowls (they also have caramelized onions and peppers) This is a fav in our house. It’s healthy and inexpensive.
Weds:
D: Home made Red Sauce (made in the crockpot- Recipe will be posted tomorrow!) baked with cheese in Zucchini Boats. Thanks to my friend Lisa for the monster zucchini!
The menu may change, as I pull stuff out of the pantry to rotate what we’ve got (I am trying to cut down on waste, and put the older stuff up front to get eaten first).
We’ve got a busy week with ABA Therapy three times, a Lego Movie event, a Lego event at our local Library, and a trip to Legoland on Saturday (just me and my Lil’ Man!). I’ve made sure to fill up our snack backpack and wash out our water bottles.
I love to cook. When US Family Guide and Home Chef offered me two free meals for two, I jumped at the chance. Home Chef delivers ready to cook meal kits. The shopping and most of the prep work is done! You get just enough of each ingredient, and you add minimal ingredients that are already in your pantry (salt, pepper, oil, water).
Each Dish comes with a recipe page that its into a 3-ring binder (which is included in your first order FREE). Directions are step by step with photos, and all ingredients are listed on the card in case you want to make it yourself from scratch again.
So, I got my first kit in the mail last month, but right away something was off. Some of the veggies were not in good shape. I called customer service in the hopes they could just resend me the spoiled ingredients, but instead they gave me credit for two more meals, which wouldn’t have been a problem, but that meant it was another week before I could do my review.
I improvised with the steak salad. I had a bag of Romaine salad on hand, and some grape tomatoes to substitute for the ingredients that were not edible in the kit. The steak was great. Overall it was easy to prepare.
Last week, the replacement kit arrived. Again, similar issues with some of the more delicate produce (cucumber, grape tomatoes, Roma tomato), but this time I didn’t bother calling. I just tossed the inedible produce, and subbed in what I had in the fridge. I made the Goat Cheese and Bacon Naan flatbread pizzas first- They were so easy and tasty.
I made a few tweaks (I didn’t use the honey to caramelize the onions- That’s totally cheating!). I made this the same day the box arrived and I will definitely be making it again!
The other recipe that I received was the Shawarma Chicken Bowl.
The poor tomato and cucumber were both inedible. The cuke was frozen upon arrival (Due to it’s location in the box directly on top of a blue ice block), and the tomato looked like it had been knocked around a bit.
I improvised the dish a bit and it turned out ok. What I didn’t care for was that the seasoning on the meat and rice is the same. I did like how the chicken came out. It had a great level of seasoning and flavor. I grilled it on our outdoor BBQ.
OVERALL: Home Chef is a great way to try out new recipes if you are not an experienced cook. It was nice to open a box and have all of the ingredients all ready to prep and cook. It is expensive for a family- starting at $9.95 per serving. That is still WAY cheaper than going out to eat, and in my opinion, these dishes could be restaurant quality with a little work on the consumers end (using proper knife skills, reading and following directions completely). They worked great for us when we wanted to have a stay in date night and watch a Redbox.
I would be careful when choosing entrees not to pick ones with more delicate veggies, just because they tend not to travel well in the box with the blue ice type frozen blocks.
That’s the nice thing about Home Chef, you can choose your entrees out of a list of many. And the menu changes frequently, so you won’t get the same dishes again and again.
If you want to try Home Chef for yourself, Check out my post here with details on how you can save $30 off your first purchase!
Disclosure: I received this offer for free in exchange for my honest opinion. I received no monetary compensation, and all opinions are my own. Sometimes I utilize affiliate links. To learn more about my use of affiliate links, please visit my disclosure page.
It’s summer and my kids would eat popsicles 24/7 if I let them. Most commercial popsicles (or as they are sometimes called, frozen dessert confections) are full of sugar and artificial ick. A few months ago my dad bought me a package of Zipzicles on Amazon. Zipzicles are long, skinny zip top freezer bags that can be filled with whatever you’d like and frozen. Think DIY Otter Pops.
What I really like is that you can be creative, use what you have on hand, and create healthy and fun treats with your kids.
Here are two recipes that the kids and I came up with. If you follow me on Instagram, you may have seen this pictures recently.
Mixed Berry Pops
Makes about 12 pops
2 cups mixed berries (use whatever you have, I used 1.5 cups of strawberries and 1/2 cup blackberries)
1/2 c water
2 t. honey
Place all ingredients into the blender and blend until smooth. Use a small funnel to fill the zipzicle pouches. Place all Zipzicle pouches into a cup or larger zip top bag and place in freezer. Ready to serve in approx 4-6 hours, or as soon as frozen solid.
Tropical Pops
Makes about 20
2c frozen bananas
2c frozen Strawberries
1 pkg frozen mangoes
2c Orange Juice
Blend together, pour into Zipzicle pouches ( I use a funnel). Store in freezer until it’s time to consume.
They are so good, and no extra sugar is needed, because the bananas are so sweet.
Next, I think we’ll be making Bachelor Mousse treats. I think it will freeze well, and everyone loves fudgsicles!
We’re back from camping and ! am pooped. Making a yummy, home cooked meal is the last thing I want to do today. I am wishing that my box from Home Chef was already here!
Home Chef delivers perfectly portioned ingredients and easy-to-follow recipes directly to your door, so whether you’re an amateur cook, or more seasoned in the kitchen, cooking with Home Chef is easy and enjoyable.
Each week, you can use the personalized recipe recommendations they provide you. Or, you can pick from 11 fresh, chef-designed dinners, priced at $9.95 per serving. They change their menu weekly to give you countless new dinner options.
In about 30 minutes, using Home Chef‘s simple, step-by-step recipe cards, you’ll confidently prepare meals from scratch that impress everyone at your table…including yourself! Use the promo code “FAMILY” to try out Home Chef for $30 off!
I can’t wait to try a few different entrees and share them with you! The Tacos al Pastor look really good! Which entrees pique your interest?
As we prep for our annual family camping trip, I thought I’d share some of the fun things we do with the kids when we camp.
In addition to all of the usual camping stuff: Tent, blankets, pillows, air mattress, clothes, toiletries, Sunscreen, food, camp kitchen stuff…. You need stuff to do!
A friend and I made a huge batch of play dough last week, and we’re taking half of the batch, along with some cookie cutters, small rolling pins and other fun play dough stuff I got on my local Buy Nothing Group.
Games: High Ho Cherry-O, card games (like Uno, and a few regular decks of cards), lawn bowling.
We also have a craft box. It’s a large tote, like this one. I’ve filled it with all sorts of craft odds and ends. Mostly stuff leftover from other projects, as well as stuff I’ve gotten from Craigslist Curb alerts, and my local Buy Nothing group. There is paper, scissors, glue, beads, pipe cleaners, paint, and so much more! The kids rifle through it and come up with some of the most interesting projects. I really believe that kids need to have free reign over creative play, so as long as I am there to make sure they are safe, they are free to create and play how they wish.
Bubbles. I make about a gallon of bubble solution, and we have all kinds of wands and stuff (Dollar tree and Target’s Dollar spot are great places to find bubble toys). We also make some out of pipe cleaners.
We also cook a lot when we are camping. We use dutch ovens to make all kinds of baked goods, including our favorite: Beer Bread. My dad has a cool clay Pizza oven (it’s this one), and we make pizzas in the late afternoons to snack on. Our favorite pizza recipe is here.
Here are a few pictures of our adventure last year:
We also of course, play at the campground play ground, go on nature hikes (and do some fun nature scavenger hunts- check out Pinterest for a bunch). We spend time with family and friends, and of course, check out all of the events and fun at the big camping event in which we are participating.
Camping is a great family activity, and here in San Diego there are so many places to camp! From the beach, to the mountains, to the desert, there are campgrounds, both private and public for low prices!
If you are a camper, where is your favorite place to camp?
Having had two kids, I can tell you that nothing is more helpful than having food to eat in the first few weeks after giving birth. Having a baby is stressful, especially if it’s your first. You can take all the classes in the world, do as much prep, but when it comes down to it, you spend the first few weeks tired, stressed, and weary.
Having a few extra hands and a hot meal you can eat one handed (especially something you can eat while breastfeeding) is worth it’s weight in gold!
Recently a friend and his wife welcomed their little girl. Hubs made up a batch of his new baby calzones. He makes them for everyone of our friends that is having a baby. They freeze well, re-heat quickly (and well), and you can eat them one handed.
Thanks to Kasandrinos Olive Oil and UsFamily Guide for the opportunity to sample this olive oil for free! I’m not usually a big Olive Oil fan, Kasandrinos Olive oil has a light flavor that works really well in Calzones! I also like that it has an easy to pour spout inside the bottle!
As the dough rises, we prep the rest of the ingredients. Sauce, cheese, meats, veggies.
I use canned tomato sauce and add Italian seasoning, red pepper flakes, a pinch of parmesan cheese, salt, and black pepper. No added sugar.
Some of the most popular ingredients around here: pepperoni, sausage, onions, bell peppers, ground cooked beef, sliced chicken breast, goat cheese, mozzarella, bbq sauce (instead of tomato sauce), cheddar cheese, ham, green chilis, meatballs (I usually make them little or slice them up), pretty much anything in the fridge!
Once the dough is ready, it is portioned out, rolled and then the magic happens!
For small/hand held sized calzones, use 1/2 cup cheese/toppings and 2-3 T. of sauce. Fold over and crimp the edges shut, and place on a cookie sheet that is either sprayed with Pan or use a silicon baking mat. I have these and I love them!
Larger Calzones need almost double the amounts above.
Bake at 450 for 10-20 minutes, depending on size.
Before and after baking!
Here is the result of a few hours work. They were delivered the next day, ready to be frozen and enjoyed at the new mom and dad’s leisure!
If cooking isn’t your “thing” here are a few other ways to help the new parents in your life:
Bring them their favorite coffee drink, and something to eat.
Offer to hold/watch the baby while they take a shower/take a nap/have 5 minutes alone.
Fold/put away their laundry.
Wash their dishes.
Take out the trash, or if trash day is the next day, take their cans down to the street (then the next day, stealthily put them back).
Be there. Honestly, it can be lonely if you are a new parent. It’s not like you are taking your new baby all over town. You are just trying to get the hang of having a new family member. Sometimes it’s just nice to have someone to come hang out with!
Kasandrinos and Us Family guide provided us with a free bottle of olive oil in exchange for this post. All opinions are my own. I was not financially compensated.
We love Garlic. It’s a good thing that hubs and I both like it, because otherwise this recipe wouldn’t go over too well.
This is my spin on the Spaghetti with Garlic White Wine sauce found here. It appeared in hubs Facebook feed one day several months ago, he sent it to me, and we’ve been tweaking it to make it our own ever since.
To make it a little healthier, I added in 1 large spaghetti squash. If you’ve never cooked one, I write about it here. It’s super easy to cook, and it’s very yummy
Lemon Garlic Spaghetti Squash Casserole
Ingredients:
2 large white onions, cut into quarters and layers separated
1 T Olive Oil
Salt and pepper
2 large lemons, zested and juiced
4 T butter, divided
6-8 cloves of garlic, minced (you can use more or less)
1/2 t. red pepper flakes
1/2 c. white wine
1/2 T Thyme (I usually have it dried in my spice cabinet, but if you have it fresh, use 5-6 springs)
1 c. Grated parmesan cheese, divided
1/2 c chicken broth (or pasta water)
1 large spaghetti Squash
If you want to add pasta to this dish, you’ll need 1/2 lb spaghetti, 8-10 cups water (to cook pasta), and salt (to salt the water)
Directions:
Preheat oven to 350.
Prep spaghetti squash (scoop out the stringy parts and seeds) and bake at 350 for 30-45 minutes.
Toss cut up onions in oil, salt and pepper. Bake in a baking dish covered for 20-30 minutes, uncover and bake an addition 10-15 minutes.
After the squash is done cooking, allow to cool for about 10 minutes, or until it’s easy to handle. Scoop the “meat” out and set aside.
Baked onions, cooling, along with the butter needed to finish the recipe.
After onions are done baking, set aside.
If you are cooking pasta, start the water to boil and cook pasta as directed.
Zest and juice the lemons, set aside.
Heat half the butter in a skillet. Once melted, add the minced garlic and cook on medium for 5-ish minutes until fragrant (watch out, it burns really easily). Add red pepper flakes.
Add Lemon juice and wine, turn up the heat for a few minutes. You’ll want to cook off the alcohol, so about 5-10 minutes at medium high heat. Add the baked onions.
Add 2 T. chicken broth (or pasta water), and the remaining butter, and the Thyme. Once the butter is melted, turn off the heat.
Add the spaghetti squash and/or pasta into the skillet, and gently toss to coat. Add lemon zest, and half of the parmesan cheese. If the mixture becomes too thick, add more chicken broth or pasta water a little at a time.
Top with any additional cheese, thyme, and/or pepper flakes.
Here is an extra step that makes it a little better (IMO) but isn’t needed: Place skillet under the broiler for 3-5 minutes, until the cheese on the top is brown and bubbly.
I have made this recipe with both pasta and spaghetti squash. This last time I made it, I used only 1 serving of whole wheat spaghetti, mostly because I prefer the way it turns out when it has the pasta water in it, instead of the chicken broth.
*If you are a vegetarian, feel free to substitute in veggie broth.