 Recently, we noticed that our box fans weren’t providing much cool air. Before dropping over $150 to replace them all, I decided to see if cleaning them would improve their airflow capabilities. After all, they were still functioning mechanically, they weren’t putting out the air flow they used to.
With temperatures in excess of 80 degrees almost all year round here, box fans are a needed appliance in our home. We can’t go without them, as running the AC is cost-prohibitive.
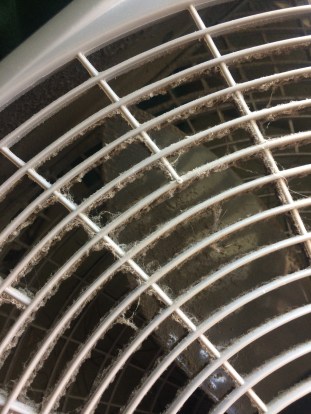
These fans are all about a year old, and while I have vacuumed the front and back of them previously (I do it once a week), they had never been taken apart and cleaned.
Gather all the tools needed before you start. For this job you will need:
- A sheet to cover your work area.
- A screwdriver (our fans all have Philips head screws)
- A dish to hold the screws while the fan is disassembled
- All-purpose cleaner. I used Comet Lilac Bliss- it’s what we had in the house, and it worked really well.
- A stiff-bristled brush. I used the brush I use to scrub the soap scum/hard water deposits out of the bathtubs (like this)
- Rags or really scratchy paper towels. You need something that will trap the dirt.
- Vacuum Cleaner with a brush attachment.


Here are my tips for deep cleaning your fans-
-
- UNPLUG THEM! It seems like a no-brainer, but I’m going to remind you to not clean appliances that are still plugged in.
- Remove the front and back plastic pieces of the fan. Ours were held together with 6 screws.
- To remove the dirt/fuzz/cat/hair/whatever grossness that was on the fan front and back, I placed them in the bathtub and sprayed them down with all-purpose cleaner. I allowed them to sit for about 20 minutes while I cleaned the fan blade and fan case.
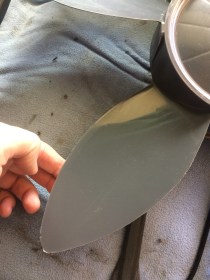
- Using all-purpose cleaner and a rag, carefully spray and wipe the fan blades, both front and back sides.
- Using the vacuum hand tool with the brush attachment, clean the interior of the fan case, as well as the backside of the fan motor. I was amazed at the amount of fuzz, dirt, and hair was around the intakes for the fans.
- Once the fan blades and fan case are clean, return to the bathroom and scrub the fan front and back. Rinse and dry completely.
- Reattach the front and back to the fan case, plug in and test out. All 6 fans worked 100% better after being cleaned. This is now a chore that has been added to the end of season home cleaning list.

Cleaning all of the fans took about 2 hours, and that included time to make snacks for two very starving kids, let the cat in and out a few times and help with math homework. Without distractions, I could have gotten done in about an hour.
In the future, I may invest in some of these Box Fan Filters, which until today I had no idea existed.
Taking care of appliances, like these box fans is just another way that we are able to extend the useful life of often-used items in our homes, and that saves us money in the long run.
Talk Back: What types of small things do you do to extend the life of your small appliances?

 Do you spend time on Facebook, Twitter, Youtube, Linkedin, and Amazon? If you do, consider joining UpVoice! UpVoice is
  As you visit Facebook, YouTube, Amazon, or any other of the participating sites on your desktop computer, they anonymously collect the ads that you see and give you daily tokens that can later be redeemed for Amazon Gift Cards. Once you visit one of the participating sites, it may take a few minutes for your token balance to be updated.
 I’ve been a member for a little over a month, and I cashed out for my first $10 Amazon Gift Card today!
 I am so stoked about this offer! 10,000 points is a $10 gift card (there are 20+ brands to choose from. I usually get Amazon)



 And what good is a notebook without a pen? This
 And the Pouch? It’s one of these

 And it’s now a lot easier to get the kids to do their chores with
 Hot Sticks
 If one of your New Year’s resolutions is to lose weight, eat better, and get healthy, here are a few awesome free e-books from


 3 for Free: Easy All-Natural Recipes Under 350 Calories
 The
The

 Prior to being a blogger, I made costumes. All kinds of costumes from Jedi Robes to A Prince Charming Costume for someone’s wedding. One skill that I am adamant about everyone having is the skill of sewing. You don’t need to be able to stitch a wedding dress, but sewing on a button, fixing a fallen hem, and repairing a seam rip are all simple and good, money-saving skills that everyone should be able to learn.
 To get started, you’ll need a sewing kit. I have one like
 I picked up a package of Denim Iron on patches at Joann’s- I used a 50% off coupon, so they were only $2.14 with tax! And I still have half a package left, so I can repair another pair of jeans too!
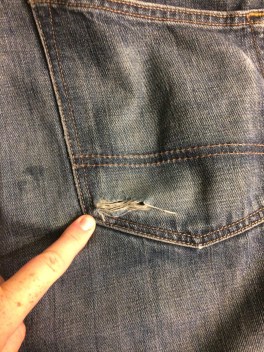 1-Find the hole, and make sure that the patch(es) are cut to the right size. You want to cover the hole completely, and the surrounding area, so the patch has some stable fabric to fuse to.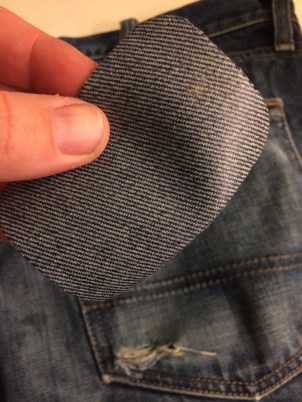


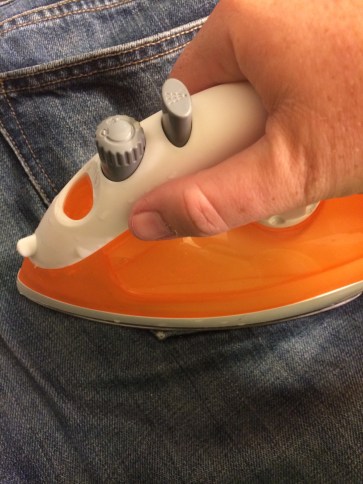 3-Once the clothing/patch has cooled, you can stitch around the edge to make it extra secure, however, in this case I did not. I would do that for the knees of kiddo pants or other high wear areas.
