Staycation Getaway in Borrego Springs with Deals at La Casa Del Zorro Resort & Spa

The kids and I love La Casa Del Zorro Resort & Spa. It’s an incredible resort out in Borrego Springs, CA. Borrego Springs is about an hour east of San Diego near the Anza-Borrego Desert State Park.

Offer Details

  • Stay Two Nights, Third Night Free
  • $50 Daily Resort Credit (redeemable at The Fox Bistro, The Fox Den Bar, Casa Café & Market, and The Spa at La Casa Del Zorro)
  • Waived Resort Fee (includes parking)

Book with promo code CYBER25 and experience exceptional value wrapped in relaxation, adventure, and desert serenity.

The $50 Daily Resort Credit applies exclusively to The Fox Bistro, The Fox Den Bar, Casa Café & Market, and The Spa at La Casa Del Zorro. Credit may not be used toward room rate, resort service fees, parking, or taxes.

Offer Valid: November 1, 2025 – December 5, 2025. Stay Dates: November 1, 2025 – March 5, 2026

Borrego Springs is a Dark Sky Community, and that means amazing stargazing year-round. La Casa del Zorro has plenty of places on site to sit and stare up at the stars.

There are all sorts of things to do in Borrego Springs after your soak in the hot tub or swim in the pool!

And if your kids are anything like mine, after a long day of fun and adventures, only a pizza will do. And Borrego Springs has Calico’s– and they deliver to the Resort!

Calico’s pizza is really good- Lots of cheese, chewy crust, and it was delivered quickly!

Recipe: Oat Flour Peanut Butter Chocolate Chip Cookies

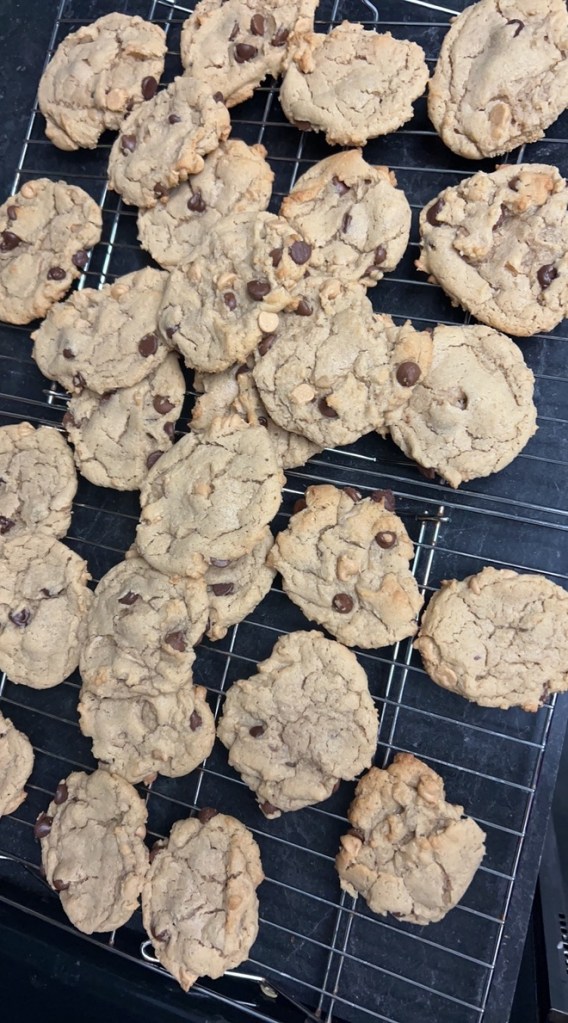
The kids love cookies. It’s one of the few foods they both agree on.

I started making these about 6 months ago. They are so good, easy to make, and they are pretty customizable if you have food allergies.

Oat Flour Peanut Butter Chocolate Chip Cookies

Ingredients

  • Two sticks (1 cup) salted butter, softened
  • 1 cup peanut butter, smooth preferred
  • 1 1/2 cups packed brown sugar
  • 1 1/2 cups white sugar
  • 2 tablespoons vanilla
  • 4 large eggs
  • 2 1/2 cups AP Flour
  • 2 cups Oat Flour
  • 1/2 cup quick-cooking oatmeal
  • 1 teaspoon baking powder
  • 1/2 teaspoon salt
  • 2 1/2 baking chips of your choice- I used Milk Chocolate, Semi-Sweet Chocolate, and Peanut Butter chips.

To make Oat Flour, pulse oats in a blender or food processor until the oats are a smooth flour. 1 1/2 cups of oats should make about 2 cups of flour. You can also buy it online or at most health food stores. 

Directions:

  • Preheat oven to 350.
  • Line baking sheets with parchment paper. 
  • In a large mixing bowl, cream the butter and peanut butter.
  • Add sugars one at a time and mix until fluffy.
  • Add eggs and vanilla and mix until incorporated fully.
  • Mix in baking powder, salt, flours, and oats.
  • Once all are blended into the dough, add chocolate chips.
  • Drop tablespoon-sized dough balls on cookie sheets that have been greased or are lined with parchment paper. I prefer parchment paper.
  • Bake at 350 degrees for 8-12 minutes.  Let cookies rest 1-2 minutes before transferring to the cooling rack.

This recipe makes about 6 dozen cookies. 

This dough also freezes well. 

If you are allergic to peanuts, you can substitute sunbutter or your favorite nut butter. Do not use Nutella- It contains a lot of sugar and other ingredients that will throw off the chemistry of the recipe, and you won’t get yummy cookies.

Gluten Free Peeps: You can use 1:1 Gluten Free AP Flour and Gluten Free Oats in place of AP flour and regular oats.

Vegans: Substitute Crisco or Coconut Oil for butter. Do not use margarine/spread as it can contain a higher quantity of liquid than butter. Use your favorite egg replacer.

Looking to add Fiber to your Cookies??

One of my goals for the year is to get more fiber into myself and the kids. The average American adult consumes about 15-16 grams of fiber per day, significantly less than the recommended daily intake of 25-38 grams (source).

Besides fruits, veggies, lentils and beans, oats also have fiber.

Making Oat flour can be done at home by pulsing rolled oats in a blender until they are a fine, smooth powder. If you don’t have the time or inclination, Quaker sells oat flour.

Here is the recipe I came up with based on my favorite cookie recipe.


Peanut Butter Chocolate Chip Oat Cookies

Ingredients:

  • 1 cup salted butter
  • 1 cup creamy peanut butter
  • 1.25 cups brown sugar
  • 1.25 cups white sugar
  • 3 large eggs
  • 2 tsp. vanilla extract
  • 2 tsp. baking soda
  • 2 cups oat flour
  • 2.5 cups AP flour
  • 2 cups semi-sweet chocolate chips

Directions:

  1. Preheat oven to 350 degrees
  2. In a large mixing bowl, cream the butter and peanut butter.
  3. Add sugars one at a time and mix until fluffy.
  4. Add eggs and vanilla and mix until incorporated fully.
  5. Mix in baking powder and flours. Once all are blended into the dough, add chocolate chips.
  6. Drop tablespoon-sized dough balls on cookie sheets that have been greased or are lined with parchment paper or a silicone baking pad.  I prefer silicone baking pads.
  7. Bake at 350 degrees for 8-10 minutes.  Let cookies rest 1-2 minutes before transferring to the cooling rack.

This recipe makes approx. 6 dozen cookies. If you are allergic to peanuts, you can substitute sunbutter or your favorite nut butter. Do Not use Nutella- It contains a lot of sugar and other ingredients that will throw off the chemistry of the recipe and you won’t get yummy cookies.

Recipe: Marry Me Cannellini Beans

Maybe you’ve seen videos or recipes online for marry me chicken. It’s a creamy Tuscan style dish that can be served with noodles or by itself.

Here is my version, but instead of using chicken, I substituted Cannellini beans. Why? Because I had cannellini beans, and I didn’t have any chicken.

If you want to use chicken, substitute about a pound of either boneless skinless trimmed thighs or boneless skinless trimmed chicken breasts for the beans.

Ingredients 

  •  2 tablespoons salted butter
  • 2 tablespoons your favorite cooking oil (I used the oil from the sun-dried tomatoes)
  • One small, yellow onion, diced
  • 2 15.5 ounce cans of Cannellini beans, drained, and rinsed
  • Three cloves of crushed garlic/3 tablespoons of Jarlic
  • 2/3 cup chopped sun-dried tomatoes 
  • 2 cups of chicken broth 
  • 1 teaspoon Italian seasoning 
  • 4 cups fresh spinach
  • One cup evaporated milk, or half-and-half (choice) 
  • 3/4 cup of Parmesan cheese (use the freshly grated variety, not the powdered variety)

Directions

  1. In a large skillet, melt butter and mix oil in with butter.
  2. Sauté onions over medium heat until translucent, about five minutes.
  3. Add in garlic and stir frequently until garlic is fragrant.
  4. Add in rinsed and drained beans, sun-dried, tomatoes, broth, Italian seasoning. Cook on medium, stirring frequently until mixture comes to a boil.
  5. Using the back of a spoon or a potato masher gently mash up about half of the beans. This will add thickness to the sauce or without adding any additional ingredients. 
  6. Once a thickened mixture simmer for about 15 minutes, add in milk/half-and-half, spinach,  and about a half a cup of the grated cheese. 
  7. Stir and turn stove down to low. Simmer on low for 5 to 10 minutes until mixture has thickened. 
  8. Serve with noodles of your choice, or serve mixture in a bowl with toasted/crusty Italian bread. Top each bowl with some of the remaining cheese.
  9. I prefer to serve this in a bowl and eat it with a toasted/crusty bread. 

Substitutions:

  • To make this recipe vegetarian, substitute chicken broth for vegetable broth/stock. 
  • To make this recipe vegan, substitute as above, and additionally substitute milk/half-and-half with your favorite dairy free variety, as well as your favorite dairy free variety of “Parmesan” type cheese. 

Family Recipe: Wet Burrito Casserole

This recipe is 100% Midwestern hotdish and 0% South of the Border. It is, however, pretty good. My brother recently texted me and asked for this recipe. It was a favorite of my dad.

Ingredients:

  • 1lb ground beef
  • 1 can of refried beans
  • 1 envelope taco seasoning 
  • 2 cups Mexican cheese
  • 8-10 taco-sized flour tortillas
  • 1 can cream of mushroom soup 
  • 1 small tub sour cream

Directions:

  1. Cook ground beef per taco package directions, once cooked and seasoned, add beans and combine.
  2. Spread 1/4-1/2 cup of beans/beef inside the tortilla, top with a sprinkle of cheese, roll up and place seam side down in greased baking dish.
  3. Once the dish is full, top with a soup and sour cream mixture. Sprinkle the remaining cheese on top.
  4. Bake at 350 for 20-30 minutes.
  5. Serve with Spanish Rice and a Salad Kit (I like the Avocado Ranch chopped salad kit from Taylor Ranch)

4 Fresh, Healthy Smoothie Recipes Kids will Love!

37f39aabb6da4ee265e271d175c59991.jpgWe have smoothies a lot. It’s a good way to get fruit and/or veggies into the kids without any fuss.

It’s important to have a good blender that can handle fruits/veggies and ice. I love our new Calphalon Blender. I received it through one of my review programs.

We also have reusable shake straws– they are perfect for thick smoothies.

Here are the four recipes that my kids love!

Copycat Strawberries Gone Bananas (from Jamba): 1 cup apple juice (or milk), 1 frozen banana, 1 1/2 cups frozen strawberries, 1/2 cup ice (or more, depending on how thick you like your smoothies). Blend all ingredients- makes 1 BIG smoothie or 2 kid-sized.

The Big Orange Smoothie: This one is the big kids’ favorite and is a version of one of his Jamba Juice favorites that is no longer on the menu. 1 cup orange juice, 1 cup frozen peaches, 1/2 c. frozen mango pulp, 1/2 cup chopped carrots, 1/2 cup ice (or more, depending on how thick you like your smoothies). Blend all ingredients- makes 1 BIG smoothie or 2 kid-sized.

Green Berry Surprise: The surprise is the spinach. You can’t see it or taste it! 1 cup water & a scoop of protein powder (Or milk of your choice), 1 cup frozen berries, 1 frozen banana, 2 large handfuls of fresh spinach, 1/2 cup ice (or more, depending on how thick you like your smoothies). Blend all ingredients- makes 1 BIG smoothie or 2 kid-sized.

Tropical Freeze: 1 cup juice (I like to mix orange and the pineapple juice from the can if you used canned pineapples until it’s 1 cup), 1 frozen banana, 1/2 c. frozen mango pulp, 1/2 cup pineapple,  1/2 c. frozen peaches, 1/2 cup ice (or more, depending on how thick you like your smoothies). Blend all ingredients- makes 1 BIG smoothie or 2 kid-sized.

The nice thing about smoothies is that you can use fresh or frozen fruit or veggies, any kind of juice, it’s all up to you!

Liquids:

  • Milk: Dairy, Oat, Hemp, Soy, Almond, or other nut milk. Your Choice.
  • Juice (Apple, Orange, and Carrot are popular)
  • Water and a scoop of protein powder
  • Water

Some of our favorite fruits include:

  • Bananas (I peel and slice overripe bananas and put them in ziploc bags, so they are ready to use!)
  • Strawberries- 99 Cents Only and Dollar Tree both stock 12 oz bags of strawberries. If you can’t find them in season, this is a great alternative.
  • Peaches- I usually buy them frozen.
  • Mangoes- 99 Cents Only sells Mango pulp, which is just the good parts of mango formed into a brick and frozen. I love mangoes, but I hate peeling and slicing them.
  • Mixed berries- 99 Cents Only sells mixed berries, which is usually strawberries, blueberries, blackberries.
  • Pineapple- Either canned in its own juice or frozen chunks. Frozen Pineapple is good straight out of the bag. Fresh pineapple is a lot of work to process just to turn into smoothies.

Tasty Veggies we enjoy in our smoothies:

  • Carrots- I usually chop them up small so they are easily incorporated.
  • Spinach- It blends in well and isn’t noticeable.


Talk Back: I’d love to hear what your favorite smoothie flavors are!


As an Amazon Associate, I earn from qualifying purchases. To learn more about how affiliate links are used, please visit my disclosure page.

Quick, Tasty Recipe: Berries Romanoff

Berries 2.jpgI was thinking of a way to use the berries we have on hand, and this recipe came to mind!

My friend Ana brought Berries Romanoff over for dessert the last time we had a potluck, and it’s now become a staple in our house. This is a variation on the original recipe, which calls for orange zest and Grand Marnier liqueur. This version is much more kid-friendly.

This is a quick, easy dessert that even kids love.

Ingredients:

  • 6 Cups berries- Raspberries, strawberries, blueberries, blackberries, boysenberries, mulberries, and pitted halved cherries are all good choices.
  • 1 cup  thawed Cool Whip (or make whipped cream from scratch if you feel motivated)
  • 1/2 cup  Sour Cream
  • 1 T. orange juice
  • 1 tsp. brown sugar
  • 1 tsp. cinnamon
  • 2 tsp. orange zest

Directions:

  1. Divide the berries into 6 dessert bowls, set aside.
  2. In a mixing bowl, combine the remaining ingredients.
  3. Spoon mixture over the top of the berries and serve.

The mixture keeps in the fridge for 3-4 days, but once you taste it, you won’t be able to stop eating it.  It’s really good.


Dinner Party Idea: DIY Ramen Potluck!

file5741236529320.jpg

We love to entertain. Dinner parties are a great way to have friends over to hang out and enjoy a good meal without breaking the budget.

We also love Ramen- not Top Ramen, but delicious, mouthwatering, tempting noodles, velvety broth, veggies, and soft boiled eggs. Doing a Ramen potluck is great way to try out new flavors that you may have never thought of.

In doing research for this article, I found out that there are so many ramen toppings and ingredients that I had never heard of (like corn, which you can see in the picture above). So some of the ingredients listed below may not make it into your potluck, but know that somewhere out there there is someone putting it on/in their ramen.

The host can provide the broth. As far as ramen broths, there are lots of options. I like Tonkatsu, which is pork and chicken based. Here is a great recipe.  Not interested in making it from scratch? You can buy Tonkatsu broth concentrate on Amazon.

If you are vegan, Ocean’s Halo makes a great seaweed based ramen broth. Miso is also a popular ramen soup base (Ocean’s Halo also makes great miso, pho, and veggie broth). We usually try to have two big pots of broth to choose from.

Screen Shot 2018-12-30 at 9.26.13 AM.pngAs far as noodles, you can get regular ramen noodles at any Asian grocery store (or most 99 Cents Only locations). I’m not talking about the kind that come in a little bag with a pouch of salty broth, those are fried so they cook super fast and aren’t really all that healthy.

I like the Organic Millet & Brown Rice Ramen from Lotus Foods. As a bonus these are gluten free and have protein in them. Our local Costco sells large packages, which is great for parties.

Some people like Soba noodles (thick buckwheat noodles), and some people like zoodles (the spiral cut zucchini “noodles”).

Now that you’ve got broth and noodles down, it’s time to get creative with toppings! Here are just a few ideas for guests to bring:

  • Eggs: I love a good soft-boiled egg on my ramen.
  • Scallions/green onions
  • Bean Sprouts
  • Seaweed/Nori sheets
  • Canned Bamboo shoots (they will need to be rinsed and probably sliced to made bite-sized.
  • Corn Kernels (defrosted frozen, fresh, or canned with no salt- drained and rinsed).
  • Mayu/Black Garlic Oil
  • Soy Sauce
  • Chili Sauce
  • Rice Vinegar
  • Pickled Ginger
  • Fish Sauce
  • Kimchi
  • Fried Tofu
  • Sesame Seeds
  • Sliced fresh Jalapeños
  • Fried or pan steamed Gyoza
  • Roasted /braised slices of pork (fattier cuts of pork are great in ramen)
  • Cooked Shrimp (I can’t really give you any other suggestions on cooking/serving, I’m allergic to shellfish)
  • Fish Cakes (available at your local Asian Market)
  • Bok Choy
  • Mushrooms (Sliced shiitakes are nice, as are enoki)

And some people like rice as a side to their ramen. I prefer sticky rice, it’s easier to eat with chopsticks.

If you’ve got friends that don’t cook, don’t forget you’ll need chopsticks, bowls, spoons, and beverages.

Talk Back: What is your favorite type of Ramen? 

Frugal (and healthy recipe): Zucchini chips!

file000926780482.jpgWe’ve been blessed (?) with an abundance of yellow zucchini as of late. Friends with gardens and  a CSA box have brought us literally 10 lbs of yellow zucchini…. That’s a lot. So after making lasagna, stir fry, and zoodles, We were still left with 6 of those little yellow bastards, staring me in the face.

Screen Shot 2017-09-21 at 6.34.48 PM.png
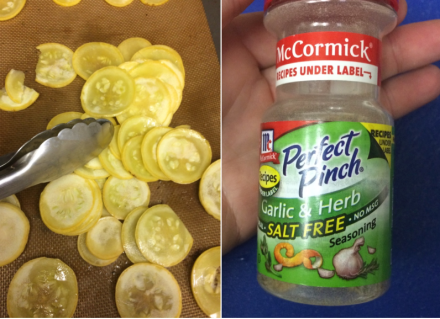
I googled “What to do with Yellow Zucchini” and the answers were shockingly, NSFW. However, deep in the recesses of Google were many recipes for baked chips.  Figuring it had to be better than my kale chips debacle (5 lbs of burnt, greasy kale bits, no thanks), I set off to work.

The first batch was too greasy, so the batch that’s in the oven now has far less oil (only 2 tablespoons). Hubs said they were tasty (albeit greasy), and even Itty Bitty gobbled a bunch down today (after I blotted them with a paper towel).

Screen Shot 2017-09-21 at 6.34.54 PM
Now, to wait…..

Feel free to sub in any herb or spice blend you like, I grabbed the first one off the spice rack.

Baked Yellow Zucchini Chips

Ingredients

  • 2 lbs yellow (or green) zucchini
  • 2 T. olive oil
  • 2 T (or more), your favorite salt free herb or spice blend
  • salt, to taste

Directions

  1. Thinly slice coins of zucchini- you can use a mandoline like this one, or a knife- whatever you’ve got.
  2. Blot them dry between two paper towels. I let mine sit between two paper towels for about 30 minutes.
  3. Toss with oil, and spread 1 layer on a cookie sheet topped with a sil pad (or you can use parchment paper- whatever you’ve got).
  4. Sprinkle oiled slices with herbs or spices.
  5. Bake at 225 degrees for a minimum of 2 hours. Check after 2 hours. Depending on how thick your chips are cut, it may take up to 2 1/2 hours.
  6. After they are room temp, then sprinkle with salt to taste. Store in a sealed container on the counter. They stay good for 3-4 days, but they won’t last that long.

Quick Recipe: Easy, Healthy Brownies!

IMGP8542.jpgIn the search for healthier yummy recipes to feed Lil’ Man, I stumbled upon a recipe for black bean brownies. Ok, so stop making that face and read on. Oh, and this one is GLUTEN FREE!!

I read the recipe, and a bunch of comments and did some more investigating online and made a few tweaks to the recipe and got to cooking.

Ingredients:

  • 1 15 ounce can of black beans, rinsed and drained
  • 3 eggs
  • 3 T. sugar free applesauce
  • 3/4 c. cocoa powder
  • 1 T. Hazelnut extract (You could use vanilla)
  • 1 1/2 c brown sugar, lightly packed
  • 1 t. instant coffee crystals (optional)- I used 1 t. of very strong coffee instead.
  • 1 C. chocolate chips

Directions:

  1. Preheat oven to 350 degrees.
  2. Grease a 8×8 baking dish. I used an 8 inch round baking dish.
  3. In a blender, combine all of the ingredients EXCEPT the chocolate chips. This is important.  I didn’t do this!
  4. Pour batter into greased baking dish and top with chocolate chips. Bake for 25-35 minutes.  The brownies are super fudgy. If you want cake-ier brownies, add a pinch of baking powder.


If you like your brownies really sweet, add 1/4 c. white sugar. I like my desserts not super sweet, so I opted to use a little less sugar, and I’ll top mine with a scoop of ice cream- Yum!

They are not bean-y.  If I didn’t know they had beans in them. I wouldn’t be able to tell.  They are very moist, fudgy brownie. And if you use a flax egg and vegan chocolate chips, you’ve got a yummy vegan recipe!