DIY Frozen Pizzas!

file7501340931583

IMG_2937
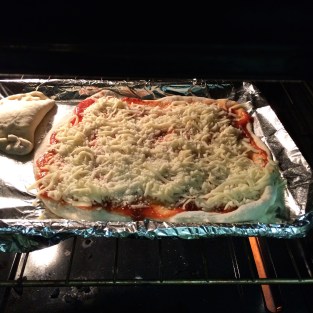
A cheese pizza baking away (and a calzone)!

We love Pizza. Probably too much. About 6 months ago, hubs bought How to Cook Everything: 2,000 Simple Recipes for Great Food,10th Anniversary Edition by Mark Bittman. It’s amazing. We’ve cooked a lot of stuff out of it, but the best is probably the pizza crust recipe.

It’s easy -only three ingredients, but I usually add a few extra!  You can make a few batches, put a ball of dough in the freezer, and save it for when you want pizza, but are feeling lazy. OR- You can make a couple frozen pizzas (which I do once a month), and when you are feeling really lazy, you’ll have no need to call Noid or Cesar (wow, both of those totally date me, right?)

DIY Frozen Pizza

Makes 1 pizza

Crust (recipe adapted from Mark Bittman’s):

  • 3 c flour, plus extra for kneading
  • 2 t. yeast
  • 1 c. very warm water (90-100 degrees)
  • 2 T parmesan cheese (it’s ok to use the Kraft in a green canister stuff)-OMIT IF YOU ARE VEGAN!
  • 1 T Olive Oil
  • dash salt
  • dash pepper


Directions:

  1. Preheat oven to 450 degrees.
  2. Mix all of the ingredients together until a soft sticky dough ball forms.
  3. Turn out onto a floured board or counter top and knead briefly.
  4. smooth a round ball of dough into a clean bowl. Cover bowl with a cool, damp cloth and allow to rise someplace undisturbed for 1 hour.
  5. After an hour, punch the dough, and turn out onto a floured board or counter top and knead for 2-3 minutes. At this time, you can roll the dough out and move onto the next step, or you can do a secondary rise (makes the crust extra crispy and chewy). If you elect to do a second rise, repeat step 3 and 4.
  6. After dough is rolled out to your preferred size and shape, lift into well greased cookie sheet or pizza pan. pierce the crust with a fork several times. This keeps the crust from getting weird bumps and lumps during the par-baking.
  7. Par-bake crust for 3-5 minutes. Allow crust to cool completely.

Now that you have cooled par-baked crust, it’s time to get topping! Transfer the pizza to a large piece of aluminum foil.

  • 1 cup or so of sauce, your choice
  • 1-2 c. cheese
  • Assorted toppings (precooked meats, veggies, fruit, herbs, etc)

Top the pizza as you like,, wrap the foil around the pizza, loosely around the top of the pizza so you don’t squash the toppings. Place in a large freezer zip top bag (don’t forget to label what kind of pizza it is) and freeze. pizzas should freeze at least 24 hours before cooking.

To heat, bake pizzas at 450 degrees for 8-10 minutes

IMG_2938Some of our favorite pizzas include:

  • Gyro (Sprouts sells it wit hthe pre-sliced deli meat!), feta, and spinach
  • Caramelized onions and peppers and sliced meatballs with cheese
  • whatever veggies we have in the house (broccoli, spinach, onions, peppers) topped  with cheese
  • chicken, bacon, and pepper jack cheese


You can substitute in whatever your fav crust is, whatever sauce, cheese, and toppings you like! And because the pizzas are room temp/cooled when you top them, it’s a great opportunity for kids to help assemble pizzas. These pizzas are a frugal way to have a yummy dinner- Each pizza costs about $3.00 and feeds the three of us!



Healthy Recipe: Pumpkin Protein Shake!

DSCN0612

We drink a lot of protein shakes. I have 1-2 a day. They help me stay full and keep me out of the fridge, and they give me the energy I need to wrangle the munchkins.

This is an easy, yummy recipe- especially if you like pumpkin!

Pumpkin Protein Shake

Makes 1 shake

Ingredients:

  • 1 scoop or pouch vanilla protein powder/protein shake (we use HMR 120)
  • 1 cup canned pumpkin (not the canned pumkpin pie filling, but the plain canned pumpkin)
  • 1/2 cup water (You can add up to an additional 1/2 c. if you want your shake thinner)
  • 1/2 cup ice cubes (You can add more if you like your shake thicker)
  • 2 T. sugar free butterscotch pudding powder
  • 1 T. sugar free vanilla syrup (like Torani)
  • cinnamon & nutmeg to taste

Directions:

  1. Place all ingredients in blender or magic bullet and blend for 1-2 minutes, or until all ingredients are blended and ice is broken down.
  2. Serve immediately.

Modifications:

  • If you do not use protein powder, substitute 1/2 c. fat free plain greek yogurt, and reduce water to 1/3 c.
  • If you are vegan, use soy yogurt (like Silk Brand).
  • If you have an ice cream maker, pour the mixer into the ice cream maker and use machine as directed for yummy pumpkin ice cream!

Calories for base recipe with no modifications: 225 Calories

Sensible Swap: PB Cup Shake

It’s really hard to lose weight and eat well, especially when there are restaurants like Sonic Drive-In. They have these yummy, thick rich shakes and blasts (which is soft serve ice cream with cookies or candy mixed in and topped with whipped cream), but good lord, do they have tons of calories.

This recipe is a Swap. We swap out stuff with crazy high calories for lower calories ingredients to make a yummy, less calorically dense treat. For reference, a MINI Reese’s Cup Sonic Blast is 580 calories and is about 8 ounces (oh, yeah, they come in four other, progressively larger sizes!). The HMR recipe is 380 calories, and the Swap version is between 380-420 calories depending on which brand of light ice cream you use. Oh, and the recipe makes about 20 ounces! Hooray for more volume and less calories!

I’ve included two versions: One with HMR ingredients (you can substitute your favorite brand of vanilla protein powder and PB Protein Bar), and one using ingredients from the grocer.

Screen Shot 2016-01-13 at 5.29.21 PM

Peanut Butter Cup Shake
Makes 1 large shake (or I guess you could split it and share, but trust me, you won’t want to!)

Ingredients:

  • 1 packet Vanilla HMR Shake (or scoop if you use the 120 version)
  • 2 Tablespoons PB2 Powdered Peanut Butter(I used the choc. PB2, it’s all we had)
  • 1 HMR Chocolate Peanut bar, chopped into small, bite-sized pieces and frozen
  • 2 handfuls of ice cubes
  • 10 oz water
  • Optional, but yummy: 3 T. Walden Farms Chocolate Syrup

Directions:

  1. Place all ingredients in the blender, except for the syrup
  2. Blend on medium until all ingredients are incorporated. Mixture should be thick and frosty.
  3. Swirl the syrup in a cold glass.
  4. Pour shake into cup and serve with both a spoon and a straw.
Freaking Delish! I have one of these about once a week!

Here is the second recipe, for those who just want to eat a little better:

Peanut Butter Cup Shake
Makes 1 large shake

Ingredients:

  • 3/4 cup Fat Free Vanilla ice cream (Your favorite brand)
  • 2 handfuls of ice cubes
  • 2 Tablespoons PB2 Powdered Peanut Butter
  • 1 Atkins Endulge Chocolate Peanut Butter Cup, chopped into small, bite-sized pieces and frozen (there are two in each serving- if you want your shake extra yummy, you could use both of them)
  • Optional, but yummy: 3 T. Walden Farms Chocolate Syrup

Directions:

  1. Place all ingredients in the blender, except for the syrup
  2. Blend on medium until all ingredients are incorporated. Mixture should be thick and frosty.
  3. Swirl the syrup in a cold glass.
  4. Pour shake into cup and serve with both a spoon and a straw.

We have both a  Ninja NJ600 Pro Blender and a Magic bullet.  The Magic Bullet is great for making shakes at the office (for hubs) and the Ninja is great for making multiple shakes at once at home.

DIY Powdered Laundry Detergent….

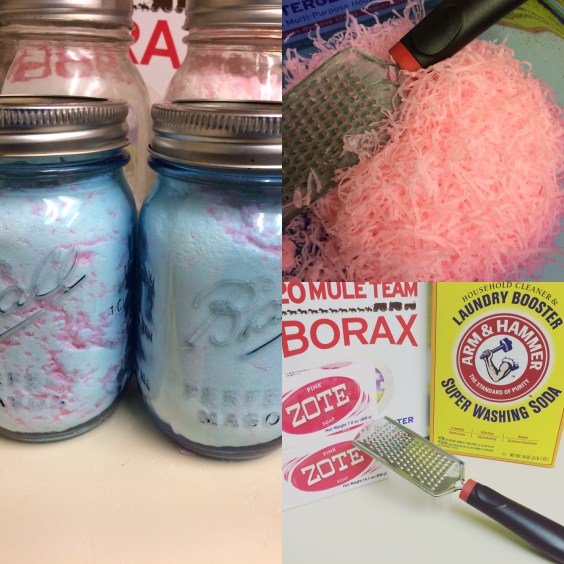
IMG_2769So I did it. I broke down after years and years of saying I’d never make my own laundry soap and I did it. If you do a quick search on Pinterest, you’ll see a lot of recipes that makes a 5 gallon bucket of thick white (or off-white) gloppy laundry detergent. With two curious kids under 5 years old, I didn’t think having that around my house would be a good idea. Plus, where the hell would I keep it? Our garage isn’t attached, and my washer and dryer are in a closet in the hallway. 5 gallons of water weighs 40-ish lbs, so 5 gallons of liquid laundry detergent would be about the same, maybe more. That’s a lot more than my poor, flimsy laundry closet shelf could handle!
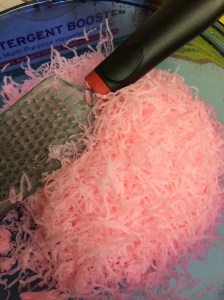
However, after tons of research and testing out ingredients, I cobbled together a recipe for powdered Laundry detergent. Here are the ingredients I used and the reasoning behind each one:

IMG_26871 Large Bar Zote Soap, grated: My great Grandmother used this soap (as well as Fels-Naptha, but I couldn’t find it in my local store) to wash their laundry in the days before they had indoor plumbing in their farmhouse (BTW, that was the 1950’s). She had an old style washing machine like this, complete with ringer. Her laundry was always super clean, so I knew that starting with a good soap was key. (It makes roughly 4 cups of grated soap) If you don’t care for Zote or Fels Naptha, I’ve seen others use Dr. Bronner’s Castille bar soap.


IMG_26864 Cups Borax: This is a pretty controversial ingredient because Borax is toxic if ingested. News Flash: DON’T EAT LAUNDRY DETERGENT. You wouldn’t pop a Tide Pod in your mouth and start chewing, so home made detergent shouldn’t be any different.  Borax is great in your wash if you have gross little boys (or not so little boys).  Here is a pretty good article that talks about how Borax works. I use a little Borax in every load of laundry, with commercial detergent too!

4 Cups Arm & Hammer Washing Soda (NOT BAKING SODA- THIS IS AN IMPORTANT DISTINCTION!!): Washing Soda is also another ingredient that people get crazy over. It’s NOT baking soda. It is not to be ingested, it is slightly caustic (I wear gloves and a mask when I work with it). This page tells you about it and how it works. Basically it acts as a solvent to help removes stains, it also helps soap or detergent foam and clean better!

Directions are easy: Grate your soap. I used a hand grater, but you can also use a food processor (I don’t have one).

Mix all your ingredients together and store in clean, dry jars. I used Ball Mason Jars because it’s what I had on hand, but whatever you have will work. A friend re-uses her empty protein powder canisters.

All you need is 1-2 tablespoons per load (for the record I use 2 T. per load because our clothes get really dirty playing outside and exercising every day).

Using 4 cups of each ingredient will yield a little less than 12 cups of detergent (The grated soap settles down once everything is mixed together) which is approx 144 loads of laundry. I paid about $12.50 for all of the ingredients, and I still have leftover Borax and Washing Soda for my next batch.

This detergent will not get sudsy/bubbly, however, your clothes are getting clean. Our clothes have never been cleaner and honestly, it’s one of the few detergents I’ve used (and trust me, as a couponer, I’ve used pretty much every brand of laundry detergent there is!) where I don’t have to pre-treat every single stain and scrub.

Scent: Some recipes call for essential oils or even Downy Unstoppables to add scent. We personally don’t like over scented detergent, so the light lemony scent from Zote is more than enough for us. If you like you clothes to smell like something, you can add 10-20 drops of Essential Oil (lavender is popular), or 1/4 cup of Downy Unstoppables (I REALLLLY don’t recommend this since it has softeners in it too).

About Fabric Softener: We don’t use fabric softener like Snuggle or Downy Unstoppables because it just coats the fabric with a waxy residue and leaves a film on it. After years, towels can stop being absorbent, and clothes can feel sticky or turn another color. If you need fabric softener or something to keep the static down, I recommend a vinegar rinse in your washer (like you would with liquid Snuggle), or wool balls in your dryer.


Holiday Cookie Recipe: Chocolate Yum Yums aka Poop Cookies!

IMGP5051

My mom makes these awesome cookies that we referred to as Poop Cookies as kids. But they are really called Chocolate Yum Yum’s. And Oh, Lord are they delicious…..

They are delicious, chewy and chocolately. You’ll have a hard time keeping them around.

Once you make them, you’ll see why we called them Poop Cookies.

Chocolate Yum Yum’s (aka Poop Cookies)

Ingredients:

  • 1 c. chocolate chips (your fav. variety- Vegan, GF)
  • 1/3 c butter (You can use coconut oil if you are vegan, don’t use spread)
  • 16 large marshmallows (You can use vegan marshmallows)
  • 1 t. vanilla
  • 1c. coconut
  • 2 c. oatmeal (GF oats are a great substitute. Don’t use Steel cut oats)

Directions:

  1. Over medium heat, combine chips, butter, and marshmallows. The mixture may separate when melting, but that’s ok. Stir frequently to prevent chocolate seizing.
  2. Once the mixture is melted and smooth, remove from heat and add remaining ingredients and stir until well combined.
  3. Drop spoonfuls onto waxed paper on a cookie sheet.
  4. Refrigerate for about an hour or until firm.
  5. Serve with cold glasses of milk

Mom has made them with lemon marshmallows and white chocolate chips.  With all of the marshmallow and chip flavors, the combinations available are endless!

If you are looking for another Poop Cookie Recipe, Check out Seraphina’s Unicorn Poop Cookie recipe here. They are really good!

Pumpkin Chocolate Chip Cookies! (Egg Free)

Screen Shot 2015-11-11 at 8.33.28 AM
Yummy pumpkin chocolate chip cookies

I had a can of pumpkin open the other day and I decided to make cookies. Part of the show that hubs is in has a scene where all the characters eat cookies on stage. They had been eating Madeline’s, which are super tasty, but high in calories.

So I opted to bake something a little lower in calories. I also made the cookies quite small (1 tablespoon, instead of two), to cut down on calories.  I added pumpkin instead of the eggs and some of the fat to lower the calories and add fiber and fruit.

In keeping with the spirit of using up what we have in the house, I also used only brown sugar, as we were out of white sugar.Lil’ Man was a big helper- He added the chocolate chips and helped scoop the dough onto the cookie sheets. He’s going to be a Master Chef yet!

Pumpkin Chocolate Chip Cookies

Ingredients:

  • 1/2 c butter (or use vegan margarine if vegan), room temp
  • 1 15 oz can of pumpkin
  • 1 cup brown sugar, packed
  • 1 tsp. vanilla
  • 1 1/2 c flour (I used AP, but feel free to use wheat or even 1 for 1 gluten free)
  • 3/4 c. almond meal
  • 1 tsp. baking powder
  • 1/2 tsp. cinnamon
  • dash salt
  • 2 c. chocolate chips

Directions:

  1. Preheat the oven to 350 degrees.
  2. In a large bowl, cream the first 4 ingredients until smooth using a hand mixer on medium.
  3. Add remaining 4 ingredients until a soft dough forms, using hand mixer on low, or by hand with large wooden spoon.
  4. Stir in chocolate chips.
  5. Drop spoonfuls onto greased cookie sheets. Bake for 9-13 minutes.

Makes 3-4 dozen cookies.

Variations: This recipe is east to make as vegan, just sub out butter for the solid fat of your choice. To make GF, sub in GF flour of your choice.  To make it nut free, omit the almond meal and increase the amount of flour to 2 cups.


New Recipe: Artichoke Bruschetta Casserole!

Artichoke Bruschetta CasseroleI’m on a new recipe kick right now. I don’t often get inspiration from Pinterest recipes because they are either things we don’t eat, or are overly complicated or cutesy. Instead I draw ideas from cookbooks, magazines, stuff I see at the grocery store while  I cruise the aisles,  and Buzzfeed’s Tasty Videos that are all over Facebook.  I was jonseing for Olive Gardens now defunct Spinach Artichoke dip the other day, so imagine my surprise when I stepped foot into my local 99 Cents Only…

IMG_1755I found a jar of this Bruschetta at 99 Cents Only the other day and small jar of Artichoke dip. I knew I had to take them home and concoct something delicious!

I set to work in the kitchen to find some other ingredients that would pair well to I could whip up something fabu for a meatless meal. I pulled out a bag of frozen spinach and cheese to compliment the flavors of the dips.


IMG_1754We had a spaghetti Squash on the counter, so in order to keep the dish healthier and full of veggies and fiber, I opted to bake up the squash and use it instead of the traditional noddles or pasta in a casserole. If you’ve never cooked with spaghetti squash, I posted a tutorial here.

After rummaging through the freezer and fridge, I assembled the ingredients and got working! There is no photo of the finished product because it got eaten up quickly.


Artichoke Bruschetta Casserole

Directions:

  1. Clean and bake the spaghetti squash. For info on how that’s done, check out the tutorial here.
  2. While the squash is baking, mix together the two dips in a large mixing bowl.
  3. Add the spinach and half of each cheese. Stir until completely mixed.
  4. Prepare a 9×9 glass pan with spray release.
  5. Place all of the spaghetti squash shreds/”noodles” in the bottom of the baking dish, and smooth down to create an even layer.
  6. Pour the dip mixture over the top and smooth to evenly cover the squash.
  7. Top with the remaining cheeses.
  8. Bake at 350 for 20-30 minutes or until the cheese has started to brown and bubble.

This dish is gluten free and vegetarian. To make it vegan, use dairy-free cheese! If you HAVE to have meat, this would be great with grilled chicken, or Italian sausages mixed in or served along side.

This recipe serves 2 as a main dish or 4 as a side dish.


Cooking Tutorial: Spaghetti Squash!

We eat a lot of veggies. That was one of the huge lifestyle changes we made a few years ago that has helped us maintain healthier weights.

One healthy swap we made was to spaghetti squash instead of pasta.  A lot of healthy/food swap websites like Hungry Girl tout Spaghetti Squash as a good substitute for carb-y noodles.

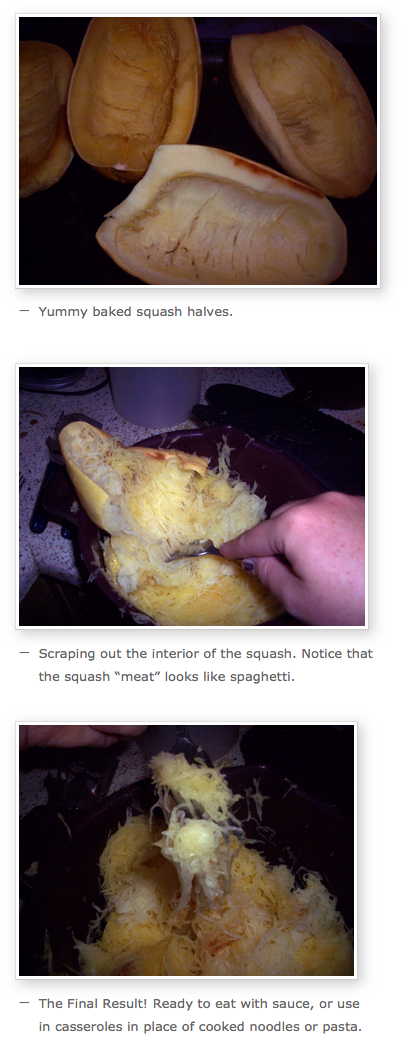
Here is a quick tutorial on making spaghetti squash.

Screen Shot 2015-11-04 at 8.56.33 AM

  1. Select a squash that is firm and unblemished. Not sure what they look like? Here is the wikipedia article all about the vegetable with a few pictures.
  2. Chop the end with the stem off. You’ll need a good sharp knife. I love our Henckels Meat Cleaver.
  3. Chop the squash in half. I do it length-wise, so it takes less time to cook in the oven.
  4. Take a spoon and scoop out the stringy guts and seeds.  Discard them.
  5. In a large glass baking dish, place the squash halves cut side down.  Pour a 1/2 cup of water into the bottom of the baking dish.
  6. Bake at 350 for 30-45 minutes or until the squash are fork tender (about the same feeling as a baked potato).
  7. Remove baking dish from oven and set the squash halves on a cutting board.  Allow to cool for 10-15 minutes, or until you can comfortable handle the vegetable.
  8. With a fork, “rake” the interior of the veggie.  The “meat” of the interior should flake off in long strings that resemble broken spaghetti.
  9. Once complete, discard the exterior of the squash.
  10. Toss the “spaghetti” with the sauce of your choice.

1 medium sized spaghetti squash serves 2-3 people, with a serving size of about 1 1/2 cups. It’s yummy with sauce (Spaghetti/red sauce, pesto, or even a cheesy sauce), or just a little butter and herbs. It’s a great way to get extra veggies into your diet, or if you’re Gluten Intolerant, it’s cheaper (and tastier) than GF pasta.

Later today, I’ll be posting a recipe that uses spaghetti squash as a main ingredient! With winter veggies starting to make an appearance in grocery stores and farmers markets, you’ll start seeing more and more squash!

Amazing New Creations at Boudin!

IMG_1509I love bread. And cheese.Imagine my excitement when Lil’ Man and I went up to Boudin‘s on Monday night and enjoyed their new seasonal offerings!

If you don’t know about Boudin, you are missing out. Crusty, tender, chewy sourdough bread, and so much more! For over 160 years, Boudin has been baking up crazy good bread, and they also have an amzing

There are tons of locations all over California, serving up amazing sandwiches, salads, soups, and heavenly bakery treats! Find your closest location here.

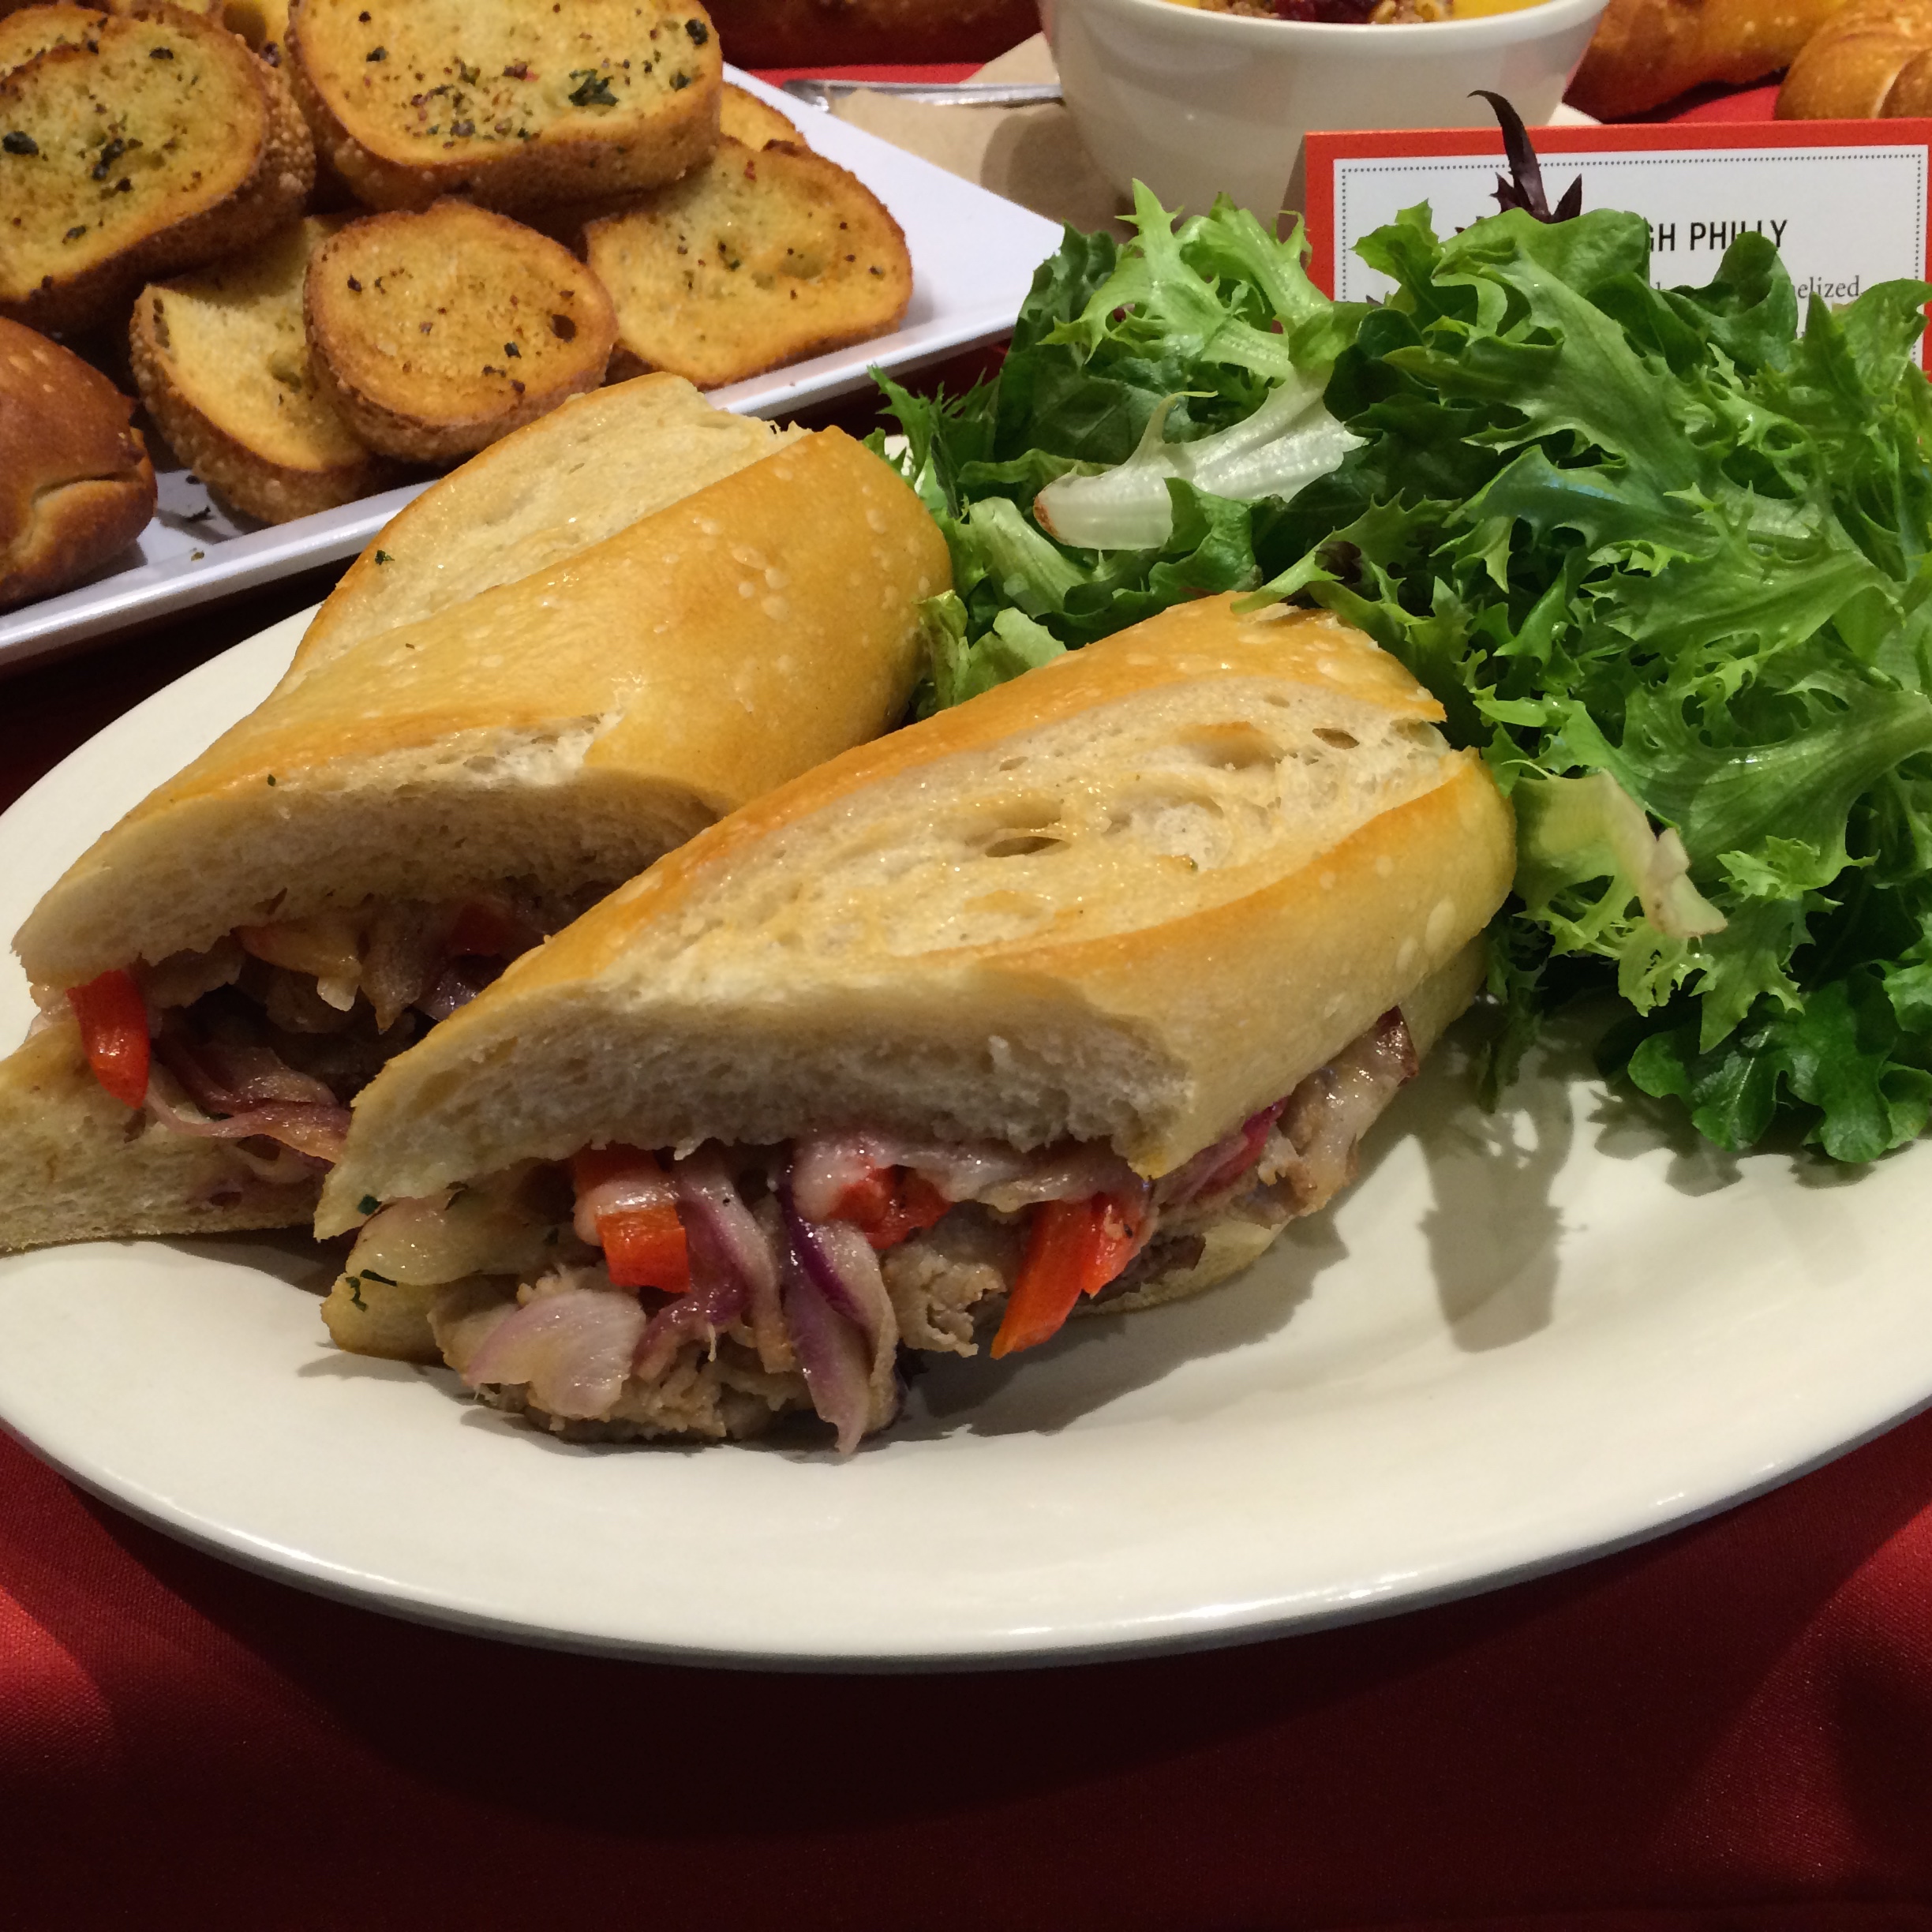
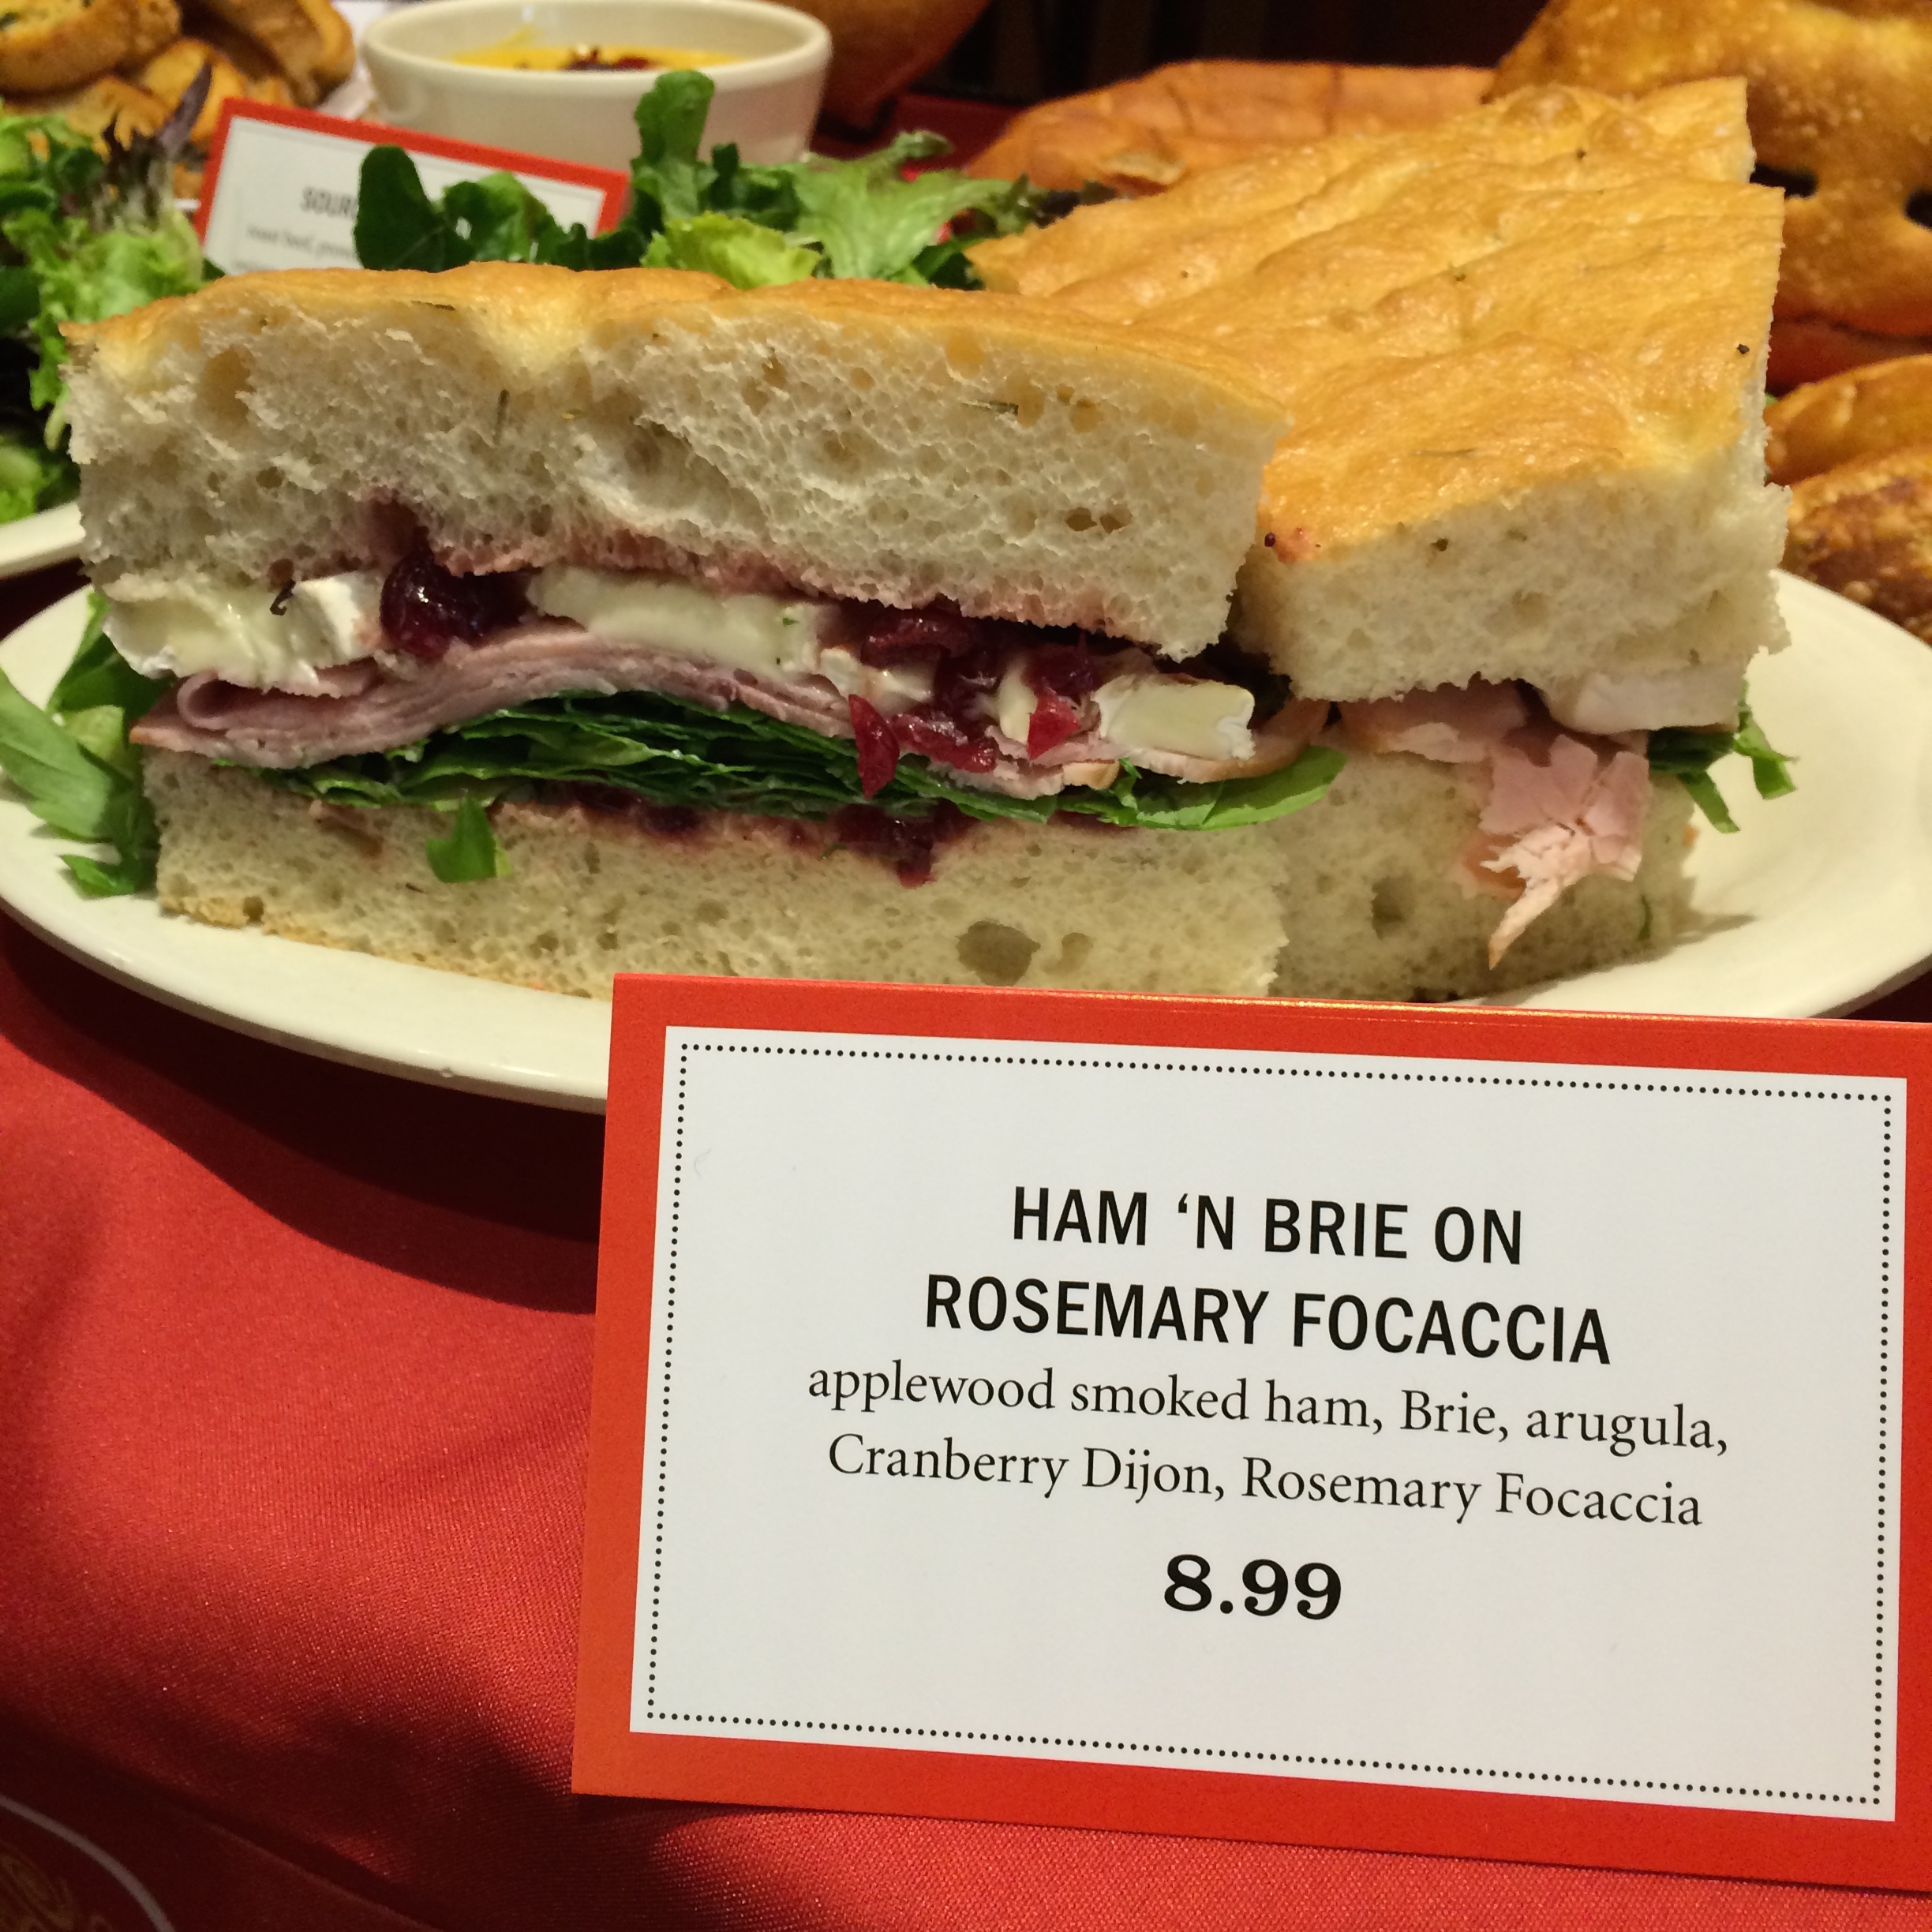
We sampled three of the new Seasonal Selections:Ham ‘N Brie on Rosemary Focaccia, Sourdough Philly, and Roasted Butternut Squash & Kale Salad

IMG_1517IMG_1520IMG_1521

Did you know that Boudin also has a Loyalty Club? Each time you make a purchase and for every dollar spent you will be awarded one (1) reward point. For every 50 points accumulated you will receive $3 off reward. The $3 reward will be automatically loaded to your account and you will receive an email notification to let you it’s there. Oh, yeah, but it gets better- You’ll get a free 1 lb. loaf of Sourdough bread each month upon any purchase that month!

Boudin also caters! Check out the awesome sourdough bread shapes you can order 24 hours in IMG_1514advance of your event: IMG_1513Yup it’s a Crab and a Turtle. They also make smaller turtles. One of the moms mentioned that she gets them for their kids. They hollow them out and turn them into bread bowls for soup. Such a great idea! You could hollow out the big ones and fill them with any kind of dip or soup to serve  at a party! They even make a Jack O’ Lantern shaped Sourdough loaf for Halloween! IMG_1535

They have all kinds of healthy, delicious foods- perfect for a busy family on the go. Eat in, or take it to go! If you opt to eat in, they serve a selection of Kendall-Jackson Wines, and have perfect pairings for everything on the menu!

Lil’ Man enjoyed a pizza and a ghost cookie. He told me the pizza was crispy and cheesy. This is coming for a four year old pizza fanatic, so you know it was good!

We’ll be going back to Boudin’s soon for lunch as a family! Big thanks to Boudin Bakery and Chef Alan Skversky for hosting a group of local bloggers on Monday night at their location on Balboa Drive. We had a great time! I received no monetary compensation for this post- I’m just sharing my experience!


Cleaning with Lemons: Three Frugal Cleaning Ideas!

Living in Southern California, everyone knows someone who has a lemon tree. Maybe you have one, and while you enjoy a cool glass of lemonade and maybe a slice of lemon meringue pie, you aren’t really sure what to do with the rest? Here are a few of my favorite ways to clean with lemons.

The oil found in the lemon rind (the little “sacs” or circles on the exterior of the peel) are the same oil in the bottle of Lemon essential oil you will find in any health food shop. This oil is purported to have anti-microbial properties. So in addition to smelling good, it will chase away germs!

1-Banish nasty garbage disposal smells. You all know the smell I’m talking about. Quarter a lemon (or cut into smaller pieces if the lemon is large), turn on the disposal and drop the pieces in one at a time, giving the disposal 20-30 seconds to pulverize the lemon piece before adding the next one.

2-Slice up a lemon, toss the slices into a microwave safe bowl, add about 1/2 cup water and microwave for 2-3 minutes. Afterwards, CAREFULLY remove the bowl of water (It will be hot!!) and wipe down the inside of the microwave with a damn cloth or sponge. The steam from the heating water will loosen up the icky crud built up inside your microwave.

Screen Shot 2015-10-15 at 11.30.50 AM3-Household cleaner. Now this is my favorite homemade cleaning solution. Most of you have everything you or do you need to create this. To get started zest 2 to 3 lemons into a mason jar. Realistically, you can use any glass screw top container it doesn’t have to specifically be a mason jar. After you have zested the lemons, place them into the glass jar and pour enough vodka in to cover the lemon zest pieces completely. You do not want the lemon zest pieces to be exposed to the air. Next, screw the lid on, and store in a warm, dark place. You’re going to shake the mason jar once every week or so for 6 to 8 weeks.

After that time has elapsed you are going to strain off of the lemon zest solids and discard them. You can run them down the garbage disposal if you’d like and it will help your garbage disposal so nice and fresh. I don’t recommend eating them or cooking with them.

The remaining liquid will be a yellowish brown and that will be just fine. This liquid will not stain.

Pour this solution into a spray top bottle, like this one available on Amazon, and use it where you would use any household cleaner such as Spic and Span or Windex. The alcohol is great for cleaning the bathroom mirrors, as it does not leave streaks on the glass. It is also great for cleaning stinky toilets, bathroom sinks, and your bathroom countertops.

In the kitchen the alcohol is great for helping and cut the grease on the stove top, and it’s great for cleaning countertops as well.  However, because this solution contains alcohol keep it out of reach of children. It does not taste good, however it does smell good and it might be an attractive nuisance to children.

You can also mix a little bit of this liquid with salt or baking soda to form a paste to get the baked on gunk off of the outside of your tea kettle or pots and pans. Simply spread the mixture on scrub it with a sponge and rinse off. The abrasive nature of the salt or baking soda mixed with the liquid is great for removing baked on masses, or years of cooking accumulation.

I keep a spray bottle of this lemon liquid as I like to call it under the sink at all times. I use it to clean my countertops in the kitchen to wipe down the inside of the refrigerator. I even use it to clean the kitchen sink.

Overall it’s very inexpensive and it’s a very effective cleaner.