
Recipe: Corned Beef in the CrockPot

file291242792789I usually save this recipe for right around St. Patrick’s Day, but there are people who enjoy Corned Beef all year, so I thought, Why not post this now?

I know a lot of people don’t like corned beef because every time they’ve had it, it was chewy or tough.  I’ll share a secret with you: bake it, don’t boil it!  When you bake the meat at a low temperature in a crock pot for hours and hours, the heat breaks up the collagen and fat, leaving you with a tender, falling apart yummy corned beef, not the rubbery mess you got at the pub last year with your annual Guinness.

If the crock pot isn’t your speed, you can bake the corned beef in the oven at a lower temperature over several hours and get the same effect.

Baked Corned Beef

Ingredients:

  • 1 Corned Beef Brisket (2-4 lbs),
  • 1 cup (not packed) brown sugar- Light or dark, use whatever you have
  • 1 jar Stone Ground Mustard (I like Ingelhoffer or Moorehouse)- DO NOT USE DIJON. USE STONE GROUND MUSTARD ONLY.

Directions:

For Crockpot: line your crockpot with a Crockpot liner and turn on to LOW.

For Oven: Preheat oven to 250 degrees

  1. Remove beef from package. Rinse meat. Discard packaging and spice envelope.
  2. In a small mixing bowl, combine sugar and mustard. Stir until combined. It’s ok if it’s lumpy.
  3. Place beef in crockpot or baking dish.
  4. Pour sugar/mustard mixture over meat.

Crockpot: Put lid on pot and cook for 6-8 hours on low.

Oven: Cover loosely with foil and bake at 250 degrees for 3-4 hours.  Remove foil for last hour of baking.

Serve with baked or boiled New Potatoes, cabbage, and carrots.  I dislike boiled cabbage, so I usually make Coleslaw with Walden Farms Coleslaw dressing.

If you have any leftovers (you probably won’t) it makes great corned beef hash too.

Oh, and Corned beef stays pink after it’s cooked because of how it is cured (or corned), so if you are squiffy about stuff like that, get a food thermometer. It should read 160 degrees or higher.


 

Family Recipe: Yummy Banana Nutty Bread

IMG_0405We love bananas, but sometimes they get over ripe before we can eat them all. That usually only happens when the weather is so hot and muggy- or if I buy too many. In that case, I peel, slice and bag them in snack sized zip top bags and toss them in the freezer. They are now perfectly portioned for smoothies or baking recipes!  This week, I’m posting my favorite Banana bread recipe. It’s quick, easy, and it uses no white sugar, so it’s ideal for those watching their sugar intake.

I’ve included variations for various diets below.

Ingredients:

1/2 cup Stevia or brown sugar splenda (or 1/4 c honey)
1/3 cup applesauce
4 egg whites
1/2 cup of ripe banana (about 3-4 ripe bananas)
3/4 cup almond meal or flax meal
1 cup all-purpose flour
1 teaspoon baking soda
1/4 teaspoon baking powder

Directions:

  1. Combine the first 4 ingredients in a large mixing bowl with electric mixer until fluffy and creamy.
  2. Add in the remaining ingredients until smooth.
  3. Pour batter into 1 greased loaf pan.
  4. Bake at 350 for 50-60 minutes.
  5. Slice and serve hot or allow to cool, wrap in aluminum foil and store in the freezer for up to 3 weeks.

Variations:

  • Gluten Free variation: Substitute coconut flour or GF baking flour blend.
  • Nut Free Variation: Use Flax meal in place of Almond Meal.
  • Vegan Variation: Substitute egg whites for flax egg.

Crockpot Recipe: Moosie’s Pot Roast!

This is a family recipe that’s been around for years. Moosie was a friend of my great-grandmother who lived up in Chicago.

This pot roast recipe is what Moosie served when they had company from out of town.  It’s easy enough to make for your family any night of the week.  The leftovers (if you have any) make a great open faced sandwich.

Moosie’s Pot Roast

Ingredients

  • 1 2-3 lb. pot roast, your favorite cut (I like Chuck Roast)
  • 1 can reduced sodium cream of mushroom soup
  • 1 envelope powdered onion soup mix (I like Lipton’s)

Directions:

  1. Brown the pot roast, place it in the crock pot.
  2. In a small bowl, mix the soups, and pour over the roast.
  3. Place cover on crock pot and cock on low for 6-8 hours.
  4. Before serving, shred the roast with a fork.
  5. If you would like creamier gravy, add 4-6 tablespoons of low fat sour cream 20-30 minutes before serving.

Serves about 6-8. Serve with mashed potatoes  or broccoli.

You can also place 1 whole onion, sliced in the bottom of the crock pot, then the roast, and then poured the gravy sauce overall of it.

Delectable Tuesday: Easy Peasy Black Bean Soup!

Hubs loves Black Bean soup.  So based on what we had in the cupboard and fridge, I whipped up a batch. I didn’t have a specific recipe in mind, I just played it by ear and it turned out GREAT!!

Black Bean Soup (makes 6 1-cup servings)

Ingredients:

  • 2 15 oz. cans of organic black beans (do not drain)
  • 2 c. salsa of your choice
  • 1 can chicken broth (if you are a vegetarian, use vegetable broth)
  • 1 bunch cilantro (top, leafy part only) chopped
  • 1/4 c. chopped onion (white or purple, whatever you have)
  • 1/4 c. chopped  Fresh Jalapeño Peppers (about 2)
  • dash of hot sauce (your choice, optional)
  • 6 T. plain Greek Yogurt or low fat Sour Cream

Directions:

  1. Combine everything in a large stockpot.
  2. Cook the soup on low for 45 minutes to 1 hour. Really simmer it gently and allow the flavors to meld.
  3. Ladle into bowls and top each bowl with 1 T. of plain Greek Yogurt or low fat Sour Cream.
  4. Serve with quesadillas and Mexican Cesar Salad.

Mexican Cesar Salad

Ingredients:

  • 6-8 cups of your favorite lettuce/lettuce blend (romaine and bibb is great!)
  • 2 tomatoes cubed/sliced
  • ½ cup purple onion, cut into rings
  • ¼ c ranch dressing
  • ½ c your favorite salsa

Directions:

  1. Combine the salsa and ranch together, chill in fridge 6-8 hours before servings. This allows the flavors to blend.
  2. Toss the veggies in a chilled salad bowl with the dressing.
  3. Top with ¼ c crushed corn chips/tortilla chips for some added crunch!

Serve topped with grilled chicken breasts for an entree or without meat as a side dish.  Serves 3 as an entree, serves 6 as a side dish.

Mixing up hydration with Soda Stream!

Recently, a friend asked me for some non-soda uses for her Soda Stream machine. Since I use ours at least 2 times a week to whip up liter bottles of fizzy water, I figured I’d share some of my concoctions!

Screen Shot 2015-05-31 at 6.58.19 AMThis is the Soda Stream Machine we have.

Here are a few ways to use your Soda Stream besides adding the Soda Stream syrups.

  1. Fill a fancy pitcher with 2-3 cups of chilled, sliced fruit. I like Apples, oranges, lemons, Kiwi, and berries (not necessarily all together). Pour 1 liter of chilled carbonated water from the Soda Stream. It makes the best fruity fizzy water!
  2. Try Torani Syrups in place of Soda Stream syrup.  It comes in tons of flavors, in both regular and sugar free, including fun fruit flavors!
  3. Instead of adding syrup, why not try ice cubes made of fruit juice?  Fill an ice cube tray with orange juice, pomegranate juice, or whatever you have on hand.  Add ice cubes to your carbonated Soda Stream water and enjoy!
  4. If you are looking for a different taste, try the powdered beverage mixes in your carbonated Soda Stream water.  Mix slowly, and carefully, since some of the powders may cause the water to get a little extra fizzy.  I like Crystal Light sticks, Snapple Sticks, and a few store brands that come in cranberry and cran-pear.
  5. Mio or other concentrated liquid beverage mixes are also great in your your carbonated Soda Stream water, and since you control how little or how much you add, your drink can be different each time!
  6. If you are looking to jazz up your beverages, try an Italian Cream Soda.  It’s a pretty easy recipe:

Italian Cream Soda

Ingredients:

  • Ice,
  • 1 ounce syrup,
  • carbonated Soda Stream water (8-12 oz, depending on your glass size),
  • 1 ounce cream,
  • whipped cream (optional, but everyone loves whipped cream).

Directions:

  1.  Scoop ice into glass
  2. Pour your carbonated Soda Stream water over the ice cubes
  3. Pour 1 ounce syrup over the ice and water.  Stir with a stir stick.
  4. Pour 1 ounce of cream over the top- Do not stir.
  5. Top with whipped cream, if desired.

How do you use your Soda Stream Machine?

Greek Yogurt- A great frugal ingredient!

IMG_7966I bet a lot of you see the coupons for Greek yogurt and pass it by.  Maybe you’ve sampled it at Costco or the grocery store and were turned off by it’s thick texture or tart taste.

Greek yogurt (or strained yogurt as it is referred to in other parts of the world) has a lot more going for it than the sugary yogurt in the little cup with a french name.

1- It’s got double the protein than regular yogurt.  That means you’ll stay fuller longer.

2- It’s lower in Carbs. That’s because most Greek yogurts don’t contains all kinds of funky sweeteners.

3- It works well in all kinds of recipes in place of sour cream, mayo, and oil. I use it in baked goods instead of the liquid oil or butter.  It adds a richness without adding fat.

4- It makes a killer chip or veggie dip, baked potato topping, or chili topping plain or dressed up with herbs and spices.

Greek Yogurt is a frugal ingredient because it’s so versatile!  You can eat it as is, dress it up with herbs, fruit, granola, or use it in recipes. We buy the large carton of Fage at Costco every few weeks.  It’s the cheapest place in town for us to get Greek Yogurt. If you aren’t a Costco shopper, keep your eyes open for coupons and sales! Here are just a few:

Here is my favorite dip recipe with Greek Yogurt- perfect for sharing at any potluck!  It’s got  thicker texture, and it’s not for a wimpy chip- I dip pita chips and veggies.

Herbed Yogurt cheese dip

Ingredients

  • 2 cups greek yogurt
  • 2 T. chopped shallots
  • 2 T. minced onions
  • 1 T. minced garlic
  • spray release (like Pam)
  • 3 T. herbs of your choice- I like Mural of Flavor from Penzey’s. (You may want more or less)
  • Salt and pepper to taste (I don’t add either)
  • cheese cloth (It’s on the baking aisle at the grocery store)

Directions

  1. Wet the cheesecloth, wring out and stretch over the mouth of a bowl.  Secure with string or a large rubber band.
  2. Gently pour the yogurt over the stretched cheesecloth, and spread evenly over the cheese cloth.  What you are doing is straining out any extra whey (liquid) from the yogurt.  This is cause it to thicken up and make one helluva dip!  You can leave it on the counter for 1-2 hours to drain, as long as the temperature in your house is at or under 75 degrees. (We never turn on the heater at our house, so that’s never a problem).  If you house is warm, you can place the bowl in the fridge.
  3. In the mean time, spray a saucepan with spray release (or you can use a little EVOO if you prefer), and saute the shallots, onions, and garlic over low for 45-50 minutes until they start to caramelize.  Remove from heat, and pour int oa large bowl.  Place in fridge to cool.
  4. After yogurt has drained, scrape the yogurt solids from the cheesecloth into the bowl with the sautéed shallots, onions, and garlic.
  5. Mix well and add herbs.  Place in fridge for a minimum of 1-2 hours before serving.  I make this dip the day before I want to serve it.
  6. Discard the liquid that drained off the yogurt and the used cheesecloth.
  7. Serve the dip with veggies, pita chips, or use it as a topping on your baked potato or chili.

Serves 10-20.

If you like your dips sweet instead of herbs and veggies, you can add a few tablespoons of jelly or jam to strained yogurt and a smidge of cinnamon to make a fruit dip.


How do you like to serve Greek Yogurt?

Frugal Cooking: Italian Sausage Casserole!

Tomato Sauce MGD©
Homemade Sauce- Yum!

This is a family favorite, even little man loves it!

You can make as much of it from scratch as you’d like, or if you’re in a hurry, you can use pre-made sausage and sauce.

This recipe is also great because you can make it vegetarian with soy crumbles, or even vegan if you use alt. cheese. Use Gluten Free Pasta and this dish Gluten Free!

This is a great dish to take to potlucks!

Italian Sausage Casserole

Serves 8-10

Ingredients:

  • 1 box of pasta, your choice, cooked al dente and drained
  • 1 jar of your fav pasta sauce, or 4 cups home made sauce
  • 1 lb bulk Italian sausage, crumbled, cooked and drained (or 1 package soy crumbles) You can use ground beef if you prefer.
  • 1 cup mozzarella cheese, shredded (or 1 cup vegan cheese)

Directions

  1. In a large baking dish, mix the pasta, sauce, and sausage.
  2. Top with cheese.
  3. Bake at 350 for 20-30 minutes until cheese is bubbly and melty.
  4. Serve hot with crusty bread and a green salad.


Frugal Recipe: Home Made Pizza!

IMG_3070
Yummy, cheesy pizza!

Who doesn’t love pizza? Ok, I know 1 person, but other than that, everyone loves it! Lil’ Man is no exception. He requests, “Cheesy pizza dinner” at least once a day, but I only acquiesce to his request once a week.

I tend to stock up on the crust mix and cans of salt free tomato sauce, so it’s easy to throw together a pizza on those days when I don’t really feel like cooking, or pizza is requested. With the only limitations being your imagination (and what’s in your fridge and pantry) you never have to have the same pizza twice!

Henry’s Cheese Pizza
Ingredients:

  • 1 Betty Crocker Pizza Crust Mix (All you add is a 1/2 cup of hot water)- available at  99 Cents Only OR most grocery stores for $1.00 or less
  • 1/2 c hot (not boiling) water
  • 1/2 c (more or less) all purpose flour (for rolling out the crust)
  • 1 small can tomato Sauce
  • Spices to taste (I use 2 T. Italian seasoning, 1 t. each granulated garlic and onion)
  • 3/4 c. Mozzarella
  • 3/4 c. cheddar cheese
  • (feel free to add up to 1 cup in additional toppings, such as veggies, meat, or even fruit!)

Directions:

  1. Prepare the crust as per the package directions. I set the dough to rest for about 10-15 minutes on the back of the stove. I do this as the stove pre-heats. The dough relaxes and rises just a little.
  2. While the dough is relaxing, mix the tomato sauce and spices together, set aside.
  3. Roll out the dough on a floured surface, and transfer to a well greased cookie sheet.
  4. Top pizza dough with about 1/2 of the pizza sauce, and the cheese
  5. Bake per the package directions
  6. Slice and serve.  I usually get 3 or 4 servings per pizza. We like thin crust, so I roll the dough out to fill a cookie sheet.

Variations: Use white sauce, bbq sauce, or even Robert Rothschild Farm Roasted Pineapple & Habanero Sauce (I usually buy it at Costco) in lieu of the tomato sauce, you can change up your base flavor.
This pizza costs us about $4.00 and serves 3-4  hungry people.  And since I make it at home, I know exactly what goes into it!

3 Ingredient Chocolate Cake!

I love this cake recipe. It’s quick, easy, and it disappears so quickly! And the best part, it’s loaded with pumpkin, so you don’t have to feel bad about serving it to your family. It’s easy enough that you can let even the littlest chef help you prepare it without risking a total cake failure!

Chocolate Chocolate Chip Pumpkin Cake

Screen Shot 2015-04-10 at 10.50.18 AMIngredients:

  • 1 Cake Mix (chocolate or Devil’s Food) I prefer the mix with pudding it it- the cake is moister
  • 1 small (approx 15 oz.) can of pumpkin
  • 1/2-1c chocolate chips (I use semi-sweet)


Directions:

  1. In a large mixing bowl combine cake mix and pumpkin. I used an electric mixer, but you can always mix it by hand.
  2. Add chocolate chips, stir to combine.
  3. Bake as directed on cake mix packaging. If making cupcakes, do not use cupcake liners, use spray release. Remember, there is no added fat in the recipe, so you’ll need the spray release, or you’ll be picking muffin-y goodness off the cupcake liners!

Screen Shot 2015-04-10 at 10.50.28 AMThis is the yummiest, fudgiest cake you’ll ever have. This is a great cake to take to potlucks!

  • Vegan Option: Use a vegan Cake Mix, and Vegan Chocolate chips
  • GF option: Use a GF cake mix

It was so good that we snuck some cupcakes for breakfast!Screen Shot 2015-04-10 at 10.50.41 AM

We also shared it with our friends at a play date! Even our pickiest eaters gobbled up the cupcakes!

Recipe: Mother’s Milk Lactation Cookies

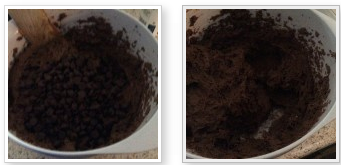
00707With the second small friend on the way, as well as many friends having kids, I’ve been whipping up batches of lactation cookies like whoah. A batch of these cookies makes a great gift!

The key ingredients to these cookies are Flax, Brewer’s Yeast, and Oatmeal. Brewer’s Yeast and Oatmeal are galactagogues, meaning they promote lactation. Flax contains Omega-3’s, which are needed for brain function and development and can be passed through breast milk. You need all three of these ingredients.

Don’t Worry: If your spouse or relatives eat these cookies, they won’t start lactating!! Galactagogues only stimulate milk production in those already lactating!

This Recipe makes A LOT of cookies (4-5 dozen). I freeze them, and thaw them 3-4 cookies at a time. 4-5 dozen cookies will last a new mom a few weeks.

Unlike my other recipes, there are no substitutions or work arounds. Each one of these ingredients is needed. This recipe cannot be made nut/seed free, or vegan.

Mother’s Milk Lactation Cookies

Ingredients:

  • 2 c. flour
  • 2 c. oats (Old fashioned is preferred, but Quick cook works as well. DO NOT USE STEEL CUT OATS!)
  • 1 tsp baking soda
  • 1 tsp baking powder
  • 1 c. Nut butter of your choice (I’ve used both Almond and Peanut- If you have nut allergies, try Sun Butter)
  • 1/4 c. brewer’s yeast (You can buy it at Sprouts or Whole Foods)
  • 1 stick butter, softened (1/2 c)
  • 1 c brown sugar, packed
  • 1 c white sugar
  • 1 T vanilla
  • 2 large eggs
  • 1 c. ground flax seeds(You can get them in the bulk food section at Sprouts or Whole Foods)
  • 1 1/3 c. warm water (you may need a little more, depending on how dry the weather is)
  • 1 bag chocolate chips
  • Dash of salt

Optional: Nuts, dried fruit in place of the chocolate chips

Directions:

  1. In a medium sized bowl, mix the flour, oats, soda and baking powder. Set Aside.
  2. in a small bowl, mix the flax and water. Set aside. The mixture will be kind of gooey- almost the consistency of a raw egg.
  3. In a large bowl, cream the butter, nut butter, yeast, vanilla, and sugar.
  4. Add the eggs one at a time, mix until combined.
  5. Add the flax/water mixture.
  6. Add the dry mixture, and mix until combined.
  7. Add the chips, dried fruit or nuts.
  8. Scoop by the spoonful onto a greased cookie sheet or into greased mini-muffin pans.
  9. Bake at 350 for 8-12 minutes.