As Lil’ Man gets bigger, we are looking for more fun outdoor adventures. This last rain storm would be the catalyst for two days of big outdoor fun.
Friday, we loaded up and headed over to to dam. The past week of rain has really changed our usual path, so we got to explore some areas we’d never seen together.
It was a great chance for him to check out new trails, see erosion in action, splash in the cold stream water (there were a couple times we had to jump over streams to continue on, and well, we didn’t quite make it!), and see shells. There are a lot of little fresh water clams that make the river their home, as a result, we saw lots of shells!
We climbed, discovered, and navigated our way through the park for about 2 hours. By far the most exciting thing we found was an old, rusted car that had been shot at many, many times in the past. When you area four year old boy, nothing is more exciting than a rusty old car.
After stopping for snacks and water, we continued on to explore nature and hopefully find some cool rocks (another favorite pastime).
On Saturday, we headed over after lunch to the Visitor & Interpretive Center. It was closed, but we checked out the nature flora and the amphitheater. Then we did the loop around the center. It was a fun, easy walk (no pictures, we were too busy exploring).
It’s a quick 1 mile loop with a couple foot bridges and it overlooks the river, which is “raging” (as much as it can here) right now.
If you are in the San Diego area and haven’t been to Mission Trails Regional Park, you are missing out. There is tons of fun to be had and nature to explore. There are paths and trails for every skill level, and there is even a paved path along Father Junipero Serra Trail if you aren’t feeling adventurous, but still want to get outside. Parking is free, admission to the park and Visitor & Interpretive Center is free (but they do accept donations!). Most paths, except the paved road are not stroller friendly. Most paths are bike and/or Equine friendly, and leashed dogs are welcome.
And of course what better way to end a fun day of hiking, than with a little park yoga:
So I did it. I broke down after years and years of saying I’d never make my own laundry soap and I did it. If you do a quick search on Pinterest, you’ll see a lot of recipes that makes a 5 gallon bucket of thick white (or off-white) gloppy laundry detergent. With two curious kids under 5 years old, I didn’t think having that around my house would be a good idea. Plus, where the hell would I keep it? Our garage isn’t attached, and my washer and dryer are in a closet in the hallway. 5 gallons of water weighs 40-ish lbs, so 5 gallons of liquid laundry detergent would be about the same, maybe more. That’s a lot more than my poor, flimsy laundry closet shelf could handle!
However, after tons of research and testing out ingredients, I cobbled together a recipe for powdered Laundry detergent. Here are the ingredients I used and the reasoning behind each one:
1 Large Bar Zote Soap, grated: My great Grandmother used this soap (as well as Fels-Naptha, but I couldn’t find it in my local store) to wash their laundry in the days before they had indoor plumbing in their farmhouse (BTW, that was the 1950’s). She had an old style washing machine like this, complete with ringer. Her laundry was always super clean, so I knew that starting with a good soap was key. (It makes roughly 4 cups of grated soap) If you don’t care for Zote or Fels Naptha, I’ve seen others use Dr. Bronner’s Castille bar soap.
4 Cups Borax: This is a pretty controversial ingredient because Borax is toxic if ingested. News Flash: DON’T EAT LAUNDRY DETERGENT. You wouldn’t pop a Tide Pod in your mouth and start chewing, so home made detergent shouldn’t be any different. Borax is great in your wash if you have gross little boys (or not so little boys). Here is a pretty good article that talks about how Borax works. I use a little Borax in every load of laundry, with commercial detergent too!
4 Cups Arm & Hammer Washing Soda (NOT BAKING SODA- THIS IS AN IMPORTANT DISTINCTION!!): Washing Soda is also another ingredient that people get crazy over. It’s NOT baking soda. It is not to be ingested, it is slightly caustic (I wear gloves and a mask when I work with it). This page tells you about it and how it works. Basically it acts as a solvent to help removes stains, it also helps soap or detergent foam and clean better!
Directions are easy: Grate your soap. I used a hand grater, but you can also use a food processor (I don’t have one).
Mix all your ingredients together and store in clean, dry jars. I used Ball Mason Jars because it’s what I had on hand, but whatever you have will work. A friend re-uses her empty protein powder canisters.
All you need is 1-2 tablespoons per load (for the record I use 2 T. per load because our clothes get really dirty playing outside and exercising every day).
Using 4 cups of each ingredient will yield a little less than 12 cups of detergent (The grated soap settles down once everything is mixed together) which is approx 144 loads of laundry. I paid about $12.50 for all of the ingredients, and I still have leftover Borax and Washing Soda for my next batch.
This detergent will not get sudsy/bubbly, however, your clothes are getting clean. Our clothes have never been cleaner and honestly, it’s one of the few detergents I’ve used (and trust me, as a couponer, I’ve used pretty much every brand of laundry detergent there is!) where I don’t have to pre-treat every single stain and scrub.
Scent: Some recipes call for essential oils or even Downy Unstoppables to add scent. We personally don’t like over scented detergent, so the light lemony scent from Zote is more than enough for us. If you like you clothes to smell like something, you can add 10-20 drops of Essential Oil (lavender is popular), or 1/4 cup of Downy Unstoppables (I REALLLLY don’t recommend this since it has softeners in it too).
About Fabric Softener: We don’t use fabric softener like Snuggle or Downy Unstoppables because it just coats the fabric with a waxy residue and leaves a film on it. After years, towels can stop being absorbent, and clothes can feel sticky or turn another color. If you need fabric softener or something to keep the static down, I recommend a vinegar rinse in your washer (like you would with liquid Snuggle), or wool balls in your dryer.
So this is the last one! I’ve been meaning to post this for a week or so, but I hurt my wrist (I fell while hiking!), so I’ve been off the computer a lot.
#10 is a big one for our family! Reduce, re-use, recycle!
Reduce:
Buy less stuff. That one is pretty simple.
Use what you have on hand. There are some pretty awesome websites like Recipe Key and Recipe Matcher that help you find recipes based on what you have in your pantry.
Reduce your waste out put. I’m not asking you to hold it when you gotta go, but put your eggshells and coffee grounds in your house plants and tomato plants. Try composting. You’ll be reducing your carbon foot print and you’ll make your plants happier!
Re-use:
Re-purpose items! This includes eating your leftovers.
Here, here, and here are some great Pinterest boards that have re-using ideas.
Mend your clothes- including fallen hems, loose buttons and minor tears. Sewing kits are inexpensive. If you don’t know how to sew or even thread a needle, check out YouTube for some tutorials. And hey, you’ll learn a new skills!
Recycle:
In some areas, recycling is done by weight (like the majority of the recycling centers we have here). You bring all of your aluminum cans crushed up or your glass bottles in big garbage bags and they are weighed, and you receive a per lb. price.
In other areas (like where my in-laws live back east and very few locations here in So Cal) there are machines that you deposit bottles and cans into one at a time and a per piece bottle deposit is returned to you. Re-Planet is one of those companies.
Some areas mandate recycling- Where we live there are special cans: Black for trash, green for yard waste, and blue for recycling. The items that cannot be returned for a bottle deposit like milk cartons, soup cans, cereal boxes can be placed into the blue bin.
Recycling doesn’t only mean bottles and cans , it can also be to give an item a new life and a new home. Donate clothes and other household items to charity or use freecycle and help your neighbors. I especially like the Buy Nothing Movement.
You can also sell items on Craigslist, have a garage sale or sell your items via a consignment shop. They will go to a new home, you will have kept the stuff from a landfill, and you’ll have a little cash!
About 6 months ago, I scored 6 new pillows for less than $10 at Sears, using Sears Shop Your Way Rewards, coupons, and a BOGO sale.
When you get new pillows, you need new pillow covers. I headed over to our local AmVets Thrift Store when all of the linens were on sale and picked up 9 pillow covers for .25/each. What I didn’t realize is that 3 of them were smaller than a standard pillow, and they didn’t fit. I set them aside, thinking I would find something else to do with them.
Fast forward to this morning. I am pulling the sheets, blankets and pillowcases off the bed, and I notice the pillow cases look gross. Like, we’ve had them since before we were married and they just don’t come clean anymore… That kind of gross. I’ve washed them with Oxyclean, borax, you name it, I’ve tried it to get them clean. Enough. I figure 8 years of rotation means they’ve served a good life.
I rifle through the linen closet to discover that about 90% of our pillow cases need to get pitched. Then, I discover the 3 small pillow covers, and I am struck with inspiration.
See, My motto for for remaining the frugal steward of our family is, “Use it up, wear it out, make do”. That means, basically: USE WHAT YOU HAVE.
I remembered that I also had a few yards of Eyelet lace in my sewing box. BUT, it’s offwhite. The pillow covers were white. But, wait… We have a box of awful tea in the cabinet. I mean it tastes like burnt rubber and camp fire smoke- blergh. But, it’s perfect for tea dying! Ever notice when you spill tea or coffee on your white clothes, it never comes all the way out? Imagine if you took light colored fabric and soaked it in boiling tea or coffee for about an hour and then washed it? That’s tea dying.
I pull out the sewing machine and some supplies and set to work. I trim the zippers off the pillow covers, measure the lace, and sew it onto the open end of the pillow case. This serves a few purposes:
Lengthens the pillow case about 31/2 inches. Now it will fit a standard pillow case
Makes the pillow case look nice
I am using up what we have in the house, and now I don’t have to go out and buy new pillow cases.
While I was in the closet with my fabric, I also found a piece of unbleached muslin that I cut into a pillow case. I had enough lace, so why not. If you’d like to make a pillow case, here is a pretty easy tutorial to follow.
I boiled my icky tea, wet the pillow cases, and tossed them into the stockpot. I covered the pot with a heavy plate to weight the fabric down so that it will take the dye evenly.
After about 30 minutes, I turned the stove off, and left the mixture until it cooled… Next, I rang out the pillow cases and tossed them into the washing machine to get out any extra tea (and the gross smell). And now… Ta Da! Three refurbished pillow cases and a brand new pillow case!
Total out of pocket: Zero Dollars
Time: about 2 hours (most of it was waiting for the dye pot to cool)
Now if you want to make your own pillow cases, the tutorial I linked to above is pretty easy to follow, and it’s a great way to use up scraps of cotton fabric that you may have hanging around the house. Since pillow cases and fitted sheets tend to wear out first, you could also cut up orphaned flat sheets too.
As the new year begins a lot of women (and men too) resolve to take better care of themselves, both physically and spiritually.
Today we’re dealing with the physical self-care, and one way to start is with a good facial. It’s important to put your best face forward, and taking care of your skin will help!
I’ve listed DIY formulations that I like as well as links to professional products that I’ve used recently. Products that I use and recommend tend to have a high concentration of natural/botanical ingredients. I’m a huge fan of using products that have a basis in nature! Facials are a fun thing to do as part of a Ladies/Moms night in!
For your Ladies/Moms night in, have every one can bring their favorite product to share, or a quick trip to the beauty supply and the grocery store can get you everything you’ll need for a soothing facial.
1: Cleanse your skin using a gentle cleanser in order to remove surface oil, dirt and germs. If you have oily or combination skin, use a foaming gel cleanser; if you have dry skin, look for a creamier blend that won’t dry out your skin. I like Dermalogica UltraCalming Cleanser
2: Exfoliate. Exfoliation helps remove dead skin cells that clings to your skin. You can either use a mechanical exfoliator (something that is rough/ scrubby like oatmeal), or a chemical exfoliator (something that dissolves the oil and dirt that holds the dead skin cells to your skin, like the acid in pineapple or dairy products).
Natural exfoliatants include: Ground oats and pineapple. Grind oatmeal in your food processor and add 3 T. oats to 2T. Plain natural yogurt (I like greek yogurt because it’s nice and thick!) Apply to the face and remove after 10 minutes with a warm towel. Or put ¼ cup pineapple and 3 T. plain yogurt into the food processor and pulse. Once combined apply to the face and remove after 10 minutes with a warm towel.
At this point, you may wish to apply a serum (I like this vitamin C serum, it’s got all kinds of botanicals and humectants in it to help moisturize your skin) or spritz the skin with a nourishing toner. I like this Vitamin C Toner. Remember to use anything that stings, burns or causes discomfort. That means NO SEA BREEZE OR ALCOHOL BASED ASTRINGENTS!
3: Mask. If you have oily or combination skin, try a clay-based mask; for dry or mature skin, look for a hydrating mask (with a creamy or gel texture). Peel off masks are better suited for oily or combination skin (They can be a little harsh for those with sensitive skin). Most beauty supply stores or drug stores sell masks in small sachets (like these) if you do not already have a favorite mask. Apply mask to the skin, being careful to avoid the eye area (this can lead to sagging skin). Leave mask on for 10 to 20 minutes or as directed. Do not allow clay masks to dry completely. The active ingredients only work as long as the mask stays moist. Sprtiz the mask with a spray bottle of water to keep it moist once or twice. Remove the mask with warm towels and follow with a light spritz of toner.
Most facials end with a special moisturizer or lotion applied to the face. Look for a moisturizer with SPF 15 or higher in order to protect your skin from the sun’s harmful rays. Don’t forget to apply moisturizer to your neck and décolleté. You can use SPF moisturizer in the evening too if your budget is too tight for two moisturizers. If you use a moisturizer that contains retinols (they are vitamin A derivatives), it’s imperative that you use an SPF during the day. Vitamin A can thin the skin and sensitize it, so you need extra protection from the suns rays.
If you wish to apply an eye cream, use only a pea sized amount and apply it with your ring fingers in a gentle patting motion. Don’t drag your fingers across the gentle under-eye tissue. It can damage the delicate skin in that area.
My Recent At Home Facial!
Here is my photo collage of my recent Spa retreat. Ok, so I was in the spare washroom after the kids were sleeping and hubs was vegging out.None the less, it’s nice to take 30 minutes or so out of your day once a week and pamper yourself!
One of my favorite websites to help me plan out shopping trips is Hot Coupon World. They have a Coupon Insert Schedule here. Remember if clipping coupons isn’t your thing, but saving money is, check out my list of Smartphone apps that can save you the big bucks!
Here are just a few of the new coupons that have me excited:
Our family has used TurboTax since my parents first bought a computer, so… it’s been more than a few years. I’ve been using it since I started my first job in 1997.
It’s super easy, guides you through each step of the way. With TurboTax you’ll get your biggest tax refund guaranteed, with 100% accurate calculations, free help, and step by step guidance so you are confident your taxes are done right. TurboTax is the #1 Rated, Best-Selling tax software brand year after year.
Now if you’ve never done your own taxes before, it can seem super daunting. But the folks at TurboTax make it easy enough that my three year-old niece could probably figure it out!
Yahoo put together a list of some of the forms and misc. “stuff” you need to file your taxes. Here are just a few:
W-2 statements (these show wages received from your employer(s))
K-1 Schedules (these should have been received from any partnerships, S Corporations, estates, trusts, and so on, in which you have an ownership interest)
1098 Forms (1098-T (Education); 1098 – Mortgage Interest)
Year End Annual Brokerage Statements
A copy of your previous year’s tax return
You may not have all of these, as not everyone has the same financial/tax situation.
Regardless of how you decide to file: e-file, by hand (on paper), or having a paid professional do it, I implore you- FILE FILE FILE!! You don’t want Uncle Sam knocking on your door, years from now with his hand out!
To get started withTurboTax for free, click on the image above! In a few weeks I’ll share one of my favorite stories about how Turbo Tax saved a friends bacon a few years ago!
Throughout December, I’m going to be posting about New Year’s Resolutions. Each post will have tips and tricks to help you navigate through your resolutions to become more successful at all of your frugal endeavors!
#7 is a resolution that I thought would be closer to the top of the list: Get Organized.
For some people that means professionally, financially or personally. I can’t help you with your professional life, but I can help you with some tips to getting your finances and personal life organized.
Organize your Finances:
You really can’t start to save money unless you get your finances in order. I cannot stress how helpful setting up a budget has been for our family.
There are a few companies that offer free budgeting tools: I like both Manila and Mint. Check both out and see which one suits your families needs.
Organize your Personal Life:
Use a calendar. It doesn’t have to be a paper one. I have a paper calendar on my desk. I write all of our play dates and appointments, parties, and other functions outside of the house on it. That way I can see at a glance what’s going of for the week. If you’ve got a smart phone, you can utilize the calendar feature. iPhones can sync to the iCal on your desktop computer. If you opt for it, iCal will pop up reminders on his phone and the computer. He uses it for business and home.
If you want to use a calendar online, Google’s Calendar feature is great, especially if you use Gmail. It can add appointments, reminders and birthdays from your email into your calendar and it will remind you of them!
If you don’t use Gmail or Google, Facebook has a great calendar under the events tab from your FB feed. It shows you upcoming events and birthday and it’s easy to plan or add an event with the “+Create Event” button.
If you are looking for Coupon Organizational methods, I’ve written about how I organize my coupons here.
I am always getting packages! I signed up for a USPS.com and now I get a text when a package ships and when it arrives! It’s a great way to keep track of packages that you are expecting.
A lot of you will start 2016 with the goal of saving money by couponing. Here are a few ways that you can organize your coupons to help you achieve your goals.
There are several methods to store your coupons when they are in your home before you go to shop, and there are several more methods for storage when you are out shopping.
Here are just a few examples of organizational methods:
Inserts filed whole by date
Whole insert: Leave the inserts whole, and file them by date. You may wish to put each insert in a tabbed folder and write the date along with the type insert such as SS (Smart Source), P&G (Proctor & Gamble), or RP (Red Plum). Example: 6/6/10 SS I recommend this method for those of you starting out, or if you don’t have a lot of time dedicated to couponing.
Clipped by dated: Filed in a similar fashion as above, but all coupons from each weeks inserts are clipped, put into an envelope, dated, and filed either in an accordion folder or filing/bank box. This can be a time saver when you need to pull coupons from a specific date. You may choose to have all coupons from the same date filed together, or you may wish to file each insert (Red Plum, Smart Source, Proctor & Gamble) separately. Example: Clipped 6/6/10 All or Clipped 6/6/10 SS
The next two storage methods are usually done when coupons are stored inside baseball card inserts in a large three ring binder.
Clipped by category: Coupons are clipped and then filed by category.
Clipped Alphabetically: Simply file the coupons alphabetically, either by product name, product type, or manufacturer.
Storage Methods
There are several methods for storage of coupons.
If you file whole inserts, you may wish to file inserts in an accordion folder or filing/bank box by date. This is the method that I use, and that I have used for over 10 years. As I have less time to dedicate to couponing, it keeps me organized and able to save the most money (and time!).
If you clip your coupons here are just a few examples of storage methods:
Coupon wallets are commercially available at office supply stores or mass merchandisers. Coupon wallets are small, reinforced accordion file with tabs. They can fit inside most purses. Organize the coupons by category or alphabetically.
Use a 3-Ring Coupon Binder with plastic page protector inserts (like these), and use tabbed dividers for the category dividers. In the front, you can put a pad of paper inside for your shopping list, a zipper pouch for pens, pencils, scissors and a calculator. 3-ring binders that zip shut are great too!
Individual envelopes- I do not recommend this method to anyone just starting out. Start with envelopes (I use #10 envelopes) and write the name of each category on the front in large, easy to read letters. File coupons by category in the corresponding envelopes, Once you have all the coupons sorted and filed, store the envelopes in a plastic tub, shoe box, whatever is easiest for you. This is by far the most time consuming method for storing coupons.
When you clip coupons and file them you can go one step further and arrange them by expiration date, amount of coupon, or alphabetically. It’s up to you. If you have multiples of the same coupon, consider paper clipping them together.


 When I was a kid, my dad took my brother and I hiking a lot. We had all kinds of fun adventures, but I always loved
  It was a great chance for him to check out new trails, see erosion in action, splash in the cold stream water (there were a couple times we had to jump over streams to continue on, and well, we didn’t quite make it!), and see shells. There are a lot of little fresh water clams that make the river their home, as a result, we saw lots of shells!
 By far the most exciting thing we found was an old, rusted car that had been shot at many, many times in the past. When you area four year old boy, nothing is more exciting than a rusty old car.
 way to end a fun day of hiking, than with a little park yoga:
 So I did it. I broke down after years and years of saying I’d never make my own laundry soap and I did it. If you do a quick search on Pinterest, you’ll see a lot of recipes that makes a 5 gallon bucket of thick white (or off-white) gloppy laundry detergent. With two curious kids under 5 years old, I didn’t think having that around my house would be a good idea. Plus, where the hell would I keep it? Our garage isn’t attached, and my washer and dryer are in a closet in the hallway. 5 gallons of water weighs 40-ish lbs, so 5 gallons of liquid laundry detergent would be about the same, maybe more. That’s a lot more than my poor, flimsy laundry closet shelf could handle!
 4 Cups Borax

 As the new year begins a lot of women (and men too) resolve to take better care of themselves, both physically and spiritually.
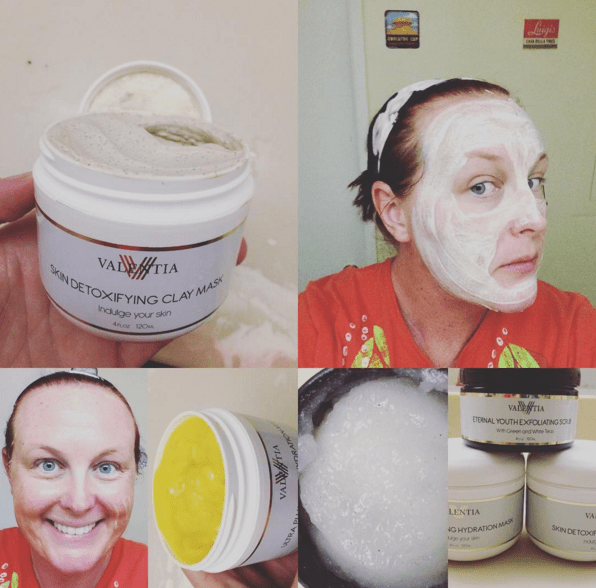


 Organize your Finances:
 Organize your Personal Life:

