Every year I look for a new way to save money. And over the past few years, it’s been harder and harder to come up with new ways to save money. And I’ve been meaning to post this for a while, but now I’ve got some free time, and Dollar Tree has some really cute fat quarters of fabric (that’s an 18×21 or 22-inch piece of typically cotton fabric). Over the winter holidays, I was watching TikTok and one of my faves creators, Domestic Blisters, had posted that instead of going the route of buying boxes and wrapping paper or paper gift bags, she was going to create a set of cloth reusable gift bags for her families gifts.
I love this idea, and honestly, I don’t know why I had never thought of it before. We are huge re-users of gift bags to the point where they’re mostly tape. And, a lot of our out-of-state/out-of-area relatives send us gifts from Amazon that come in reusable cloth Amazon bags.
We reuse those bags until they fall apart. And in the past, we have had 10 to 20, although in recent years we had started to cycle out ones that were falling apart or just weren’t in great shape.
So on a cold and rainy afternoon, I pulled my box of fabric out of the closet and set to go through it. I have recently acquired a pretty good selection of quilting fat quarters and smaller (left the yard) pieces of various weights of cotton. I squared off all the pieces so there were no round edges or strange shapes, and set to making some gift bags. We will primarily use these for Christmas, but, I wanted them to be used all year so I did not specifically make them Christmas or winter-holiday-themed. And because I used what fabrics I had on hand, they are lots of different colors and prints.
If you have basic sewing skills and can sew a square or rectangle, this is an easy project for you.
Items needed:
- Fabric: If you are using fat quarters, you will need two pieces- one for the front and one for the back. I used a lot of 1/2 yard pieces- and I folded those in half. Cotton or cotton blend works best.
- Pins: To pin together your project.
- Safety Pin: To guide your string/ribbon/yarn through the casing.
- String/Ribbon/Yarn: about 2 feet-ish (24-ish inches) per bag. You want enough where you can open the bag all the way and have enough to come out of the opening.

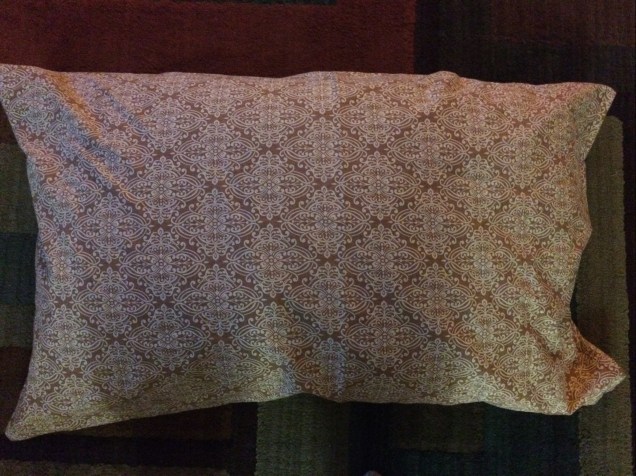
 You’re basically just making a pillowcase, and on the top of the bag (or on the side of the pillowcase where you would leave it open to put the pillow in), you fold over the raw edge and make a tiny casing.


 I fold my raw edge over twice to make sure the inside is nice looking. I frequently use my decorative stitches on the casing to make it a little extra festive.
Make sure to leave a little gap so that you can put ribbon or yarn all the way through to make a drawstring pouch.
We’ve already used some of these bags for my birthday, and my son’s birthday.
1 gift bag can cost upwards of $5, and if it isn’t opened carefully, it can be torn and then trashed. These bags cost about $2 to make (or less if you shop sales for fabric or reuse clothes that are stained or otherwise cannot be handed down. Make sure to cut around stains!) and can be reused for years. Spools of Ribbon can be picked up for less than $2/roll at Michaels, and they frequently have coupons!
So there you have it. In a few hours, you can have your own stack of reusable gift bags!
 We had a Cool Maker My Style Party earlier today with some friends and family. I didn’t get a lot of pictures just because I spent so much time fixing the machines and getting projects set up. This is not going to be like a lot of my other reviews or Tryazon party posts. Let me make that clear right now. The entire event was a disaster from start to finish.
 As you can see from the pictures, it was a disaster. I had to pull everything apart, rewind the white bobbins, and set up the machine 4 times. Finally, when the girls who wanted the make bracelets were almost in tears, I pulled out some of the empty black bobbins, wound them with embroidery floss, which is not shiny or slippery, and set the machine back up. They were able to finally use the machine without unwinding the bobbins, catching, or having the tension freak out.

 Next up is the

 After Margaret and the girls tried to make a scrunchy several times without success, I tried to give it a shot too. The stitches unraveled for me too. I now have to get out my sewing machine and make the girls custom scrunchies, as they are so disappointed that the machine didn’t work like they hoped (and I hoped too).
 Prior to being a blogger, I made costumes. All kinds of costumes from Jedi Robes to A Prince Charming Costume for someone’s wedding. One skill that I am adamant about everyone having is the skill of sewing. You don’t need to be able to stitch a wedding dress, but sewing on a button, fixing a fallen hem, and repairing a seam rip are all simple and good, money-saving skills that everyone should be able to learn.

 1-Find the hole, and make sure that the patch(es) are cut to the right size. You want to cover the hole completely, and the surrounding area, so the patch has some stable fabric to fuse to.


 3-Once the clothing/patch has cooled, you can stitch around the edge to make it extra secure, however, in this case I did not. I would do that for the knees of kiddo pants or other high wear areas.
 Last year, my husband decided that he wanted to put in a bid to direction a production of
  , the costumes and language are classic. And you may notice for the photos I’ve posted that there is also gender blind casting.

 Lay fabric out, right side facing up.
 Using a straight stitch on your sewing machine and a 5/8 inch seam allowance around one skinny end, turn the corner and sew up the side with the selvedge.