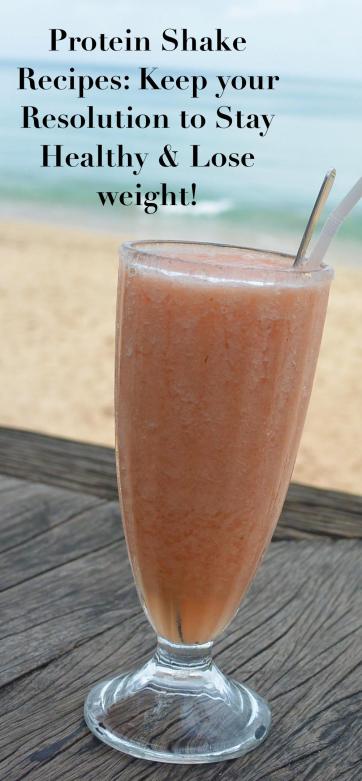
Protein Shake Recipes!

DSC_0824For some of us, our New Year’s Resolution to lose weight has already started to peter off. NOT ME! I’ve got 40-ish lbs to drop to get back down to my pre-bitty Bird weight. I’m using protein shakes to help me.

A few years ago hubs and I did Sharp Weight Management to lose weight and to this day, we still use the protein shakes that are part of their program. HMR shakes are tasty and have a good amount of protein and other nutrients. All of the recipes below use HMR shakes, but you can use whatever kind of protein powder you like best (everyone has their favorite!).

I usually start my day with a coffee based shake!

Hazelnut Mocha: Mix Chocolate protein powder with  tablespoon sugar free chocolate pudding powder, 1 tablespoon Cocoa powder, 2 tablespoons Sugar Free Torani Hazelnut syrup, and 12-20 ounces of strong, hot coffee, When blending hot drinks in the blender make sure to vent the lid or it might pop off! To do this cold, use cold coffee and add 8-10 ice cubes.

Cinnamon Dulce Latte: The same drink at Starbucks (made with Fat Free milk and without whipped cream) has 210 Calories. With my version, you save 40 calories, and score at least 10 more grams of protein- this will vary for you, depending on how many grams of protein your protein shake has. Mix vanilla protein powder with 12-20 ounces of hot coffee (I like a larger drink, so I add more coffee), 2 tablespoons of Torani Syrup Brown Sugar Cinnamon (sugar free), a dash of cinnamon.  When blending hot drinks in the blender make sure to vent the lid or it might pop off! To do this cold, use cold coffee and add 8-10 ice cubes.

Frappacino: If you have leftover coffee after making your morning pot, don’t throw it away, put it in the fridge and make yourself a blended frozen protein shake. They will taste just like a frappacino, but with a lot less calories.  The average ice blended drink from a coffee shop has 300 calories!

The basic Frap recipe is as follows:

  • Protein Powder (the amount indicated on your package for 1 serving)
  • 12-20 oz cold coffee
  • 8-10 ice cubes (add more if you want it more icy)

Add in any of the following:

  • 2 tablespoons of your favorite sugar free syrup
  • 1 tablespoon Cocoa Powder, Ovaltine, Sugar Free Pudding powder (your choice of flavors)
  • Use  Walden Farms Calorie Free Chocolate Syrup (or one of their other ice cream syrups- they make caramel and strawberry too) as a drizzle inside the cup and on top to make your drink with more of a Coffee House Flair without adding any calories!

Here are a few more of our favorite shakes. When we did the Weight management program through Sharp, we drank 6-8 a day, so creativity was the key to keep us from becoming bored and deviating from the program. (AKA cheating) These days, I use these shakes as a swap for a higher calorie dessert most of the time. That way my sweet tooth is happy, and I’m consuming WAAAY less calories!

As a note, I usually use a lot more ice to make it more “ice cream-y” and less like a chocolate milk.

Cherry Cheesecake shake: 1 pouch vanilla HMR shake, 6 oz cold water, 6-8 ice cubes, 1 tsp. sugar free cheesecake flavored powdered pudding, 3 pumps (roughly 3 tablespoons) sugar free black cherry Torani Syrup. You can substitute Strawberry syrup in place of the black cherry.

50/50 Bar Shake: 1 pouch vanilla HMR shake, 6 oz cold water, 6-8 ice cubes, 1 tsp. sugar free vanilla flavored powdered pudding, 3 pumps (roughly 3 tablespoons) sugar free orange Torani Syrup.

Eggnog shake:  1 pouch vanilla HMR shake, 6 oz cold water, 6-8 ice cubes, 1 tsp. sugar free cheesecake flavored powdered pudding, 1tsp. rum extract, sprinkle/dash of grated nutmeg. (Mr. C had this on X-mas eve and it was FABU!)

Lemon/Raspberry Shake: 1 pouch vanilla HMR shake, 6 oz cold water, 6-8 ice cubes, 1 tsp. sugar free lemon flavored powdered pudding, 3 pumps (roughly 3 tablespoons) sugar free Raspberry Torani Syrup.

Peanut Butter Cup Shake: 1 pouch chocolate HMR shake, 6 oz cold water, 6-8 ice cubes, 1 tsp. sugar free chocolate flavored powdered pudding, 2 tablespoons of PB2 powder.

Almond Joy Shake: 1 pouch chocolate HMR shake, 6 oz cold water, 6-8 ice cubes, 1 tsp. sugar free chocolate flavored powdered pudding,2 pumps (roughly 2 tablespoons) sugar free Almond Torani Syrup, and 2 pumps (roughly 2 tablespoons) sugar free coconut Torani Syrup . You can use 1 tsp. Almond extract if you prefer in lieu of the almond syrup.

Mounds Shake: 1 pouch chocolate HMR shake, 6 oz cold water, 6-8 ice cubes, 1 tsp. sugar free chocolate flavored powdered pudding,3 pumps (roughly 3 tablespoons)  sugar free coconut Torani Syrup .

Milky Way Shake: 1 pouch chocolate HMR shake, 6 oz cold water, 6-8 ice cubes, 1 tsp. sugar free butterscotch flavored powdered pudding.  To make a snickers shake, add 1-2 Tablespoons of PB2.

Butterfinger: Mix chocolate protein powder with 1 tablespoon PB2 Powdered Peanut Butter, 1 tablespoon sugar free butterscotch pudding powder, 1 tablespoon Cocoa powder, 8-10 ounces of cold water and 8-10 ice cubes. Blend on high until the ice cubes are incorporated.

Mud Pie: Mix chocolate protein powder with 1 tablespoon sugar free chocolate pudding powder, 1 tablespoon Cocoa powder, 1 tablespoon Ovaltine, 8-10 ounces of cold strong coffee and 8-10 ice cubes. Blend on high until the ice cubes are incorporated.

Chocolate Malt:  MIx chocolate protein powder with 1 tablespoon sugar free chocolate pudding powder,  1 tablespoon Ovaltine (choose the malted variety- it’s in the yellow package), 8-10 ounces of cold water and 8-10 ice cubes. Blend on high until the ice cubes are incorporated.

PB&J: Mix vanilla protein powder with 2 tablespoons PB2 Powdered Peanut Butter, 2 pumps of your favorite fruit flavored Torani Syrup (strawberry, grape, raspberry are just a few), and 8-10 ounces of cold water and 8-10 ice cubes. Blend on high until the ice cubes are incorporated. Tastes just like a PB&J!

Later in the week, I’ll be posting my home made protein bar recipe and an oatmeal protein muffin recipe- perfect for keeping you on track!

DIY Fairy Jar (No Glow Sticks needed!)

Screen Shot 2016-02-01 at 12.51.22 PMEveryone has seen the Fairy jars on Pinterest that glow in the dark. In fact, you may seen them on Pinterest fail lists too, because, well, the directions don’t work.

Not familiar? Ok, it goes like this: Take a Mason Jar (because after all 90% of crafts/stuff on pinterest involve a Mason Jar), open 2-3 glow sticks, dump them into the mason jar, screw the lid on and shake. OOOH, it’s supposed to look like a magical Fairy Jar. What it really looks like it a fairy vomited into a jar. And glow sticks glowiness only lasts one night (or so).

So here is the deal on how to make a legit, serious, awesomely cool fairy jar in less than 10 minutes, no glow sticks or scissors needed.

You need two things:

A jar with a screw on lid. I used an Anchor Hocking jar that my mom gave me (she got it here). You could also use a wide mouth quart Mason Jar.

A string of these cool LED battery operated lights on a copper wire. You get two for $7.99, so really, you could make two if you had another jar.

Here are the totally simple directions:

  1. Wash and dry the jar.
  2. Loosely coil the string of lights around your hand, put hand into jar. let go of the lights.
  3. Leave the end of the string with the switch dangle over the lip of the jar.
  4. Screw on lid (the wire is so thin, you’ll be able to screw on the lid with the wire coming up over the top of the jar).
  5. Turn lights on.

That’s it. REALLY! The batteries last a while, especially if you aren’t leaving the lights on 24/7. If you wanted to get a little fancier, you could spray paint the inside of the jar, allow it to dry, then continue with steps 2-5. I am doing that with my second string of lights. Watch my Instagram feed for photos of that when it’s done later today.

Screen Shot 2016-02-01 at 12.50.58 PM

I can’t wait to share this with Henry when he gets home from school.


Thanks to Tomoson and #OakleafLEDLight for the opportunity to try these cool little lights for free. I was not financially compensated for this review, however I only review items that I think area good fit for my family. All opinions are my own!

It’s BACK! Free FroYo Day!

Is it wrong that I look forward to this every year?

Screen Shot 2016-01-25 at 10.37.39 AMFebruary 1st is National Frozen Yogurt Day and that means free Fro Yo at Menchie’s!
It’s from 4-7pm on Monday, February 1st!

Fine Print: The first 6 ounces are free on February 1, 2016 from 4pm – 7pm. Additional ounces are at cost to the consumer. Limit one cup per guest while supplies last. Flavors are available at participating locations, while supplies last.

This is going to be a great after school treat for our family! As more Free Fro Yo offers are announced for other fro yo companies, I’ll post!

DIY Frozen Pizzas!

file7501340931583

IMG_2937
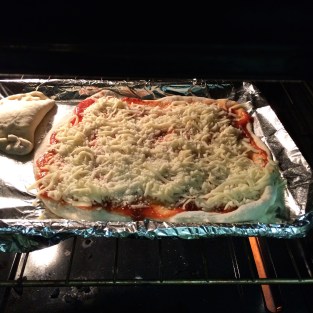
A cheese pizza baking away (and a calzone)!

We love Pizza. Probably too much. About 6 months ago, hubs bought How to Cook Everything: 2,000 Simple Recipes for Great Food,10th Anniversary Edition by Mark Bittman. It’s amazing. We’ve cooked a lot of stuff out of it, but the best is probably the pizza crust recipe.

It’s easy -only three ingredients, but I usually add a few extra!  You can make a few batches, put a ball of dough in the freezer, and save it for when you want pizza, but are feeling lazy. OR- You can make a couple frozen pizzas (which I do once a month), and when you are feeling really lazy, you’ll have no need to call Noid or Cesar (wow, both of those totally date me, right?)

DIY Frozen Pizza

Makes 1 pizza

Crust (recipe adapted from Mark Bittman’s):

  • 3 c flour, plus extra for kneading
  • 2 t. yeast
  • 1 c. very warm water (90-100 degrees)
  • 2 T parmesan cheese (it’s ok to use the Kraft in a green canister stuff)-OMIT IF YOU ARE VEGAN!
  • 1 T Olive Oil
  • dash salt
  • dash pepper


Directions:

  1. Preheat oven to 450 degrees.
  2. Mix all of the ingredients together until a soft sticky dough ball forms.
  3. Turn out onto a floured board or counter top and knead briefly.
  4. smooth a round ball of dough into a clean bowl. Cover bowl with a cool, damp cloth and allow to rise someplace undisturbed for 1 hour.
  5. After an hour, punch the dough, and turn out onto a floured board or counter top and knead for 2-3 minutes. At this time, you can roll the dough out and move onto the next step, or you can do a secondary rise (makes the crust extra crispy and chewy). If you elect to do a second rise, repeat step 3 and 4.
  6. After dough is rolled out to your preferred size and shape, lift into well greased cookie sheet or pizza pan. pierce the crust with a fork several times. This keeps the crust from getting weird bumps and lumps during the par-baking.
  7. Par-bake crust for 3-5 minutes. Allow crust to cool completely.

Now that you have cooled par-baked crust, it’s time to get topping! Transfer the pizza to a large piece of aluminum foil.

  • 1 cup or so of sauce, your choice
  • 1-2 c. cheese
  • Assorted toppings (precooked meats, veggies, fruit, herbs, etc)

Top the pizza as you like,, wrap the foil around the pizza, loosely around the top of the pizza so you don’t squash the toppings. Place in a large freezer zip top bag (don’t forget to label what kind of pizza it is) and freeze. pizzas should freeze at least 24 hours before cooking.

To heat, bake pizzas at 450 degrees for 8-10 minutes

IMG_2938Some of our favorite pizzas include:

  • Gyro (Sprouts sells it wit hthe pre-sliced deli meat!), feta, and spinach
  • Caramelized onions and peppers and sliced meatballs with cheese
  • whatever veggies we have in the house (broccoli, spinach, onions, peppers) topped  with cheese
  • chicken, bacon, and pepper jack cheese


You can substitute in whatever your fav crust is, whatever sauce, cheese, and toppings you like! And because the pizzas are room temp/cooled when you top them, it’s a great opportunity for kids to help assemble pizzas. These pizzas are a frugal way to have a yummy dinner- Each pizza costs about $3.00 and feeds the three of us!


Healthy Recipe: Pumpkin Protein Shake!

DSCN0612

We drink a lot of protein shakes. I have 1-2 a day. They help me stay full and keep me out of the fridge, and they give me the energy I need to wrangle the munchkins.

This is an easy, yummy recipe- especially if you like pumpkin!

Pumpkin Protein Shake

Makes 1 shake

Ingredients:

  • 1 scoop or pouch vanilla protein powder/protein shake (we use HMR 120)
  • 1 cup canned pumpkin (not the canned pumkpin pie filling, but the plain canned pumpkin)
  • 1/2 cup water (You can add up to an additional 1/2 c. if you want your shake thinner)
  • 1/2 cup ice cubes (You can add more if you like your shake thicker)
  • 2 T. sugar free butterscotch pudding powder
  • 1 T. sugar free vanilla syrup (like Torani)
  • cinnamon & nutmeg to taste

Directions:

  1. Place all ingredients in blender or magic bullet and blend for 1-2 minutes, or until all ingredients are blended and ice is broken down.
  2. Serve immediately.

Modifications:

  • If you do not use protein powder, substitute 1/2 c. fat free plain greek yogurt, and reduce water to 1/3 c.
  • If you are vegan, use soy yogurt (like Silk Brand).
  • If you have an ice cream maker, pour the mixer into the ice cream maker and use machine as directed for yummy pumpkin ice cream!

Calories for base recipe with no modifications: 225 Calories

Schoola: $20 for You. $20 for your Friend. + $25 Gift Card to Amazon

I love Schoola, so I’m stoked to hear about their latest promotion!unspecified

Check it:  $20 for You. $20 for your Friend. 40% to Schools. + $25 Gift Card to Amazon

In the month of January 2016, refer at least 3 friends and Schoola email you a $25 gift card to Amazon. WOOO HOOO!!

To get started, click here. New to Schoola- that’s cool too. Sign up here and score $20 in new to you clothes for you, or your kiddos!

Here is a photo of Birdie in her latest Schoola outfit (and her forever photo bombing brother):

IMG_1884


Sensible Swap: PB Cup Shake

It’s really hard to lose weight and eat well, especially when there are restaurants like Sonic Drive-In. They have these yummy, thick rich shakes and blasts (which is soft serve ice cream with cookies or candy mixed in and topped with whipped cream), but good lord, do they have tons of calories.

This recipe is a Swap. We swap out stuff with crazy high calories for lower calories ingredients to make a yummy, less calorically dense treat. For reference, a MINI Reese’s Cup Sonic Blast is 580 calories and is about 8 ounces (oh, yeah, they come in four other, progressively larger sizes!). The HMR recipe is 380 calories, and the Swap version is between 380-420 calories depending on which brand of light ice cream you use. Oh, and the recipe makes about 20 ounces! Hooray for more volume and less calories!

I’ve included two versions: One with HMR ingredients (you can substitute your favorite brand of vanilla protein powder and PB Protein Bar), and one using ingredients from the grocer.

Screen Shot 2016-01-13 at 5.29.21 PM

Peanut Butter Cup Shake
Makes 1 large shake (or I guess you could split it and share, but trust me, you won’t want to!)

Ingredients:

  • 1 packet Vanilla HMR Shake (or scoop if you use the 120 version)
  • 2 Tablespoons PB2 Powdered Peanut Butter(I used the choc. PB2, it’s all we had)
  • 1 HMR Chocolate Peanut bar, chopped into small, bite-sized pieces and frozen
  • 2 handfuls of ice cubes
  • 10 oz water
  • Optional, but yummy: 3 T. Walden Farms Chocolate Syrup

Directions:

  1. Place all ingredients in the blender, except for the syrup
  2. Blend on medium until all ingredients are incorporated. Mixture should be thick and frosty.
  3. Swirl the syrup in a cold glass.
  4. Pour shake into cup and serve with both a spoon and a straw.
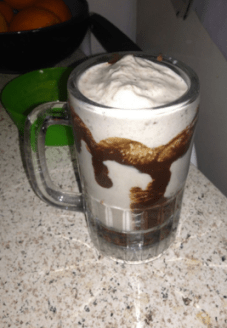
Freaking Delish! I have one of these about once a week!

Here is the second recipe, for those who just want to eat a little better:

Peanut Butter Cup Shake
Makes 1 large shake

Ingredients:

  • 3/4 cup Fat Free Vanilla ice cream (Your favorite brand)
  • 2 handfuls of ice cubes
  • 2 Tablespoons PB2 Powdered Peanut Butter
  • 1 Atkins Endulge Chocolate Peanut Butter Cup, chopped into small, bite-sized pieces and frozen (there are two in each serving- if you want your shake extra yummy, you could use both of them)
  • Optional, but yummy: 3 T. Walden Farms Chocolate Syrup

Directions:

  1. Place all ingredients in the blender, except for the syrup
  2. Blend on medium until all ingredients are incorporated. Mixture should be thick and frosty.
  3. Swirl the syrup in a cold glass.
  4. Pour shake into cup and serve with both a spoon and a straw.

We have both a  Ninja NJ600 Pro Blender and a Magic bullet.  The Magic Bullet is great for making shakes at the office (for hubs) and the Ninja is great for making multiple shakes at once at home.

Enjoy The Great Outdoors at Mission Trails Regional Park!

IMG_2837
Exploring the Dam is one of our favorite activities!

IMG_2796When I was a kid, my dad took my brother and I hiking a lot. We had all kinds of fun adventures, but I always loved Mission Trails Regional Park, specifically Old Mission Dam.

As Lil’ Man gets bigger, we are looking for more fun outdoor adventures. This last rain storm would be the catalyst for two days of big outdoor fun.

Friday, we loaded up and headed over to to dam. The past week of rain has really changed our usual path, so we got to explore some areas we’d never seen together.

IMG_2833It was a great chance for him to check out new trails, see erosion in action, splash in the cold stream water (there were a couple times we had to jump over streams to continue on, and well, we didn’t quite make it!), and see shells. There are a lot of little fresh water clams that make the river their home, as a result, we saw lots of shells!

We climbed, discovered, and navigated our way through the park for about 2 hours. IMG_2817By far the most exciting thing we found was an old, rusted car that had been shot at many, many times in the past. When you area four year old boy, nothing is more exciting than a rusty old car.

After stopping for snacks and water, we continued on to explore nature and hopefully find some cool rocks (another favorite pastime).IMG_2818

On Saturday, we headed over after lunch to the Visitor & Interpretive Center. It was closed, but we checked out the nature flora and the amphitheater. Then we did the loop around the center. It was a fun, easy walk (no pictures, we were too busy exploring).

It’s a quick 1 mile loop with a couple foot bridges and it overlooks the river, which is “raging” (as much as it can here) right now.

If you are in the San Diego area and haven’t been to Mission Trails Regional Park, you are missing out. There is tons of fun to be had and nature to explore. There are paths and trails for every skill level, and there is even a paved path along Father Junipero Serra Trail if you aren’t feeling adventurous, but still want to get outside. Parking is free, admission to the park and Visitor & Interpretive Center is free (but they do accept donations!). Most paths, except the paved road are not stroller friendly. Most paths are bike and/or Equine friendly, and leashed dogs are welcome.

And of course what better IMG_2835way to end a fun day of hiking, than with a little park yoga:
 

Review: Coobie Seamless Bra

UGH. I hate writing less than stellar reviews, but Ya’ll need to know. I teased the review about the Coobie Seamless Bras here.

IMG_2747
I promised no photos of me parading around in my bra, so I’m not parading. And I’ve cropped out my naked, pale flesh.

Well, I’m not impressed. The ladies on the website must either all have had really good breast lifts or have not breast fed two babies because the Coobie is NOT supportive. I couldn’t exercise in it, and by the end of the day, my poor ol’ boobs hurt. Adjusting the straps didn’t give me any extra “lift”.

Hubs remarked that I had a “uni-boob”, which ya know, no one wants to hear.

I had to remove the triangular shaped pads on each side as well. They looked like they were for the smaller size bra (oh, Coobie Bras only come in two sizes), and sat super weird on my breasts, almost giving them a lopsided cone shape. There is an opening inside the bra under each arm for removal.

So, there ya go. They didn’t work for my floppy mom boobs, but if you have naturally perky, pert boobs, the Coobie Seamless Bra may be for you.


Thanks to USFG and Coobie for giving me the opportunity to review the Coobie Seamless Bra. I received it for free to facilitate my review.

DIY Powdered Laundry Detergent….

IMG_2769So I did it. I broke down after years and years of saying I’d never make my own laundry soap and I did it. If you do a quick search on Pinterest, you’ll see a lot of recipes that makes a 5 gallon bucket of thick white (or off-white) gloppy laundry detergent. With two curious kids under 5 years old, I didn’t think having that around my house would be a good idea. Plus, where the hell would I keep it? Our garage isn’t attached, and my washer and dryer are in a closet in the hallway. 5 gallons of water weighs 40-ish lbs, so 5 gallons of liquid laundry detergent would be about the same, maybe more. That’s a lot more than my poor, flimsy laundry closet shelf could handle!
However, after tons of research and testing out ingredients, I cobbled together a recipe for powdered Laundry detergent. Here are the ingredients I used and the reasoning behind each one:

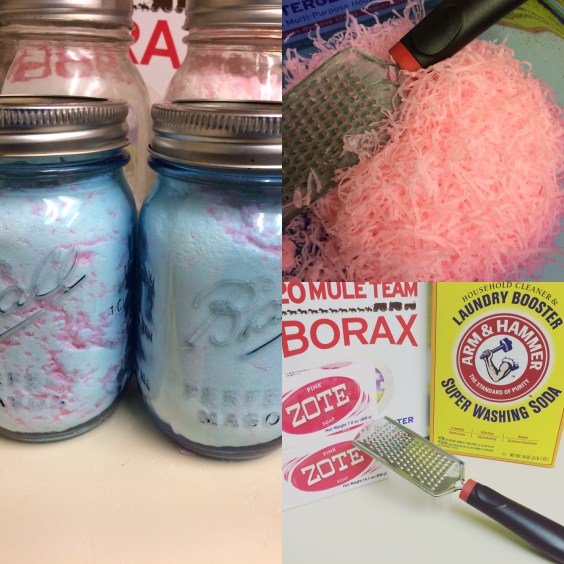
IMG_26871 Large Bar Zote Soap, grated: My great Grandmother used this soap (as well as Fels-Naptha, but I couldn’t find it in my local store) to wash their laundry in the days before they had indoor plumbing in their farmhouse (BTW, that was the 1950’s). She had an old style washing machine like this, complete with ringer. Her laundry was always super clean, so I knew that starting with a good soap was key. (It makes roughly 4 cups of grated soap) If you don’t care for Zote or Fels Naptha, I’ve seen others use Dr. Bronner’s Castille bar soap.


IMG_26864 Cups Borax: This is a pretty controversial ingredient because Borax is toxic if ingested. News Flash: DON’T EAT LAUNDRY DETERGENT. You wouldn’t pop a Tide Pod in your mouth and start chewing, so home made detergent shouldn’t be any different.  Borax is great in your wash if you have gross little boys (or not so little boys).  Here is a pretty good article that talks about how Borax works. I use a little Borax in every load of laundry, with commercial detergent too!

4 Cups Arm & Hammer Washing Soda (NOT BAKING SODA- THIS IS AN IMPORTANT DISTINCTION!!): Washing Soda is also another ingredient that people get crazy over. It’s NOT baking soda. It is not to be ingested, it is slightly caustic (I wear gloves and a mask when I work with it). This page tells you about it and how it works. Basically it acts as a solvent to help removes stains, it also helps soap or detergent foam and clean better!

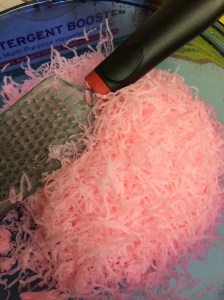
Directions are easy: Grate your soap. I used a hand grater, but you can also use a food processor (I don’t have one).

Mix all your ingredients together and store in clean, dry jars. I used Ball Mason Jars because it’s what I had on hand, but whatever you have will work. A friend re-uses her empty protein powder canisters.

All you need is 1-2 tablespoons per load (for the record I use 2 T. per load because our clothes get really dirty playing outside and exercising every day).

Using 4 cups of each ingredient will yield a little less than 12 cups of detergent (The grated soap settles down once everything is mixed together) which is approx 144 loads of laundry. I paid about $12.50 for all of the ingredients, and I still have leftover Borax and Washing Soda for my next batch.

This detergent will not get sudsy/bubbly, however, your clothes are getting clean. Our clothes have never been cleaner and honestly, it’s one of the few detergents I’ve used (and trust me, as a couponer, I’ve used pretty much every brand of laundry detergent there is!) where I don’t have to pre-treat every single stain and scrub.

Scent: Some recipes call for essential oils or even Downy Unstoppables to add scent. We personally don’t like over scented detergent, so the light lemony scent from Zote is more than enough for us. If you like you clothes to smell like something, you can add 10-20 drops of Essential Oil (lavender is popular), or 1/4 cup of Downy Unstoppables (I REALLLLY don’t recommend this since it has softeners in it too).

About Fabric Softener: We don’t use fabric softener like Snuggle or Downy Unstoppables because it just coats the fabric with a waxy residue and leaves a film on it. After years, towels can stop being absorbent, and clothes can feel sticky or turn another color. If you need fabric softener or something to keep the static down, I recommend a vinegar rinse in your washer (like you would with liquid Snuggle), or wool balls in your dryer.