Recipe: Butternut Carrot Bisque

Bisque. It’s gotten a bad rap. Rich, creamy, laden with calories.

If your refined palette demands a creamier texture here is a secret cooking ingredient: Evaporated Milk. It’s got a rich, velvety mouth feel that mimics cream in soups, but it’s got a fraction of the calories. And it’s shelf stable, so you can always keep a few on-hand.

Butternut Carrot Bisque

Ingredients:

  • 1 bag of cut up Butternut Squash (about 22 ounces- About the same amount of flesh from one medium sized Butternut Squash)
  • 1 cup chopped yellow onion
  • 1 T. butter
  • 10 oz Wild Veggie™ Carrot Puree
  • 4 cups Stock (your choice, I either use vegetable stock or chicken stock)
  • Salt, pepper, cinnamon, and nutmeg to taste

Directions:

  1. In a large stockpot, saute onion in butter until the onions are translucent.
  2. Add in butternut squash and continue to cook over medium heat for 10-15 minutes until squash is soft.
  3. Add remaining ingredients, and cook on low for 20-30 minutes, allowing flavors to blend.
  4. Prior to serving, process in a blender in batches (I use our Ninja), or use an immersion blender.
  5. Serve steaming hot with biscuits. YUM!

This also freezes really well, so if you have leftovers, freeze them for a night that’s begging for soup!

Making a better cup of coffee with the Francois et Mimi 50oz Glass French Press!

Zut Alors! I wrote a few weeks back about how you can save money by ditching the ‘Bux habit, but I wanted to share a few quick, easy coffee recipes with you using freshly brewed coffee. We ditched our Mr. Coffee a few years back and opted to embrace the French Press.

The great people over at L&Z and Tomoson recently gave me the opportunity to try out the the Francois et Mimi 50oz Glass French Press. For those unfamiliar with a French press, it looks like this:

IMG_2739It’s a glass pot held by a metal “cage” with a heat proof handle. The lid contains a plunger with a fine mesh to contain all of the grounds in the bottom of the pot (and not in your cup) once the plunger has been depressed all the way.

Making Coffee in A French Press is a cinch:

  1. Place 3 scoops of coffee grounds in the bottom of the glass pot.
  2. Heat water in a pot or tea kettle until it is VERY HOT, but not boiling (about 30 second from boil- if you are using a tea kettle to heat your water, you’ll get familiar with the “I’m almost boiling” gurgle. If you are heating water on the stove in a pot, you want the water to have tiny bubbles that have yet to “pop”).
  3. Pour hot water over grounds and put the lid on the pot, but do not depress the plunger.
  4. After about 4 minutes, depress the plunger and the coffee is ready to drink.

The Francois et Mimi French Press is awesome because it’s 50 ounces, while most French Presses are 12-20 ounces. 50 ounces is comparable to a standard drip coffee pot. That means the Mr. and I can actually share a pot of coffee without one of us sneaking back into the kitchen after the first cup and finishing the pot (Our former French Press was only 24 ounces, which makes about 2 1/2 coffee cups of coffee).

So now you know how to make coffee in the French press here are a few ways to fancy up your cuppa Joe.

Quick & Easy Misto (aka a Cafe au Lait)

Ingredients:

  • 20 ounces Hot Coffee (prepared however you like)
  • 1 cup milk (whatever kind you like, I prefer whole or 2%).
  • Sweetener, if desired
  • Ground Nutmeg or Cinnamon, if desired

Directions:

  1. In a heat proof cup, heat milk for approx. 30 seconds in the microwave.
  2. Froth milk in a Magic bullet, blender, or using an Milk Frother. This takes about 30 seconds. The more fat the milk contains, the foamer the milk gets. Fat free milk (either dairy or non-dairy) does not get too frothy.
  3. Pour Hot Coffee into your serving cup. Add your sweetener and stir. This is a great time to try a new sweetened syrup!
  4. Using a spoon, Push frothed milk to the side and pour milk over the coffee.
  5. Top with Foam if desired.
  6. Get extra fancy and sprinkle the top of the foam with nutmeg or cinnamon!
IMG_2740
Hot, frothy milk!
IMG_2741
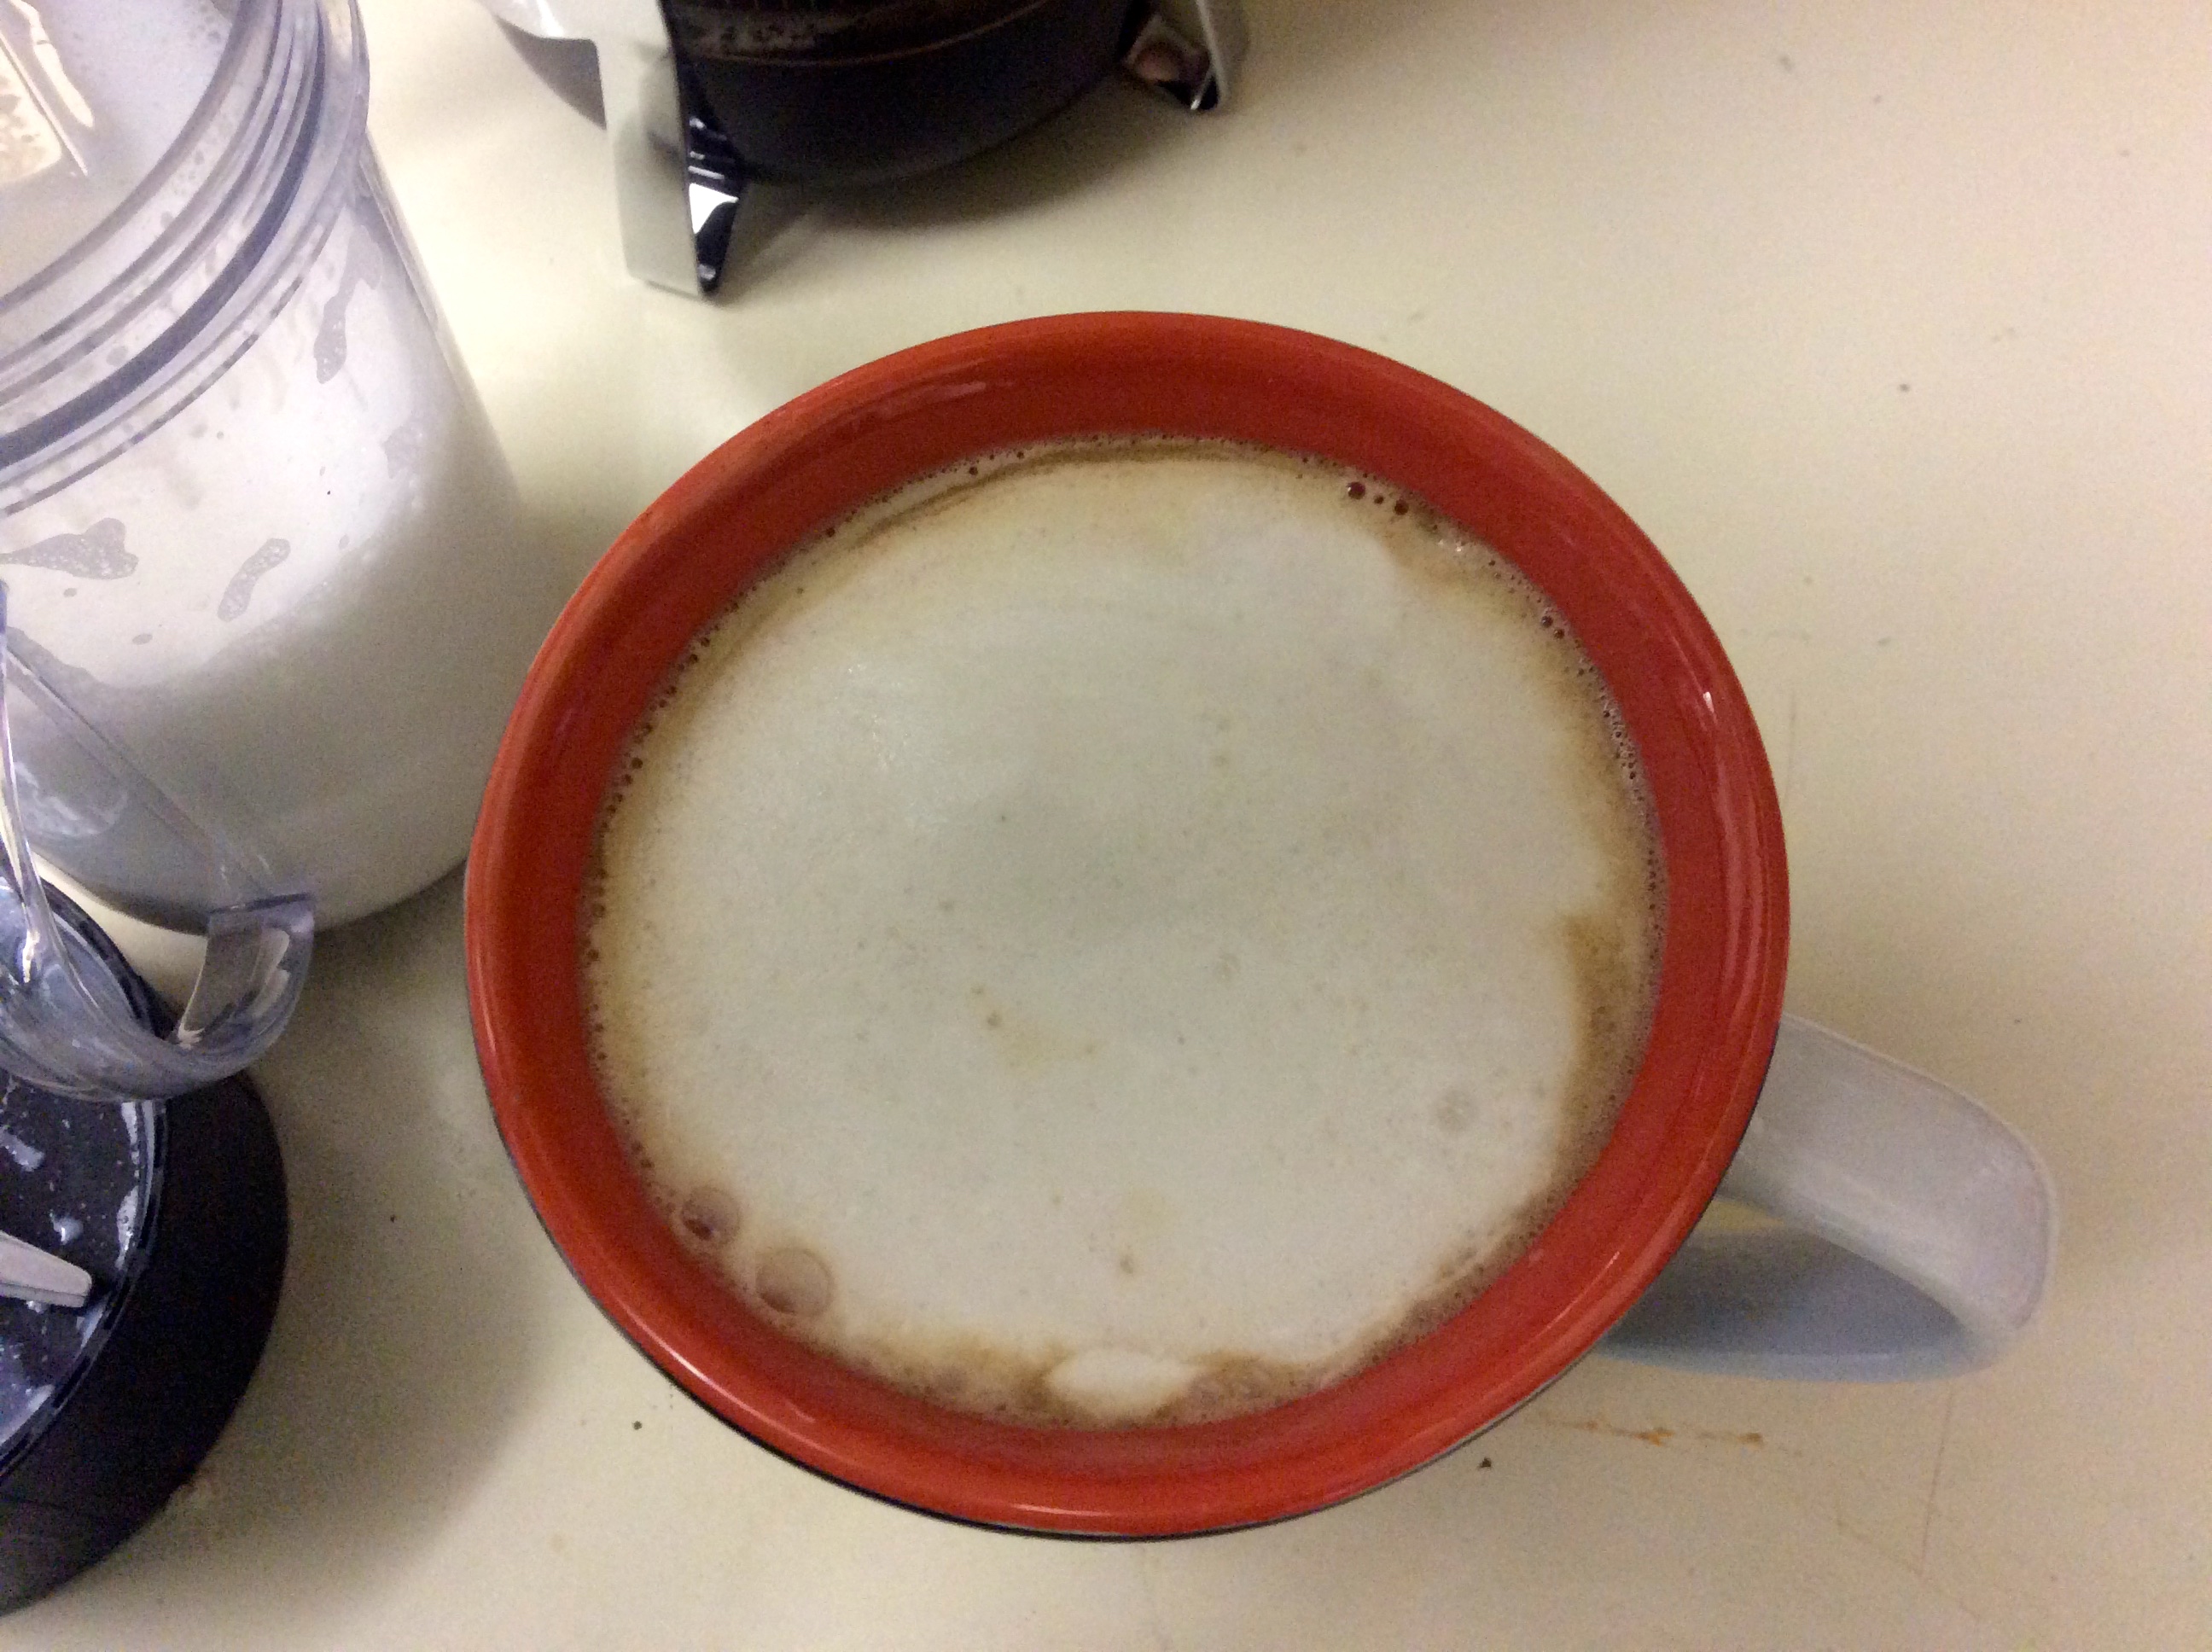
The finished product, time for breakfast!


Quick & Easy Mocha: If you love a Cafe Mocha to start your day, simply add 2 T. of your favorite Chocolate milk mix to the milk before your heat and froth it. Follow the same directions as above.

If you like your coffee a little stronger, add an extra scoop of grounds into the French Press during the brewing process.

Because the French Press does not have a heat mechanism to keep the coffee hot throughout the day, you may want to pour the coffee into an insulated carafe.  Because there is no heating mechanism, if you make an iced coffee using the remaining coffee (if there is any!) later in the day, the coffee will not be thick, bitter, or tar like (think about the coffee in your work place break room about 3pm- EEK!).

Cooled/leftover French Press coffee makes GREAT iced coffee. Simply pour over ice, add any milk and sweetener/syrup you’d like and serve. YUM!

For an Iced Mocha, mix 2 T. of your favorite Chocolate milk mix to the milk before adding it to your ice and coffee.

I love the Torani Sugar Free syrups, they come in over 40 flavors and most of them are great in coffee. We like the following flavors:

  • Irish Coffee (it’s non-alcoholic)
  • Caramel
  • Hazelnut
  • French Vanilla
  • Brown Sugar Cinnamon (Takes just like a cinnamon Dulce Latte from Starbucks)
  • Almond
  • Pumpkin Spice
  • Coconut (it’s good in a mocha)


I want to thank the great people over at L&Z and Tomoson for the chance to review this rad French Press. I was not financially compensated to review these products, however I received a 50 ounce French Press free to facilitate my review. I only recommend products and services that I feel may be a good fit for my readers.

I’d love to hear about your favorite coffee recipes. Leave a comment and share how you dress up your Cuppa Joe!

It’s Yum Time- Easy Frittata!

Whomever coined the term “morning sickness” either had never been pregnant or couldn’t tell time. I’ve been really nauseous lately all the time, so I’ve been cooking a lot of dinners that I haven’t been eating. Most of my evening meals have comprised of cold cereal and a splash of whole milk.

However, I made an awesome, easy Frittata last night that smelled so good, I actually ate about a quarter of it.

I love making Frittatas. They are super easy to make, and you can use basically anything in your kitchen. Veggies, cheese, and protein of any type. Frittatas are gluten free, and can be made vegetarian (but not vegan, since they do have eggs as a major ingredient).

Here is the recipe that I cobbled together. I didn’t write anything down, I just rummaged through the fridge and pulled out stuff that looked good together. I chose the yellow potatoes because when they cook, they have a rich, creamy texture without adding tons of empty calories (Potatoes are high in potassium, which his mama needs to keep the charlie horses at bay).

Easy Frittata (serves 4-6)

Ingredients:

  • 6 eggs
  • 3/4 cup Milk (use whatever kind you normally use- soy, cow’s milk, whatever)
  • 1/2 lb turkey sausage (or your fav. breakfast sausage)
  • 2 T. butter, divided
  • 8-10 small yellow potatoes, chopped into small pieces (you can leave the skin on)
  • 1 16oz bag of peppers and onions
  • 1T minced garlic
  • 1 ripe tomato, roughly chopped
  • 1 cup sharp cheddar cheese, shredded (If you are watching calories, opt for a low cal. cheese)
  • salt, pepper to taste
  • Olde Westport’s Gold Coast Garlic Shake or your favorite garlic powder to taste

Directions:

  1. Preheat oven to 350 degrees.
  2. In a medium mixing bowl, whisk the eggs, milk and salt and pepper. Set aside.
  3. In a large oven proof skillet, cook sausage per package directions. Once sausage is cooke, remove from the pan, chop into bite size pieces and set aside (You can also use pre-cooked sausage- just heat it up and cut into bite sized pieces).
  4. Deglaze the pan with a scant 1/4 c. water. scrape the yummy brown bits off the bottom of the pan.
  5. Add the potatoes and 1 T butter. Cook the potatoes on medium/low until the potatoes are “al dente”.
  6. Add the remaining butter, garlic, and the onions/peppers. Continue to cook on medium heat until the veggies are soft, about 10 minutes.
  7. Remove from heat, add the sausage back into the pan.
  8. Pour the reserved egg mixture over the veggies, and sprinkle with a touch of garlic powder (if desired).
  9. Top with the chopped tomatoes and cheese
  10. Place the entire oven proof skillet in the oven, bake for 20-30 minutes, or until the eggs are set.
  11. Serve right away with a small green salad or with fruit. I love frittata topped with fresh salsa and a little plain greek yogurt or sour cream.

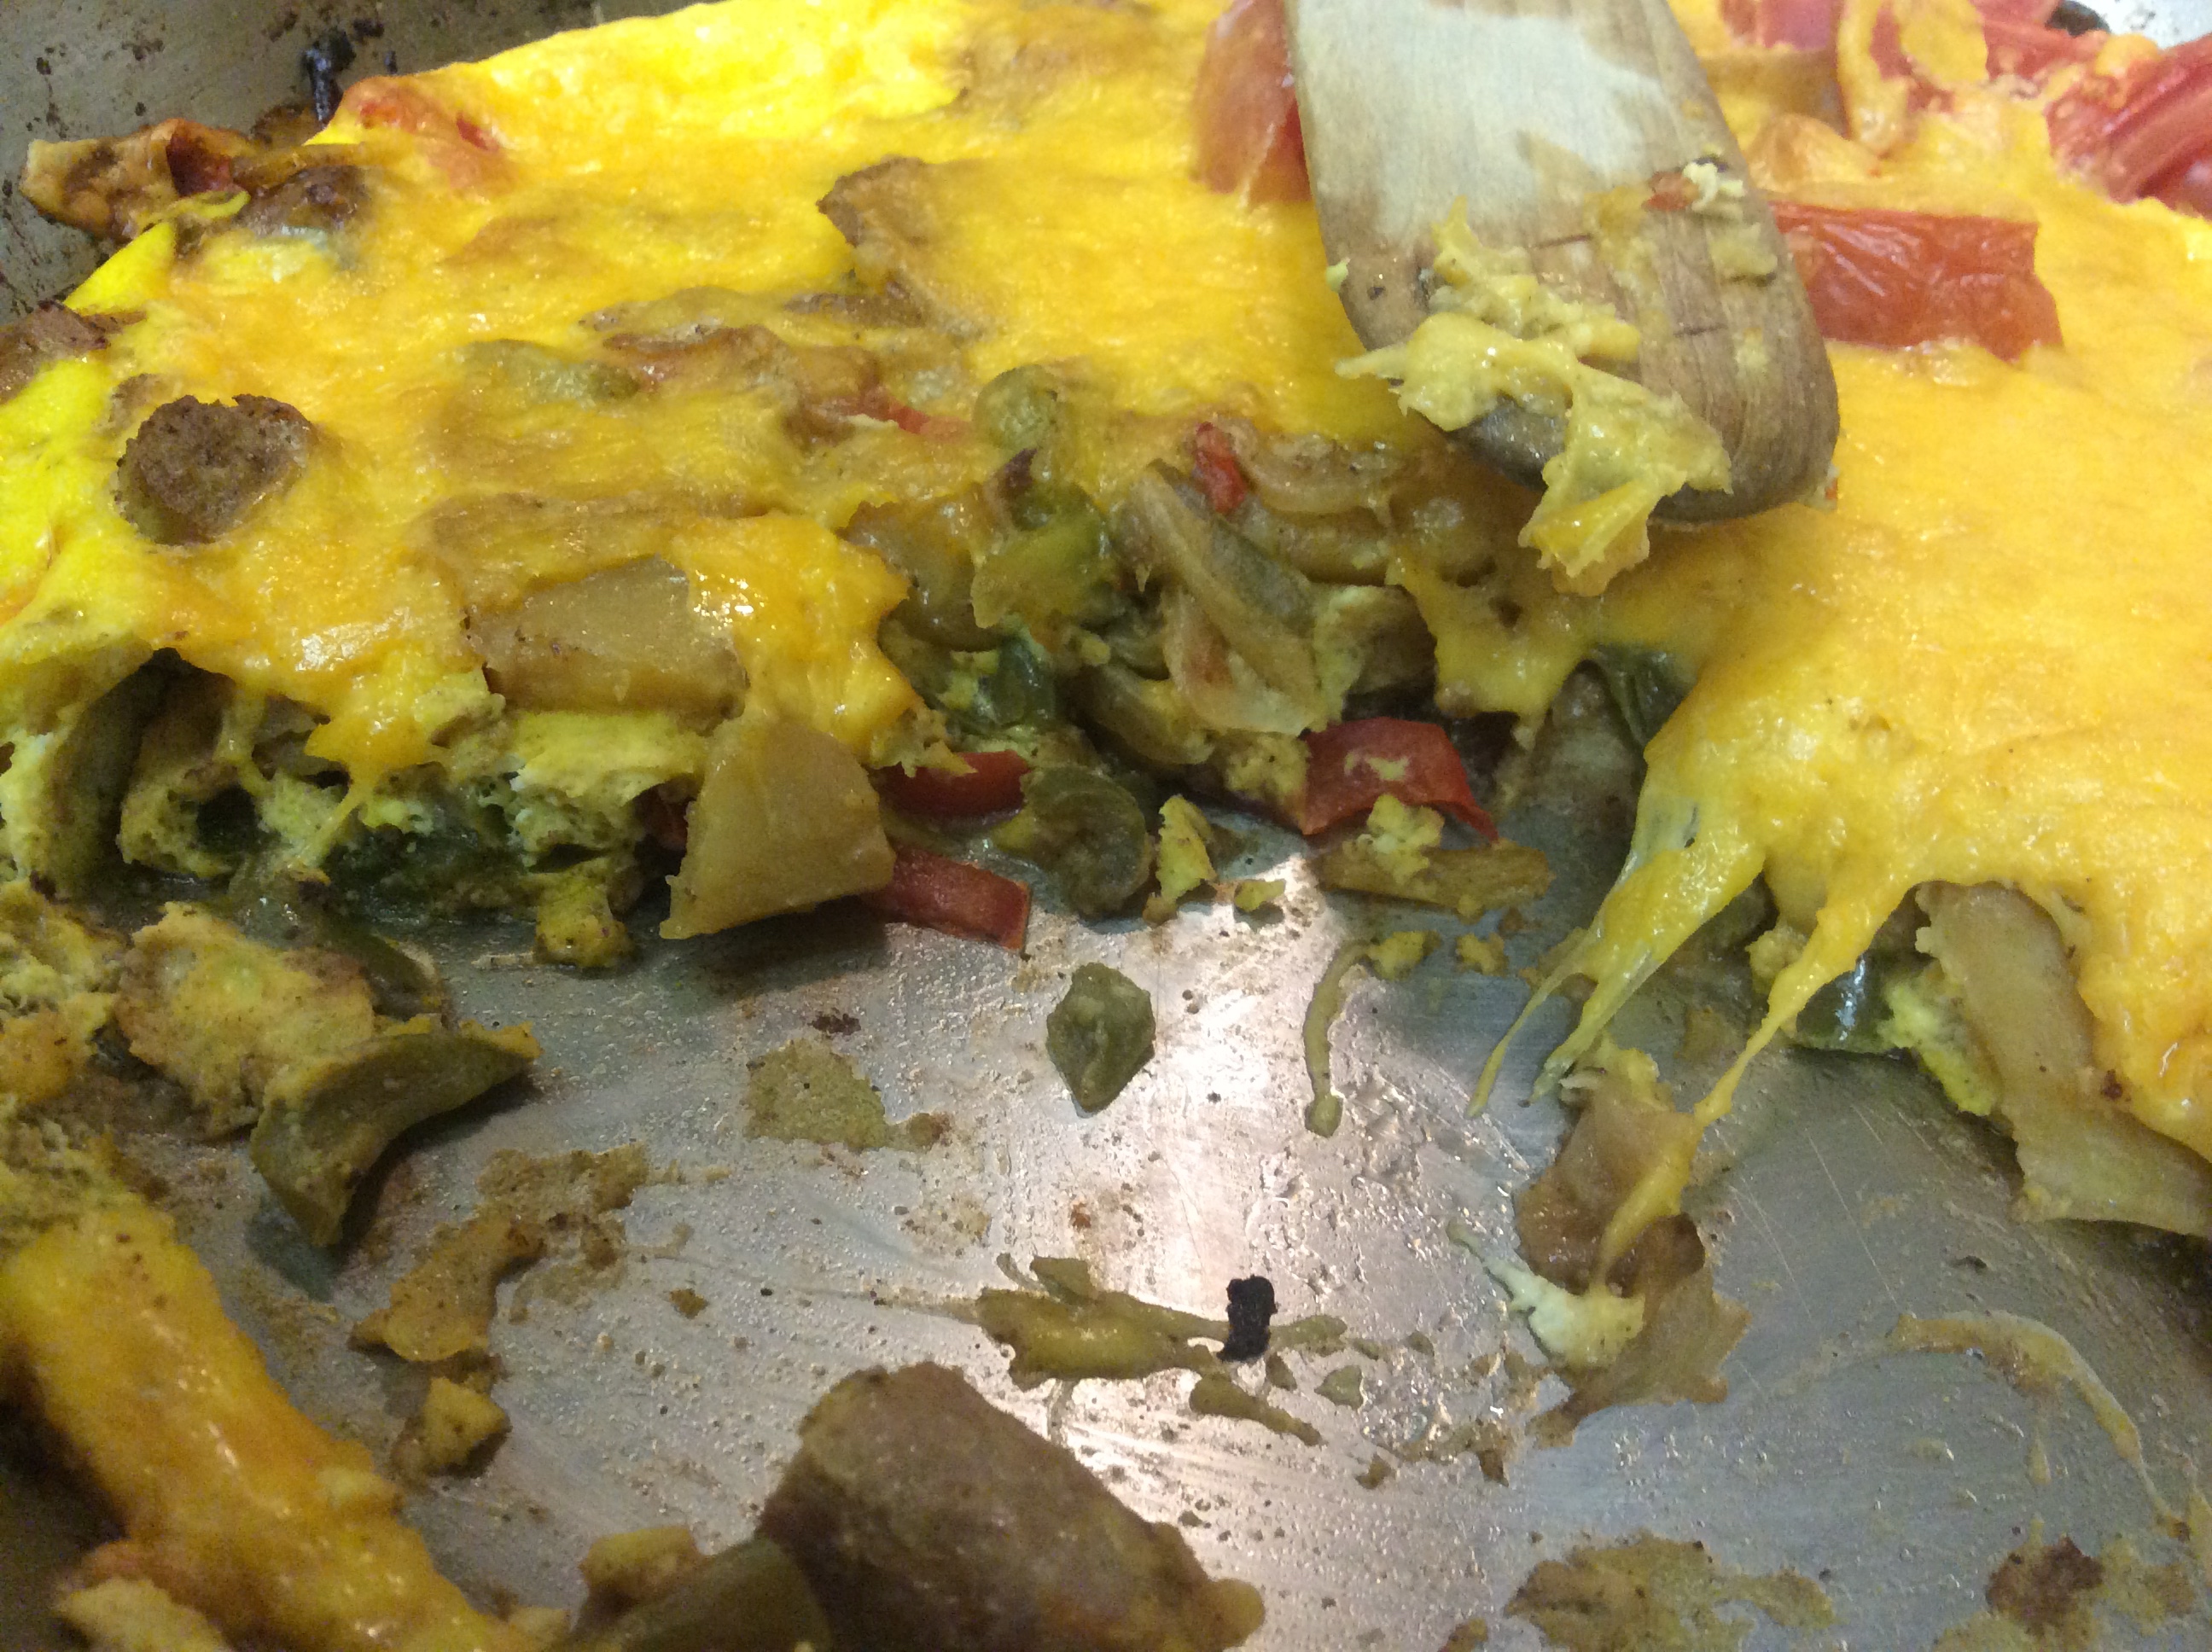
And here are some shots before we demolished it. If you can’t eat it all in one meal, you can always stash the leftover in the fridge and eat it cold, or re-heat it in the microwave. It’s good for breakfast too!

IMG_2698
Notice all the yummy veggies!!

IMG_2699


When being frugal isn’t easy…

"Hot Diggity Dog! .25 off a 48 pack of Toilet Paper!" Courtesy : thegraphicsfairy.com
“Hot Diggity Dog! .25 off a 48 pack of Toilet Paper!” Courtesy : thegraphicsfairy.com

Being Frugal ain’t easy sometimes, kids. I won’t lie.

It’s not always carts of free groceries, double coupons, and mail boxes fulla rebate checks.

Sometimes it’s getting stuck with a cart full of free food that’s yucky (once I bought a bunch of dinner kits that were free after coupon, but they tasted like what I imagine dog food resembles), a newspaper full of .35 off a huge package of already very expensive toilet paper, and an empty mail box (or a mailbox full of bills-Even Worse!).

These are all experiences that every couponer and frugal person goes through.

How do I keep my head up during the hard times were it seems like no matter how I try, money is just pouring out of my hands, and I can’t get a handle on it?

  1. This too shall pass! It’s hard to believe, but everyone goes through it. Even frugal folks like me!
  2. Count your blessings. And while you’re at it, inventory your pantry, fridge, and other stockpiles. Know what you’ve got on hand, and find ways to use up what you’ve got- That will help you get spending under control.
  3. Make a plan. How can you: Repair, upcycle, use up or do without? Don’t forget local community resources like freecycle, Craigslist free section, and your local branch of the Buy Nothing Project to help you find what you need.
  4. Forget about the Joneses.  Everyone wants what’s new, bigger, better, faster. Get out of that mindset. Forget about what your friends and neighbors have, and focus on what matters. Family, friends, and being a good person (seriously!). If you ever find yourself thinking “What kind of dining set defines me as a person?” maybe it’s time to re-assess priorities.
  5. Don’t spend money. For some people, shopping is catharsis. Buying new things makes you feel new, but at the end of the day, how did all this stuff get paid for? If you gotta get out and shop, check out a local thrift store. Support a charity and save some money.

How do you keep your head above water when living the frugal life gets hard?


Delectable Tuesday: Quinoa tri-color pepper salad

This is a super yummy salad that is easy to prepare and can be kept in the fridge for up to a week. I used green red and orange peppers but feel free to use whatever color bell peppers you can find in your local supermarket.

Ingredients:

  • 1 cup quinoa ( I used red quinoa)
  • 2 cups water or broth, your choice
  • 3 bell peppers, cleaned and diced
  • 1/4 cup oil, your choice (I used corn oil)
  • 1/4 cup vinegar, you choice (I used pomegranate, but balsamic would be good too)
  • 1/4 cup stone ground mustard
  • Pepper and salt to taste
  • (optional 1/4 c. feta or goat cheese crumbled)

Directions:

  1. Cook quinoa in water or broth as indicated on package directions.
  2. Once quinoa is cooked refrigerate until cool.
  3. In a large bowl mix cooked chilled quinoa and bell peppers set aside.
  4. In a small bowl mix oil, vinegar, and mustard until combined.
  5. Pour over quinoa mixture and stir to combine. Taste and salt and pepper as needed.
  6. Store in refrigerator for at least four hours prior to serving.

Delicious as a side dish or top a green salad with this mixture to make a large entree salad.

Because of this salad is a vegan (sans cheese, of course), vegetarian, and gluten free it is a great option for a potluck with friends or family.

This recipe makes six side dish servings or three main dish servings

Saving time and money with meal planning!

One way to keep on the frugal track is to meal plan.  If you’ve never meal planned before, it can seem daunting. Here are just a few tips to get started.

  1. Inventory your pantry, freezer, and fridge. I use these worksheets. I keep them in plastic sheaths taped to the fridge and inside the cupboard. That way you know what you’ve got on hand without having to dig. I update them every week.
  2. Check out your favorite grocery stores weekly circular online before you hit the market. You may find that chicken is on sale that week- in that case, plan to cook more dishes that involve chicken. To save the most amount of money, eat what is in season and what is on sale!
  3. Make a list of the types of dishes that your family already enjoys. Make a list of the ingredients for each recipe. Check off the ingredients you already have on hand.
  4. Gather up some recipes that you’ve wanted to try for a while. Make a list of the ingredients the recipes call for that you don’t have on hand. I try to add in one new recipe each week.
  5. Decide what you want to cook for dinner each night (based on what’s on sale, recipes your family likes, and maybe 1-2 recipes that you’d like to try that are new to you). I try to have one night where we eat up leftovers. I also make a green salad to go with dinner that night.
  6. Plan on having the ingredients for a few easy meals on reserve in the pantry/freezer. Sometimes your day goes south and you don’t have the time/energy to make what’s on the menu for a certain night. Having something easy to make waiting in the wings keeps you out of the drive-thru! I try to plan the extra meals around stuff that we already have in the cupboard. If you don’t have any “extra” food, plan on buying the ingredients for 1 extra meal each week for a month. It can be as simple as a can of soup and grilled cheese- No need to be gourmet every night!
  7. Write a list of all of the ingredients that you need for your weeks menu that you do not have on hand.
  8. Look online and in inserts for coupons. To save time, use a Coupon Database to locate coupons.  I like Couponmom’s Coupon Database– it’s separated by state!

It can take a few weeks to a month to get into the meal planning groove. Give yourself grace and realize that it doesn’t come easy to everyone!

Now, if that is too much work, there are websites (and companies) dedicated to helping you meal plan. eMeals is one of them- It’s not free, but it’s pretty cheap ($5/week or so). They ask you a bunch of questions about your family, diet, and where you live and they supply you with grocery lists based on your dietary needs and where you live and shop.

Recipe Tuesday: Black Beans and Brown Rice!

I’m going to try to publish a recipe at least once a week. Some of these may seem familiar to those who have eaten in my kitchen before. Most of these recipes are family favorites with a healthy twist.

Ingredients:

  • 1 T. butter
  • 1 T. diced garlic
  • 1 bag Birdseye Recipe Ready Mirepoix OR 1/2 cup each, chopped: white onion, celery, & carrots
  • 1 red or green bellpepper, diced
  • 1 1/2 cups brown rice
  • 4 cups water or broth (I used homemade chicken broth)
  • 1 can black beans, rinsed and drained
  • 1/2 T. Cajun Seasoning

Directions:

  1. In a large saucepan, melt butter and add garlic. Cook until fragrant (about 5 minutes)
  2. Add Mirepoix and pepper.  Cook on medium until onions are clear.
  3. Add rice and liquid, cook on medium, stirring often, for 30-35 minutes, until rice is tender.
  4. Add black beans, and cook until beans are heated.
  5. Add Cajun Seasoning and serve.

This makes 6-8 servings. It’s yummy!

*To make it vegan,use coconut oil in place of butter, and use veggie broth instead of chicken broth.


Photo credit: ronnieb from morguefile.com

Small changes can add up to big savings!

chaulkboard_bkgrnd_506x575 I get asked a lot, “How can I save money besides clipping coupons, using store club cards, apps, and shopping sales?”

Well, ok. Hmmm…. How do you save money without actively saving money? It’s easier than you think, in fact, you probably already do a few of these things, or could with little effort.

Drop the daily Starbucks habit. Seriously. How easy it it to set up your coffee maker before you go to bed and flip on a switch when you crawl out of bed in the morning? It’s so incredibly easy. Like iced coffee or something a little foo foo? The extra ingredients are pretty cheap and last a while, and it takes the same amount of time in the morning to make it yourself, minus the line at the drive-thru.

Supplies you probably have on hand: Coffee/k-Cups, Coffee maker (or french press or Kuerig), creamer, milk, cream, sweetener, flavored syrups, chocolate syrup (if you like a mocha), double walled tumblers with lids and straws for cold drinks, and insulated hot beverage cups with lids for hot drinks.

Don’t know how to make your fav. coffee house recipes? Check out this article, or this one,  for some ideas on how you can do it at home. Oh, and don’t forget Pinterest.

Ditch the Drive-Thru. Again, it’s so easy to spend 10-15 minutes before bed packing your lunch and snacks (not to mention healthier) for the next day. Do it while you are setting up your coffee maker! If you aren’t a sandwich and chips fan, there are tons of yummy lunch alternatives, even if your work place doesn’t have a microwave or method for re-heating your lunch.

Just a quick googling of Adult Lunch Ideas came up with tons of yummy ideas, and Pinterest is full of them too.

And if you’ve got space in your pantry, consider making an area where you can store all your shelf stable lunch and snack components together. We have one shelf called that is the designated snack shelf. I tend to stock up when snacks that we like are cheap or free. I hide them and only put out one or two boxes at a time. That way they last longer. My two go to stores for inexpensive healthy snacks are Costco and Grocery Outlet.

Supplies you probably have on hand: An insulated lunch bag (I have two: One from Thirty-one that looks like this, and an Thermos brand one that is bigger and better for packing lunch and snacks all in one), Reusable containers to hold lunch (I like the Rubbermaid Easy Find Lid sets, they snack together and the lids nest. Not to mention that they are durable), blue ice (here is a list of great DIY hacks), an extra set of silverware, a reusable beverage container (like a water bottle, or even a reusable juice box if you like juice in your lunch). If you like salad, consider getting a salad container like this one that has a dressing container and silverware that snaps on.

Meal Plan: it’s totally easy. I promise you that meal planing is so easy, anyone can do it. Lemme break it down:

  • Inventory your pantry and freezer (You can use forms here to make it easier)
  • Make a list of dishes you can create with what you have on hand.
  • Make a list of dishes you can make with 1 or 2 additions that you don’t have on hand.
  • Put the missing ingredients on your shopping list and pick them up on your next few trips
  • Post the lists of dishes on fridge.
  • Don’t freak out when it’s time to cook, you’ve got a cheat sheet on your fridge!

You can even do some freezer/batch cooking when you have a few spare hours and you’ll have a few yummy meals at your fingertips for meals that you don’t feel like cooking. Here are a few free Kindle books from Amazon about freezer/batch cooking. I’ll be posting some batch/Freezer cooking recipes in the near future.

Eat fruit and vegetables that are in season. This sounds like a no-brainer, but it bears repeating.  Right now we are eating a lot of  of apples, citrus, and winter squashes. Eating food that is in season and inexpensive means I can get more for my buck. We also shop for our produce at 99 Cents Only first to pick up quality name brand products, then fill in with a trip to Sprouts as needed.