Recipe: Honey Lemon Ginger Syrup

P1050863I’m no doctor, but I do know that when we don’t feel good, nothing is more soothing than lemon and honey.

IMG_3602I recently made a very soothing syrup, and I had to share it with you. I put 1/3 cup of the syrup in the bottom of a coffee mug and pour boiling water over it. I have been drinking a mug full twice a day.

It’s quick and easy to make!

Ingredients:

  • 2 C honey (real honey, none of that honey flavored syrup junk!)
  • Juice of 10-12 lemons (reserve two lemons and chop them up)
  • A Thumb sized knob of ginger, peeled and sliced

Directions:

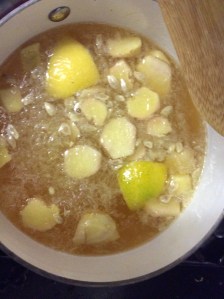
  1. In a saucepan, combine the honey, juice, and ginger.
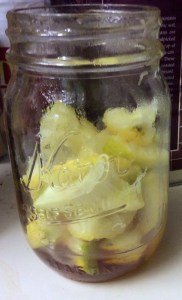
  2. In a jar with a screw on lid, pack in reserved chopped up lemon pieces.
  3. Cook on low for about 20 minutes. Do Not boil!
  4. Pour honey mixture over lemons.
  5. Screw lid on and let sit on counter until it reaches room temperature.
  6. Store in the fridge.
IMG_3603
Waiting for yummy syrup!
IMG_3601
Hunks of ginger

If you’re looking for the science behind all of this, Lemons contain a lot of vitamin C! Honey is very soothing and coats a sore throat. Remember that honey should not be consumed by anyone under 12 months of age. And ginger contains anti-oxidants.

2 Great Freebies from Ralphs!

Right now Ralphs club members can add two great real food freebies to their Ralphs Club Card!

Screen Shot 2016-02-26 at 7.21.39 AMScreen Shot 2016-02-26 at 7.22.36 AM

The first great freebie is  ONE  Free Bfree bakery item – includes loaves, rolls, bagels and wraps. Available ONLY at Ralphs. This deal expires on 02/29/16, so you best hurry!

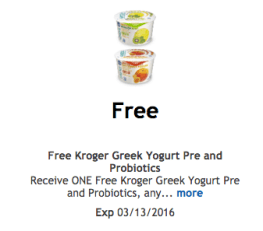
The second is the usual Free Friday Download, but this week it’s actually something yummy and a little more healthy than the usual fare. Score one Free Kroger Greek Yogurt Pre and Probiotics, any variety (5.3oz). This deal expires 03/13/2016.

One thing that I really like about Ralphs is their Free Friday Download.  If you are new to Free Friday Downloads from Ralph’s, here is more info about how it works:

WHAT IS FREE FRIDAY DOWNLOAD? An exclusive benefit to having an account online at ralphs.com is FREE products (yes, we said FREE!). When you download the free product coupon, it will be loaded directly to your Shopper’s Card and applied at checkout in-store.

HOW DOES IT WORK? Visit this page on Fridays

DOWNLOAD the digital coupon for the free product (make sure to download between 12:01 am and 11:59pm PT). View the coupon under ‘My Coupons’ in your account online or in the mobile app.

You have two weeks to redeem this coupon in store! Pick up the product at your local Ralphs store and digital coupon will automatically apply at checkout.

Don’t forget to check back on Fridays to see if a free product is available for download!


I’ll be getting back into the habit of posting the freebies at Ralphs as they pop back up!

Learn a new skill from Craftsy for free!!

Screen Shot 2016-02-26 at 7.05.01 AM

I love Craftsy! I love making stuff and being creative, but sometimes it’s hard to learn a new skill or hone one you already have on a budget. Craftsy to the rescue! They have awesome free classes where you can learn to do all kinds of cool stuff from cooking and baking to knitting!

The free mini classes can be viewed on any device, so you can learn anywhere! Right now there are 47 mini classes that are free. Mini-courses  feature student-led discussions and are shorter in length than regular courses. They are a perfect way to learn new skills and experience the Craftsy platform first-hand.

Here are just a few of the ones I’ve saved to watch and explore:

For the complete list, click here.

Which Mini-Classes are you going to take?

Protein Shake Recipes!

DSC_0824For some of us, our New Year’s Resolution to lose weight has already started to peter off. NOT ME! I’ve got 40-ish lbs to drop to get back down to my pre-bitty Bird weight. I’m using protein shakes to help me.

A few years ago hubs and I did Sharp Weight Management to lose weight and to this day, we still use the protein shakes that are part of their program. HMR shakes are tasty and have a good amount of protein and other nutrients. All of the recipes below use HMR shakes, but you can use whatever kind of protein powder you like best (everyone has their favorite!).

I usually start my day with a coffee based shake!

Hazelnut Mocha: Mix Chocolate protein powder with  tablespoon sugar free chocolate pudding powder, 1 tablespoon Cocoa powder, 2 tablespoons Sugar Free Torani Hazelnut syrup, and 12-20 ounces of strong, hot coffee, When blending hot drinks in the blender make sure to vent the lid or it might pop off! To do this cold, use cold coffee and add 8-10 ice cubes.

Cinnamon Dulce Latte: The same drink at Starbucks (made with Fat Free milk and without whipped cream) has 210 Calories. With my version, you save 40 calories, and score at least 10 more grams of protein- this will vary for you, depending on how many grams of protein your protein shake has. Mix vanilla protein powder with 12-20 ounces of hot coffee (I like a larger drink, so I add more coffee), 2 tablespoons of Torani Syrup Brown Sugar Cinnamon (sugar free), a dash of cinnamon.  When blending hot drinks in the blender make sure to vent the lid or it might pop off! To do this cold, use cold coffee and add 8-10 ice cubes.

Frappacino: If you have leftover coffee after making your morning pot, don’t throw it away, put it in the fridge and make yourself a blended frozen protein shake. They will taste just like a frappacino, but with a lot less calories.  The average ice blended drink from a coffee shop has 300 calories!

The basic Frap recipe is as follows:

  • Protein Powder (the amount indicated on your package for 1 serving)
  • 12-20 oz cold coffee
  • 8-10 ice cubes (add more if you want it more icy)

Add in any of the following:

  • 2 tablespoons of your favorite sugar free syrup
  • 1 tablespoon Cocoa Powder, Ovaltine, Sugar Free Pudding powder (your choice of flavors)
  • Use  Walden Farms Calorie Free Chocolate Syrup (or one of their other ice cream syrups- they make caramel and strawberry too) as a drizzle inside the cup and on top to make your drink with more of a Coffee House Flair without adding any calories!

Here are a few more of our favorite shakes. When we did the Weight management program through Sharp, we drank 6-8 a day, so creativity was the key to keep us from becoming bored and deviating from the program. (AKA cheating) These days, I use these shakes as a swap for a higher calorie dessert most of the time. That way my sweet tooth is happy, and I’m consuming WAAAY less calories!

As a note, I usually use a lot more ice to make it more “ice cream-y” and less like a chocolate milk.

Cherry Cheesecake shake: 1 pouch vanilla HMR shake, 6 oz cold water, 6-8 ice cubes, 1 tsp. sugar free cheesecake flavored powdered pudding, 3 pumps (roughly 3 tablespoons) sugar free black cherry Torani Syrup. You can substitute Strawberry syrup in place of the black cherry.

50/50 Bar Shake: 1 pouch vanilla HMR shake, 6 oz cold water, 6-8 ice cubes, 1 tsp. sugar free vanilla flavored powdered pudding, 3 pumps (roughly 3 tablespoons) sugar free orange Torani Syrup.

Eggnog shake:  1 pouch vanilla HMR shake, 6 oz cold water, 6-8 ice cubes, 1 tsp. sugar free cheesecake flavored powdered pudding, 1tsp. rum extract, sprinkle/dash of grated nutmeg. (Mr. C had this on X-mas eve and it was FABU!)

Lemon/Raspberry Shake: 1 pouch vanilla HMR shake, 6 oz cold water, 6-8 ice cubes, 1 tsp. sugar free lemon flavored powdered pudding, 3 pumps (roughly 3 tablespoons) sugar free Raspberry Torani Syrup.

Peanut Butter Cup Shake: 1 pouch chocolate HMR shake, 6 oz cold water, 6-8 ice cubes, 1 tsp. sugar free chocolate flavored powdered pudding, 2 tablespoons of PB2 powder.

Almond Joy Shake: 1 pouch chocolate HMR shake, 6 oz cold water, 6-8 ice cubes, 1 tsp. sugar free chocolate flavored powdered pudding,2 pumps (roughly 2 tablespoons) sugar free Almond Torani Syrup, and 2 pumps (roughly 2 tablespoons) sugar free coconut Torani Syrup . You can use 1 tsp. Almond extract if you prefer in lieu of the almond syrup.

Mounds Shake: 1 pouch chocolate HMR shake, 6 oz cold water, 6-8 ice cubes, 1 tsp. sugar free chocolate flavored powdered pudding,3 pumps (roughly 3 tablespoons)  sugar free coconut Torani Syrup .

Milky Way Shake: 1 pouch chocolate HMR shake, 6 oz cold water, 6-8 ice cubes, 1 tsp. sugar free butterscotch flavored powdered pudding.  To make a snickers shake, add 1-2 Tablespoons of PB2.

Butterfinger: Mix chocolate protein powder with 1 tablespoon PB2 Powdered Peanut Butter, 1 tablespoon sugar free butterscotch pudding powder, 1 tablespoon Cocoa powder, 8-10 ounces of cold water and 8-10 ice cubes. Blend on high until the ice cubes are incorporated.

Mud Pie: Mix chocolate protein powder with 1 tablespoon sugar free chocolate pudding powder, 1 tablespoon Cocoa powder, 1 tablespoon Ovaltine, 8-10 ounces of cold strong coffee and 8-10 ice cubes. Blend on high until the ice cubes are incorporated.

Chocolate Malt:  MIx chocolate protein powder with 1 tablespoon sugar free chocolate pudding powder,  1 tablespoon Ovaltine (choose the malted variety- it’s in the yellow package), 8-10 ounces of cold water and 8-10 ice cubes. Blend on high until the ice cubes are incorporated.

PB&J: Mix vanilla protein powder with 2 tablespoons PB2 Powdered Peanut Butter, 2 pumps of your favorite fruit flavored Torani Syrup (strawberry, grape, raspberry are just a few), and 8-10 ounces of cold water and 8-10 ice cubes. Blend on high until the ice cubes are incorporated. Tastes just like a PB&J!

Later in the week, I’ll be posting my home made protein bar recipe and an oatmeal protein muffin recipe- perfect for keeping you on track!
DIY Frozen Pizzas!

file7501340931583

IMG_2937
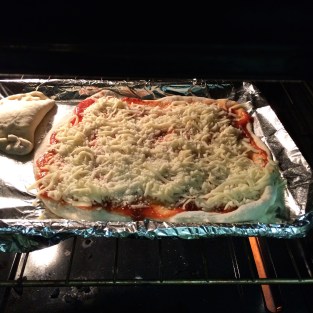
A cheese pizza baking away (and a calzone)!

We love Pizza. Probably too much. About 6 months ago, hubs bought How to Cook Everything: 2,000 Simple Recipes for Great Food,10th Anniversary Edition by Mark Bittman. It’s amazing. We’ve cooked a lot of stuff out of it, but the best is probably the pizza crust recipe.

It’s easy -only three ingredients, but I usually add a few extra!  You can make a few batches, put a ball of dough in the freezer, and save it for when you want pizza, but are feeling lazy. OR- You can make a couple frozen pizzas (which I do once a month), and when you are feeling really lazy, you’ll have no need to call Noid or Cesar (wow, both of those totally date me, right?)

DIY Frozen Pizza

Makes 1 pizza

Crust (recipe adapted from Mark Bittman’s):

  • 3 c flour, plus extra for kneading
  • 2 t. yeast
  • 1 c. very warm water (90-100 degrees)
  • 2 T parmesan cheese (it’s ok to use the Kraft in a green canister stuff)-OMIT IF YOU ARE VEGAN!
  • 1 T Olive Oil
  • dash salt
  • dash pepper


Directions:

  1. Preheat oven to 450 degrees.
  2. Mix all of the ingredients together until a soft sticky dough ball forms.
  3. Turn out onto a floured board or counter top and knead briefly.
  4. smooth a round ball of dough into a clean bowl. Cover bowl with a cool, damp cloth and allow to rise someplace undisturbed for 1 hour.
  5. After an hour, punch the dough, and turn out onto a floured board or counter top and knead for 2-3 minutes. At this time, you can roll the dough out and move onto the next step, or you can do a secondary rise (makes the crust extra crispy and chewy). If you elect to do a second rise, repeat step 3 and 4.
  6. After dough is rolled out to your preferred size and shape, lift into well greased cookie sheet or pizza pan. pierce the crust with a fork several times. This keeps the crust from getting weird bumps and lumps during the par-baking.
  7. Par-bake crust for 3-5 minutes. Allow crust to cool completely.

Now that you have cooled par-baked crust, it’s time to get topping! Transfer the pizza to a large piece of aluminum foil.

  • 1 cup or so of sauce, your choice
  • 1-2 c. cheese
  • Assorted toppings (precooked meats, veggies, fruit, herbs, etc)

Top the pizza as you like,, wrap the foil around the pizza, loosely around the top of the pizza so you don’t squash the toppings. Place in a large freezer zip top bag (don’t forget to label what kind of pizza it is) and freeze. pizzas should freeze at least 24 hours before cooking.

To heat, bake pizzas at 450 degrees for 8-10 minutes

IMG_2938Some of our favorite pizzas include:

  • Gyro (Sprouts sells it wit hthe pre-sliced deli meat!), feta, and spinach
  • Caramelized onions and peppers and sliced meatballs with cheese
  • whatever veggies we have in the house (broccoli, spinach, onions, peppers) topped  with cheese
  • chicken, bacon, and pepper jack cheese


You can substitute in whatever your fav crust is, whatever sauce, cheese, and toppings you like! And because the pizzas are room temp/cooled when you top them, it’s a great opportunity for kids to help assemble pizzas. These pizzas are a frugal way to have a yummy dinner- Each pizza costs about $3.00 and feeds the three of us!


Healthy Recipe: Pumpkin Protein Shake!

DSCN0612

We drink a lot of protein shakes. I have 1-2 a day. They help me stay full and keep me out of the fridge, and they give me the energy I need to wrangle the munchkins.

This is an easy, yummy recipe- especially if you like pumpkin!

Pumpkin Protein Shake

Makes 1 shake

Ingredients:

  • 1 scoop or pouch vanilla protein powder/protein shake (we use HMR 120)
  • 1 cup canned pumpkin (not the canned pumkpin pie filling, but the plain canned pumpkin)
  • 1/2 cup water (You can add up to an additional 1/2 c. if you want your shake thinner)
  • 1/2 cup ice cubes (You can add more if you like your shake thicker)
  • 2 T. sugar free butterscotch pudding powder
  • 1 T. sugar free vanilla syrup (like Torani)
  • cinnamon & nutmeg to taste

Directions:

  1. Place all ingredients in blender or magic bullet and blend for 1-2 minutes, or until all ingredients are blended and ice is broken down.
  2. Serve immediately.

Modifications:

  • If you do not use protein powder, substitute 1/2 c. fat free plain greek yogurt, and reduce water to 1/3 c.
  • If you are vegan, use soy yogurt (like Silk Brand).
  • If you have an ice cream maker, pour the mixer into the ice cream maker and use machine as directed for yummy pumpkin ice cream!

Calories for base recipe with no modifications: 225 Calories

What is overage? (or how I score groceries for free)

DSCN7877Overage is a wonderful thing. If you read deal blogs or watch Extreme Couponing on TV, you’ve heard the term, but maybe you aren’t familiar with the meaning.
Overage is money that you receive back, either as cash in hand or money off the rest of your order when you have a coupon whose face value is higher than the price of the items.

Most grocery, drug and mass merchandisers do not allow overage. They will adjust the value of the coupon to make the items free. Walmart, however, does allow for overage. This means I shop at the largest Wal-Mart closest to us, because it has a huge grocery section.  I usually go once a month.

For those in the military or who have base privileges, the commissary also allows overage.

The secret to getting the overage is to purchase the least expensive item allowed by the coupon. Often times, this means the smallest item allowed. If there are no size restrictions, this means you might be able to use a coupon on a travel or trial size! Check all of the fine print on your coupons.

For example, I received 2 coupons for $10.00 off any Butterball item (I won them in a contest online) and this is how I used them:
2 Butterball Turkey Burgers $6.98/each

  • -2 $10.00 any Butterball Turkey product coupon
  • = $6.04 Overage

Generally, I use overage to purchase items I did not have coupons for (usually fresh fruits and vegetables).

If you are looking for some recent coupons that might provide you with some overage at Walmart, Paul over at I Heart The Mart has an awesome list of items at Walmart for $1 or less. 

What have you scored recently for free or received overage on?

Holiday Cookie Recipe: Chocolate Yum Yums aka Poop Cookies!

IMGP5051

My mom makes these awesome cookies that we referred to as Poop Cookies as kids. But they are really called Chocolate Yum Yum’s. And Oh, Lord are they delicious…..

They are delicious, chewy and chocolately. You’ll have a hard time keeping them around.

Once you make them, you’ll see why we called them Poop Cookies.

Chocolate Yum Yum’s (aka Poop Cookies)

Ingredients:

  • 1 c. chocolate chips (your fav. variety- Vegan, GF)
  • 1/3 c butter (You can use coconut oil if you are vegan, don’t use spread)
  • 16 large marshmallows (You can use vegan marshmallows)
  • 1 t. vanilla
  • 1c. coconut
  • 2 c. oatmeal (GF oats are a great substitute. Don’t use Steel cut oats)

Directions:

  1. Over medium heat, combine chips, butter, and marshmallows. The mixture may separate when melting, but that’s ok. Stir frequently to prevent chocolate seizing.
  2. Once the mixture is melted and smooth, remove from heat and add remaining ingredients and stir until well combined.
  3. Drop spoonfuls onto waxed paper on a cookie sheet.
  4. Refrigerate for about an hour or until firm.
  5. Serve with cold glasses of milk

Mom has made them with lemon marshmallows and white chocolate chips.  With all of the marshmallow and chip flavors, the combinations available are endless!

If you are looking for another Poop Cookie Recipe, Check out Seraphina’s Unicorn Poop Cookie recipe here. They are really good!

Packing an awesome school lunch on a budget!

OLYMPUS DIGITAL CAMERA

Most kids are on Fall break right now and school starts back up on Monday, but this post comes from my heart. I can’t tell you how many times I opened my lunch bag as a child, only to be disappointed by a limp, sweaty bologna sandwich, a warm juice box and a bag of chips. My mom is an awesome cook, but lunches as a kid were always uninspired. She packed us the same lunch that our friends had.

Kids now have a lot more choices when it comes to lunches. Cooler bags/soft sided insulated bags are now chic, and many schools have restrictions on what kids can bring to school (mostly due to common food allergies).

Here are some tips that can help you pack a yummy, nutritious, frugal lunch for your kids (or heck, even for you if you pack your lunch for work):

  • Plan ahead. Take an inventory of your pantry, fridge and freezer.  Make a list of lunches you can make with what you’ve got on hand.
  • Eat what’s on sale! You’ll save more if you eat what’s in season.
  • Involve the eater of the lunch: if you involve the kids, they’ll be more apt to eat what’s packed.
  • Keep Lunch fun! Use cookie cutters (like this one– I love it for sliced cheese) to make sandwiches, fruit, and cheese into fun shapes.
  • Set aside time for prep: When you get home from the store, set aside some time to chop veggies, fruit, and cheese and place single servings in baggies. Store the baggies in a drawer in the fridge. Resist the urge to snack on them!
  • Resist the urge to buy individual packages of snacks. They are usually not the best value for your dollar. Set aside some time after your shopping trip to portion out cookies, crackers, snacks and even yogurt.
  • Along the same lines: Resist the urge to buy pre-made sandwiches, like UnCrustables. Many schools don’t allow Peanut Butter (or other nut butters) in school lunches.  If your kids love those sandwiches, make your own. All you need in an empanada press (like this one) or a Wonder Bread Sandwich Sealer and D-Cruster a loaf of bread, your fav. peanut or other nut/seed butter, and some jam or jelly. Make about 12 sandwiches for less than $10. The average price for a box of 4 UnCrustables is around $3.50! You can use whatever type of sliced bread you like too!
  • Sandwiches need not be an everyday food! Make wraps with tortillas, sliced cheese, deli meats, and flavored cream cheese. Send sliced cheese, sandwich meat, and crackers (think a homemade Lunchable!) in a plastic box in separate muffin papers. Cold Pizza, salads that include a protein, soup in a thermos, heck, even cereal in a plastic container and a thermos of cold milk.
  • Re-use your empty Mio containers to send condiments or salad dressing to keep sandwiches and salads from getting icky and soggy. Simply remove the wrapper from the empty bottle, pop the top off and clean out the bottle and lid.  Once they are dry, fill 1/2 to 3/4 full and write on the front of the bottle with a sharpie.
  • Don’t just stick to Major Grocery Store chains! I love shopping for lunch yummies at Grocery Outlet. They have a wide variety of crackers, cookies, lunch meat, and a killer cheese section!  Now that we have a Grocery Outlet and a 99 Cents Only in the same shopping center, I can get most of my school lunch shopping done in one trip!

Oh, and most importantly- Don’t forget the note. My mom always put a note in our lunch each day. It made my day, especially when I was having a hard morning!

Looking for more ideas on keeping school lunches fun? Here are a few books I found on Amazon:

Pumpkin Chocolate Chip Cookies! (Egg Free)

Screen Shot 2015-11-11 at 8.33.28 AM
Yummy pumpkin chocolate chip cookies

I had a can of pumpkin open the other day and I decided to make cookies. Part of the show that hubs is in has a scene where all the characters eat cookies on stage. They had been eating Madeline’s, which are super tasty, but high in calories.

So I opted to bake something a little lower in calories. I also made the cookies quite small (1 tablespoon, instead of two), to cut down on calories.  I added pumpkin instead of the eggs and some of the fat to lower the calories and add fiber and fruit.

In keeping with the spirit of using up what we have in the house, I also used only brown sugar, as we were out of white sugar.Lil’ Man was a big helper- He added the chocolate chips and helped scoop the dough onto the cookie sheets. He’s going to be a Master Chef yet!

Pumpkin Chocolate Chip Cookies

Ingredients:

  • 1/2 c butter (or use vegan margarine if vegan), room temp
  • 1 15 oz can of pumpkin
  • 1 cup brown sugar, packed
  • 1 tsp. vanilla
  • 1 1/2 c flour (I used AP, but feel free to use wheat or even 1 for 1 gluten free)
  • 3/4 c. almond meal
  • 1 tsp. baking powder
  • 1/2 tsp. cinnamon
  • dash salt
  • 2 c. chocolate chips

Directions:

  1. Preheat the oven to 350 degrees.
  2. In a large bowl, cream the first 4 ingredients until smooth using a hand mixer on medium.
  3. Add remaining 4 ingredients until a soft dough forms, using hand mixer on low, or by hand with large wooden spoon.
  4. Stir in chocolate chips.
  5. Drop spoonfuls onto greased cookie sheets. Bake for 9-13 minutes.

Makes 3-4 dozen cookies.

Variations: This recipe is east to make as vegan, just sub out butter for the solid fat of your choice. To make GF, sub in GF flour of your choice.  To make it nut free, omit the almond meal and increase the amount of flour to 2 cups.