Having spent a few years as an esthetician, I’ve seen and heard of people using all kinds of weird things on their skin (like the lady who scrubbed her face with Comet and used Listerine as toner), but the one thing I’ve always recommended for most people is using Essential Oils in their homes for skin and body care.
Unfamiliar with Essential oils? Wikipedia defines them as, “An essential oil is a concentrated hydrophobic liquid containing volatile aroma compounds from plants.”
Very few oils are ok to use neat (straight out of the bottle), most need to be diluted with another compound to be safety used on the skin. I like essential oils because not only do they smell great, but many can help with health issues.
I wanted to highlight a few essential oils and give you a few ideas on how you can incorporate them into your life. Because you don’t need many drops for most uses, one bottle will last you a while. And most of the other ingredients for the recipes below include items that you may already have in your home! Thanks to InstaNatural and Tomoson, I was able to try Lavender and Peppermint essential oils for free recently.
 Lavender: It is great for helping you relax, and to lull you to sleep.
Linen spray is awesome for helping you unwind after a long day. Spray your pillows and bedclothes about 20 minutes before bed. Take a few deep breaths when you get into bed and you’ll be sleeping like a teenager (we all know that babies don’t sleep well) in no time. I like mixing 20 drops Lavender oil with 1 part vodka (the cheap stuff or rubbing alcohol), and 2 parts distilled water. Pour into a spray top bottle (like these).
Relaxing body moisturizer is wonderful way to calm down a child that doesn’t want to go to bed. Just mix 3 T. of room temp. coconut oil with 10-20 drops of Lavender oil. Let the mixture sit overnight. Scoop out a little bit and work it between your hands until it’s melted and massage it onto your clean kiddo. I do this for Lil’ Man on those days when he just won’t go to sleep. I rub it onto his back, shoulders, and chest. By that time, he’s pretty calm and ready for bed!
The InstaNatural Lavender oil was very mild- Perfect for use right after a bath on Lil’ Man’s back and feet. He slept for 13 hours, I think that might be a new record!
After Lavender, my next favorite essential oil is Peppermint. It’s very invigorating, and clean smelling.
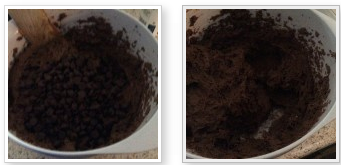
 Body Scrub can be made with any Essential Oil, but I love using Peppermint oil. Mix 1 cup sugar (white or brown, your choice), with 1/4 c up of room temperature shea butter or coconut oil, and 20 drops of essential oil. Mix together and store in a jar with a tight fitting lid. You can also use salt, but it’s a lot more abrasive.
Decongestant A simple DIY trick to help release that awful stuffy nose you or the kiddos have is to drop a few drops of Peppermint Oil into a diffuser (like this one) and breathe deeply. Peppermint oil really helps you breathe when you are all congested. You can also drop a few drops into a basin of very hot (steaming) water, put a towel over your head, lean over the bowl (using the towel as a tent) and breathe in the steam. You’ll be feeling better in no time! If you have very sensitive eyes or skin, I’d avoid the “steam tent”.
I used theThe InstaNatural Peppermint oil this morning! I whipped up a batch of peppermint scrub this morning, using kosher salt and coconut oil in a repurposed cream cheese tub. I’ll be using it to give my self a pedicure tonight. The abrasiveness of the kosher salt will really help exfoliate the dry, rough spots on my heels. I’m breathing clearly just from smelling the oil while mixing up my batch. I’ll report back with an update after my pedicure tonight!
I want to thank the great people over at InstaNatural and Tomoson for the chance to review these essential oils. I was not financially compensated to review these products, however I received a bottle of each oil free to facilitate my review. I only recommend products and services that I feel may be a good fit for my readers.
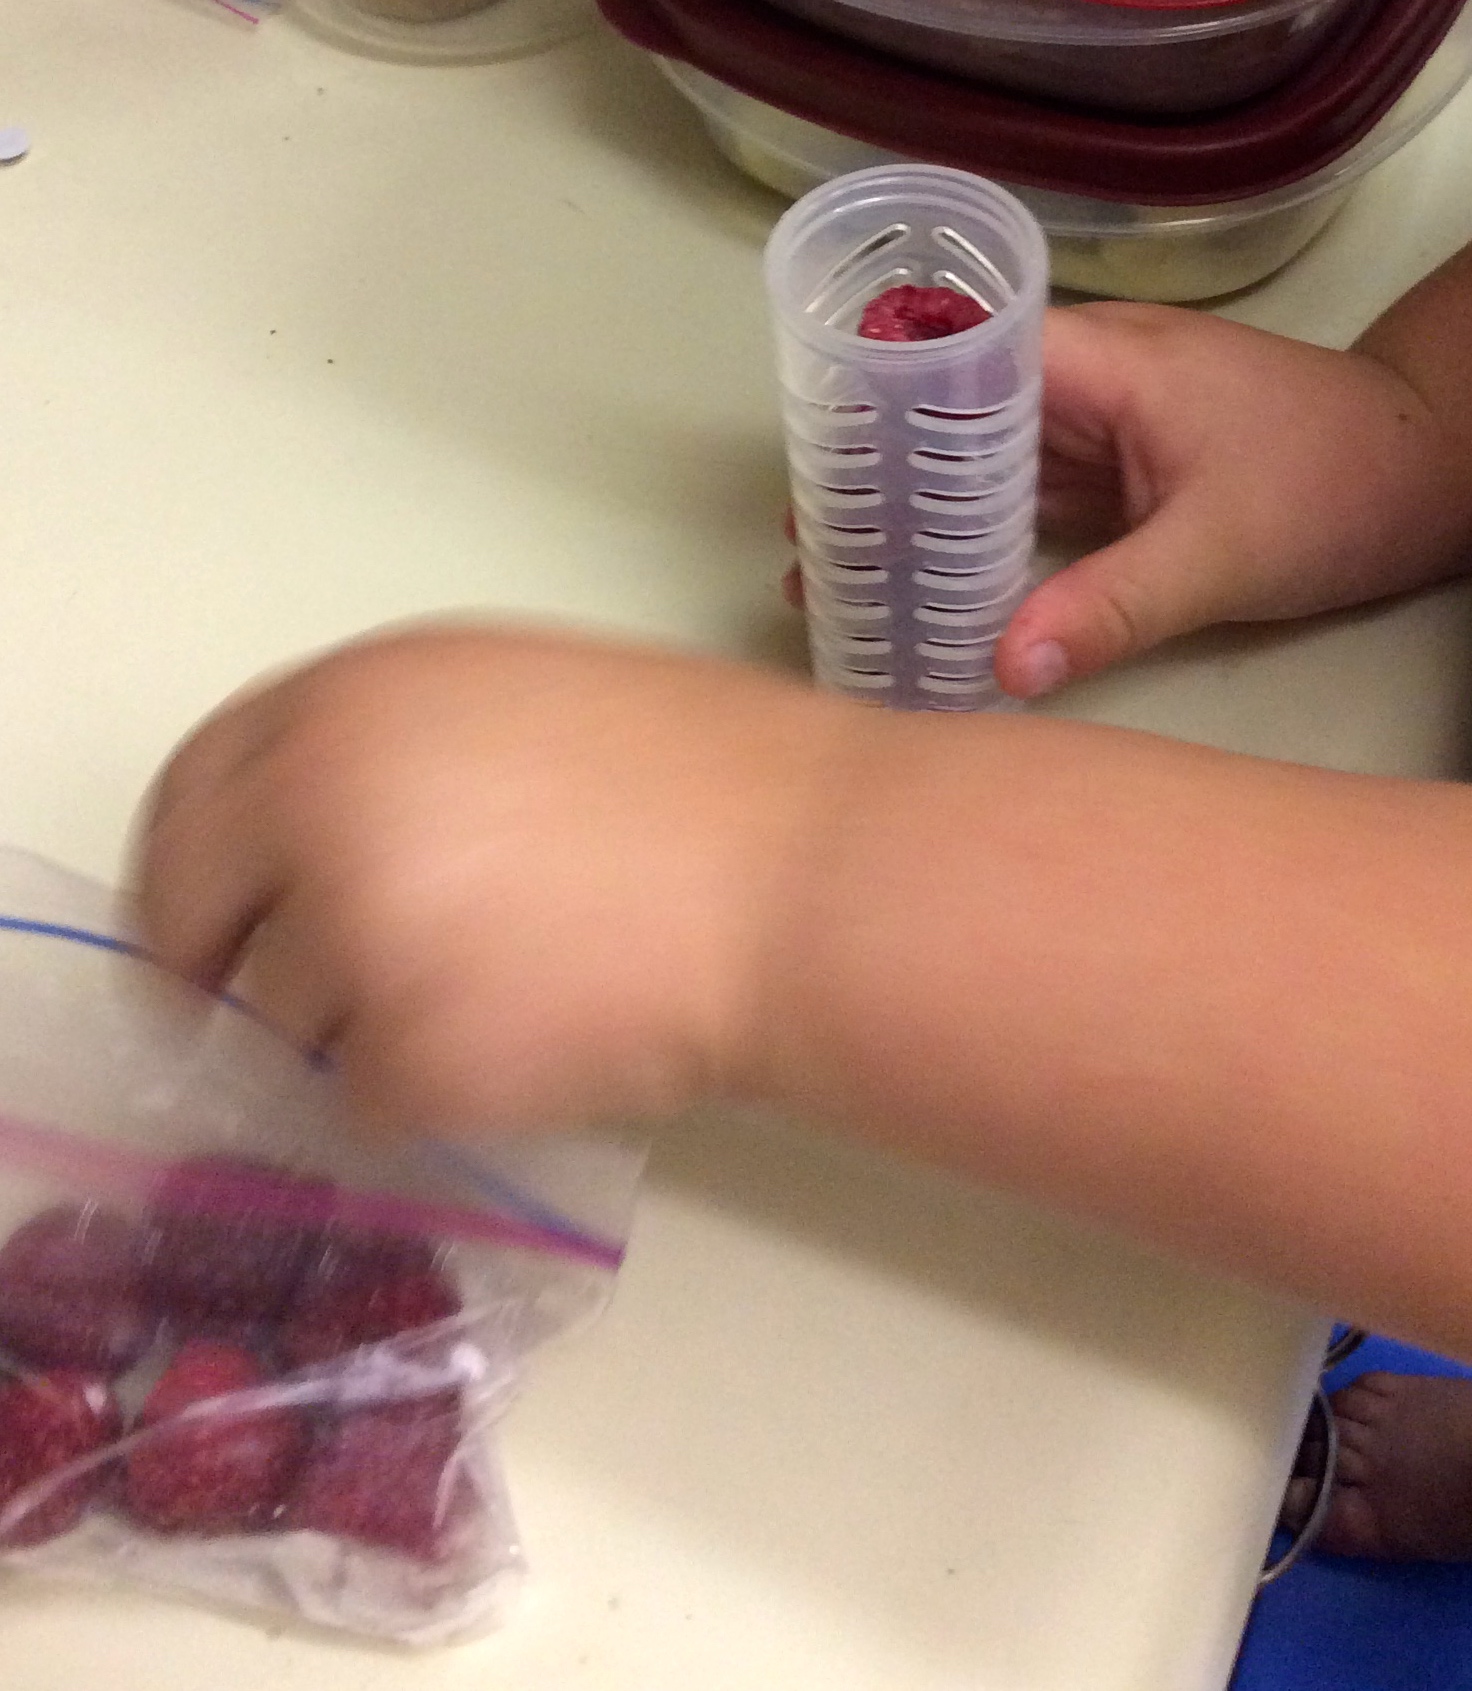
 As you can see from the photo, we buy a lot of fruit.