Jar Salads- Healthy Meal Prep!

I love salad. We eat a lot of veggies because of our Yasukochi Famil Farms CSA box subscription, and I’m always looking for new ways to serve veggies and keep them fresh.

Jar salads have already had their heyday a few years ago, but they are an amazing meal prep idea. Many of us have Eating Healthy and Losing Weight are New Year’s Resolutions- Jar Salads are a great tool.

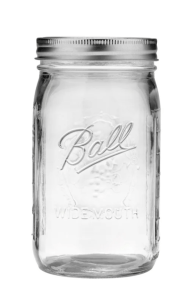
It’s quite popular to use wide Mouth quart Mason jars, but I’m a little clumsy, so I prefer Quart-sized deli containers.   I also find that Quart-sized deli containers are a little more economical and can easily be recycled when they wear out. And they stack really well in the fridge.

Whichever option you choose, here are some tips for perfecting your salad creations.

Whether you use a quart-size Mason Jar or a quart-size deli container, start with 2 tablespoons of dressing and build your salad.

Bottom Layer: The base where wetter ingredients go. Putting the wetter ingredients together helps keep the more delicate ingredients like lettuce crunchy. Ingredients for the bottom sections include: Dressing, salsa/sauce, tomatoes, guacamole, avocadoes, strawberries, citrus, and grains (rice, quinoa, pasta, farro).

Middle Layer: Beans, bell peppers, corn, seeds/nuts, onions, cucumbers, carrots, radishes, hard cheeses, sprouts, pickled veggies, hardboiled eggs, tofu, and other protein sources such as chopped chicken breast. Shredded cabbage or coleslaw blend/ shreds can also go on this layer.

Top Layer: Bite-size lettuce or other greens.


These salads can be really filling, depending on which ingredients you choose. 3-5 salads a week is a great start. Jar salads like this tend to last 5-7 days in the fridge, stored upright. 

Family Recipe: Making Your Own Cordials and Liqueurs

I love making cordial and liqueurs. I’ve been making them for over 20 years, and they can take a little time and effort, but I promise you the end result is definitely worth it.

A few weeks ago I posted on Instagram about a cherry cordial that I had just started.

I know a lot of people think of cherry cordial they think of those Queen Anne’s chocolates with the goo in the middle and the maraschino cherry. And I promise you this is not that.

Ingredients/Supplies:

750ml (aka a fifth) bottle of mid-grade vodka or brandy. I like vodka because it usually doesn’t have any flavor of its own or has a very mild flavor. You want mid-grade because you want something that tastes ok on its own, but isn’t too cheap or too expensive.

3lbs. Fresh, Ripe Fruit– I prefer cherries, strawberries, pineapple, chopped into bite-sized pieces. With cherries, poke holes in the cherries with a knife, or if you have a cherry pitter, pit your cherries(not necessary, but it’s cool). You can use most fruit, stone fruits are great! The only two that I’ve made that turned out gross were banana and kiwi.

Sweetener- About 1 cup, but it can vary based on your desired level of sweetness. See below.

A clean jar with a screw-on lid. I washed my mason jar (this size) in the dishwasher.

Directions:

Before you start: It is crucial that you wash and dry the jar and both pieces of the lid (band and flat lid). Everything needs to be clean and free of bacteria- otherwise, this can turn funky.

  1. Pack the fruit into the jar, and pour alcohol over the fruit. The fruit needs to all be covered by the liquor. Why? Otherwise, the fruit will rot. Ewww.
  2. Screw the lid on tightly and place the jar in a cool dry place- I use the cupboard over the fridge. Give it a shake about once a month. After about 6 months, give it a taste. It may need to sit for up to a year to fully develop the full fruit flavor.  Sometimes the alcohol will leech the color from the fruit. This usually happens with strawberries.
  3. Once the fruit flavor is imparted to your liking, strain the solids off, press the excess liquid from the fruit and discard the solids.
  4. Wash and dry the jar and lid. Add the liquid back to the jar and sweeten as desired. I use simple syrup, but you can use honey or straight white sugar. I like simple syrup because it easily incorporates with the liquid. Whereas if you use honey or plain straight white sugar, you can end up with the sweetener sinking to the bottom and not fully incorporating. I start with a 1/4 cup, mix, taste, and adjust as needed.
  5. Allow this mixture to mellow and age at least 6 weeks. At this point, your fruit liqueur/cordial is ready to drink!

How do I drink Cherry Cordial? Usually with coke, but it’s good with all sorts of mixers. It also makes a great gift!

My next liqueur recipe will be for my award-winning Irish Cream. This stuff puts Bailey’s to shame! I’ll post it later this week.