DIY Frugal Facial!

file9131343110988As the new year begins a lot of women (and men too) resolve to take better care of themselves, both physically and spiritually.

Today we’re dealing with the physical self-care, and one way to start is with a good facial.  It’s important to put your best face forward, and taking care of your skin will help!

I’ve listed DIY formulations that I like as well as links to professional products that I’ve used recently. Products that I use and recommend tend to have a high concentration of natural/botanical ingredients. I’m a huge fan of using products that have a basis in nature! Facials are a fun thing to do as part of a Ladies/Moms night in!

For your Ladies/Moms night in, have every one can bring their favorite product to share, or a quick trip to the beauty supply and the grocery store can get you everything you’ll need for a soothing facial.

1: Cleanse  your skin using a gentle cleanser in order to remove surface oil, dirt and germs. If you have oily or combination skin, use a foaming gel cleanser; if you have dry skin, look for a creamier blend that won’t dry out your skin. I like Dermalogica UltraCalming Cleanser

2: Exfoliate. Exfoliation helps remove dead skin cells that clings to your  skin. You can either use a mechanical exfoliator (something that is rough/ scrubby like oatmeal), or a chemical exfoliator (something that dissolves the oil and dirt that holds the dead skin cells to your skin, like the acid in pineapple or dairy products).

Natural exfoliatants include: Ground oats and pineapple. Grind oatmeal in your food processor and add 3 T. oats to 2T. Plain natural yogurt (I like greek yogurt because it’s nice and thick!) Apply to the face and remove after 10 minutes with a warm towel. Or put ¼ cup pineapple and 3 T. plain yogurt into the food processor and pulse. Once combined apply to the face and remove after 10 minutes with a warm towel.

If you don’t want to muss with mixing up your own, I like Valentia’s Eternal Youth Exfoliating Scrub.

At this point, you may wish to apply a serum (I like this vitamin C serum, it’s got all kinds of botanicals and humectants in it to help moisturize your skin) or spritz the skin with a nourishing toner. I like this Vitamin C Toner. Remember to  use anything that stings, burns or causes discomfort. That means NO SEA BREEZE OR ALCOHOL BASED ASTRINGENTS!

3: Mask. If you have oily or combination skin, try a clay-based mask; for dry or mature skin, look for a hydrating mask (with a creamy or gel texture).  Peel off masks are better suited for oily or combination skin (They can be a little harsh for those with sensitive skin).  Most beauty supply stores or drug stores sell masks in small sachets (like these) if you do not already have a favorite mask. Apply mask to the skin, being careful to avoid the eye area (this can lead to sagging skin). Leave mask on for 10 to 20 minutes or as directed.   Do not allow clay masks to dry completely.  The active ingredients only work as long as the mask stays moist.  Sprtiz the mask with a spray bottle of water to keep it moist once or twice. Remove the mask with warm towels and follow with a light spritz of toner.

Most facials end with a special moisturizer or lotion applied to the face.  Look for a moisturizer with SPF 15 or higher in order to protect your skin from the sun’s harmful rays. Don’t forget to apply moisturizer to your neck and décolleté. You can use SPF moisturizer in the evening too if your budget is too tight for two moisturizers. If you use a moisturizer that contains retinols (they are vitamin A derivatives), it’s imperative that you use an SPF during the day. Vitamin A can thin the skin and sensitize it, so you need extra protection from the suns rays.

If you wish to apply an eye cream, use only a pea sized amount and apply it with your ring fingers in a gentle patting motion.  Don’t drag your fingers across the gentle under-eye tissue.  It can damage the delicate skin in that area.

Screen Shot 2016-01-03 at 12.14.39 PM
My Recent At Home Facial!

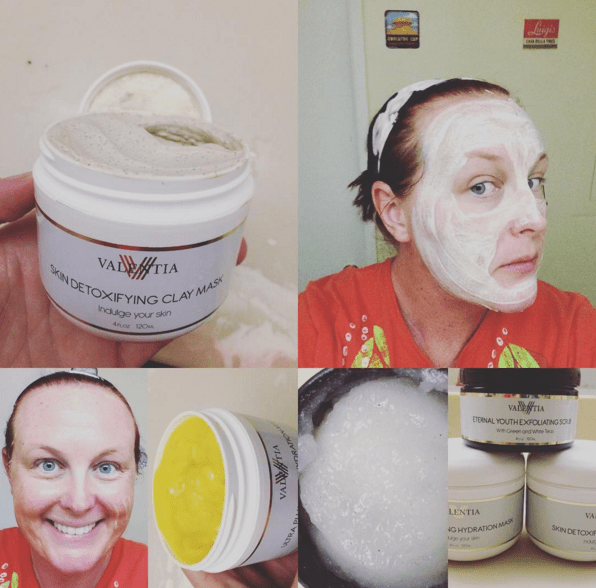
Here is my photo collage of my recent Spa retreat. Ok, so I was in the spare washroom after the kids were sleeping and hubs was vegging out.None the less, it’s nice to take 30 minutes or so out of your day once a week and pamper yourself!

Cooking Tutorial: Spaghetti Squash!

We eat a lot of veggies. That was one of the huge lifestyle changes we made a few years ago that has helped us maintain healthier weights.

One healthy swap we made was to spaghetti squash instead of pasta.  A lot of healthy/food swap websites like Hungry Girl tout Spaghetti Squash as a good substitute for carb-y noodles.

Here is a quick tutorial on making spaghetti squash.

Screen Shot 2015-11-04 at 8.56.33 AM

  1. Select a squash that is firm and unblemished. Not sure what they look like? Here is the wikipedia article all about the vegetable with a few pictures.
  2. Chop the end with the stem off. You’ll need a good sharp knife. I love our Henckels Meat Cleaver.
  3. Chop the squash in half. I do it length-wise, so it takes less time to cook in the oven.
  4. Take a spoon and scoop out the stringy guts and seeds.  Discard them.
  5. In a large glass baking dish, place the squash halves cut side down.  Pour a 1/2 cup of water into the bottom of the baking dish.
  6. Bake at 350 for 30-45 minutes or until the squash are fork tender (about the same feeling as a baked potato).
  7. Remove baking dish from oven and set the squash halves on a cutting board.  Allow to cool for 10-15 minutes, or until you can comfortable handle the vegetable.
  8. With a fork, “rake” the interior of the veggie.  The “meat” of the interior should flake off in long strings that resemble broken spaghetti.
  9. Once complete, discard the exterior of the squash.
  10. Toss the “spaghetti” with the sauce of your choice.

1 medium sized spaghetti squash serves 2-3 people, with a serving size of about 1 1/2 cups. It’s yummy with sauce (Spaghetti/red sauce, pesto, or even a cheesy sauce), or just a little butter and herbs. It’s a great way to get extra veggies into your diet, or if you’re Gluten Intolerant, it’s cheaper (and tastier) than GF pasta.

Later today, I’ll be posting a recipe that uses spaghetti squash as a main ingredient! With winter veggies starting to make an appearance in grocery stores and farmers markets, you’ll start seeing more and more squash!

Save Money with a DIY Pedicure (and look like you just stepped out of a spa!)

file4461303072393 (1)I love a good pedicure. Living in California, I wear sandals 300 days in a year. What I don’t love is paying $40-$60 each month for a good pedicure that lasts a month. Sure, sure, I could get a cheaper pedicure, but the polish would chip in a week and I’d look scruffy.

Here are some tips for a great at home spa pedicure.

Screen Shot 2015-10-09 at 10.00.45 AMYou don’t need a foot spa. I use a Rubbermaid Dish pan. I got it on Amazon for $9.00. It’s the perfect size for both of my big feet to fit into (I wear a size 11.5 shoe!) After I’m done with it, I just scrub it out with dish soap, a little beach, hot water, and dry it by hand. The best part is, you can store all of your pedicure supplies in the tub. You can also use a shallow pan or basin that both of your feet will fit in.

Use good quality tools. There are coupons regularly for Revlon and Sally Hansen beauty tools. In my pedicure kit I have:

Cuticle Remover, orangewood sticks, Polish remover, Emory boards, Buffing block, Cuticle nipper, nail scoop/nail cleaner, base coat, Top Coat, Colored polish, q-tips, cotton balls, alcohol, cuticle oil, foot scrub, callus remover, Mr. Pumice Pumi Bar, lotion. (I’ve included links to products on Amazon that I love!)

Now that you’ve gathered all the needed supplies here are the steps to a top notch pedicure!

Here are some simple steps that will have you pampering your feet in 30 minutes or less:
• Remove old polish using a gentle nail polish remover (if you have glitter polish on, check out this tutorial on getting that stubborn polish off).
• Clip and file your nails. The modern look for nails is to keep them on the short side with a straight shape and slightly-rounded edge. Remember to file in one direction- don’t saw back and forth, it will weaken and damage your nail.
• Soak your feet for about ten minutes in a dishpan or plastic bowl filled with warm water and a few drops of your favorite body wash or Epsom salts (which have excellent relaxing properties that will soothe your tired, aching feet)
• Apply a cuticle remover; after a few minutes, push back the cuticles gently using an orangewood stick. Use Cuticle nippers to remove dead skin around the cuticle bed. Clean under your toenails with the nail scoop/cleaner.
• Apply a callus remover liquid containing alpha hydroxy acids. Slip you feet into plastic bags for 5-10 minutes, remove the bags and use a pumice stone to remove dead skin cells.
• Use an exfoliating foot scrub on your feet and calves, remove with a hot, damp towel. I make up 3 or 4 per pedicure and keep them warm in a crockpot set to low.
• Massage feet and calves with a creamy hand lotion. Rub in for a couple of minutes in order to fully hydrate the skin, particularly if you are suffering from dry skin.
• Use some rubbing alcohol on a cotton pad on your nail beds to remove any lotion on your nails (The lotion will keep the polish from adhering to your nails) and apply a base coat. Adter the base coat is dry, apply two coats of your favorite nail polish color. Add nail decals, gems or paint flowers on your toes! Follow with a topcoat.

What kinds of frugal beauty regimens do you have?

Getting Crafty at Home: Play Dough!

This is another “Don’t eat this” recipe, but it’s oodles of fun to make and play with!

Play doh can get expensive, especially when the kids mix the colors or leave the lid off, and you are constantly having to replenish the supply.  The following recipe is super easy to make, and most of you have the ingredients in the house. I don’t recommend having the kids help you make this recipe.

Play Dough/Doh

Ingredients:

  • 1c flour
  • 1c warm water
  • 1/2c salt
  • 1 Tablespoon vegetable oil (you can also use melted coconut oil)
  • 1 Tablespoon cream of tartar (optional, but it makes the dough last longer)
  • Food Coloring (I use Wilton Gel Food Coloring– it’s less messy)

Directions:

  1. Mix dry ingredients together, set aside.
  2. In a sauce pan, combine water, oil, and food coloring, stir over low heat.
  3. Add dry ingredients and stir until combined. cook for 4-5 minutes, stirring continuously.
  4. Turn dough onto cutting board, and when warm to the touch, knead for 2-3 minutes until dough is elastic.
  5. Store in zip-loc bags or air tight containers.

I made 5 batches last week, each one a different color for Lil’ Man and his buddies to play with!

Screen Shot 2015-04-10 at 10.59.00 AMI’ve made other recipes, including one with conditioner and corn starch (smells nice, but it’s super sticky and gets stuck to EVERYTHING), and by far, this is my favorite recipe. It lasts a long time, doesn’t get moldy (that’s important), and doesn’t dry out INSTANTLY if you leave it out.


Screen Shot 2015-04-10 at 10.59.06 AMYes, the brown Play Dough looks like poop! But the kids don’t care- they were mostly concerned with having brown, so they could have dirt play dough for their cars.

You can also add glitter if you’d like. Some recipes recommend that you add essential oil or scent, but with littler kids, I do not recommend that, it will just encourage them to eat it.

Here are a few of the Play Dough toy sets that Lil’ Man loves:

We also use cookie cutters, a garlic press, potato masher, and whatever fun looking kitchen gadgets we find at the thrift stores or the 99 Cents Store.

Infused Water: Adding flavor to Hydration without adding Calories!

Recently the awesome people over at Tomoson and Big Easy Brands gave me the opportunity to try out the FlavFusion 26 Oz Infuser Water Bottle with Flip Top Sipper Lid. Most of you know I love water, but sometimes I need a little flavor. I’m over the powdered packets of drink mix- with my amazing pregnancy super taster status, they all have a weird aftertaste, and even my formerly beloved Mio!

When the bottle arrived, Lil’ Man and I washed it, and set to work. He chose raspberries to infuse our water. He grabbed a ziploc baggie out of the freezer, and told me he was going to, “Little Chef cook the waters.” Ok. Being the cool mom I am, I stood back and let the 4 year old do it. And I took photos.

IMG_2844
Step one: Disassemble the bottle (assistance from Mommy required)
IMG_2846_2
Step 2: Load fruit of your choice (fresh or frozen) to the little infuser basket.
IMG_2849
Step 3: Re-assemble the infuser basket into the lid, add water, and shake. We stored ours in the fridge for the fruit flavor to infuse.


What I love about the FlavFusion 26 Oz Infuser Water Bottle with Flip Top Sipper Lid is that it’s 26 ounces- more than just a few sips.

It’s BPA & Lead Free and made of PET Plastic – the Safest Plastic in Drinkware. No worrying about Toxins and Chemicals Seaping into your Drink. The bottle isn’t as rigid as some of the double walled water bottles in our collection, but this bottle is perfect for packing in our snack bag when we visit the zoo (I just toss a few ice cubes into the bottom of the bottle to keep the water cold).

So far we’ve enjoyed raspberry, strawberry, and pineapple. Tomorrow we will be enjoying green apple! It’s a great alternative to flavored waters that contain artificial flavors and colors. Plus, you can eat the fruit when you are done! You can use whatever fruit you have on-hand! It’s a great way to use up the last few lingering berries, orange segments, or mango tidbits.

I want to thank the great people over at Big Easy Brands and Tomoson for the chance to review this product. I was not financially compensated to review these products, however I received a FlavFusion 26 Oz Infuser Water Bottle with Flip Top Sipper Lid free to facilitate my review. I only recommend products and services that I feel may be a good fit for my readers.

Getting Crafty at Home: Frugally!

Screen Shot 2015-03-07 at 8.04.54 AMHenry loves Animals- All Kinds. So a few months ago we decided to do a craft that focused on his love of sea life. I try to do a craft with him 3-4 days a week in the morning after breakfast. And we do it on a budget. I spend no more than $10/month of craft supplies. I’ve posted my money saving tips for crafting at the bottom of this post.
Making our Aquarium took a few steps.
  1. Gather supplies: Construction paper, glue sticks, scissors, pipe cleaners, and googly eyes. We also use a lot of glitter glue.
  2. Cut out “water” and glue/paste it to large piece of craft paper.
  3. Then we selected 4-5 sea animals the he likes, made them out of construction paper (and pipe cleaners for the crab!), drew faces on each animal based on what the animals do (mean face for crab because he pinches, big open mouth for the hungry piranhas). We made a few of the sea animals 3-d (anemones and jellyfish and crabs legs and pinchers).
  4. If you aren’t sure what kinds of sea creatures to make, check out Octonauts (they are on YouTube), or other nature shows for kids (we also like Wild Kratts). There are tons of cool books about undersea creatures aimed at kids at your local library.
 If your kids aren’t into undersea animals, here are a few other fun crafts with animals:
Make a goldfish bowl: Start by pasting goldfish to fishbowl shaped paper and use water colors to paint the water in the fish bowl.
We also love to make what Henry calls “Going to the zoo”: Draw animal cages on paper or make them out of pipe cleaners or stick pretzels and put different animal crackers in the cages. We do this before a zoo trip. I try to keep 2-3 zoo maps with our craft stuff too, so we try to find the animal cracker animals on the zoo map too.
10918948_10153024113906061_2463789217471650233_oCaterpillars: I cut out wiggly caterpillars from green construction paper. Then we glue pom poms to his body (because caterpillars are fuzzy), add googily eyes and draw a mouth. Sometimes we add antennae.
To make our crafts more educations, during our craft time, we talk about the sounds that the animals make, where they live (habitat), what do they eat (meat, plants, both?).
Sometimes we make Monsters. This is a great opportunity to talk about different body parts, and how people and animals are all different. Here is a photo of out Monster assembly line:
10857190_10153014987651061_2298967290518812755_o
We try to do a craft each day: drawing, painting, cutting paper into shapes. These activities help foster his creativity and imagination, and they help hone his motor skills. To keep Henry engaged, I select crafts and activities based on subjects that are of his interest.
Tips to keep daily/weekly crafting frugal: 
  • We re-use all kinds of stuff: paper towel or toilet paper rolls for kaleidoscopes or pirate spyglasses, magazines for pictures in collages, cardboard egg cartons make caterpillars, clamshells, baby chickens, or spiders.
  • Dollar tree and 99 cents only have great selection of craft supplies like construction paper, glue and glue sticks, googly eyes, jingle bells, pipe cleaners.
  • I try to make a batch of playdoh each month. I use glitter and food coloring to make the playdoh a little more fun. We use playdoh to crafts and creative play. I’ll post my Fool Proof Play dough recipe later this weekend.
  • Stuff around the house that isn’t strictly a craft supply can be used: cupcake liners make flowers or butterfly wings, q-tips, sponges (cut them up to paint), potatoes (stamping or painting).
  • Using stuff from nature: Henry loves the little “pokey balls” from the Chinese elms. Right now they are porcupine puffer fish, but in the past they’ve been all kinds of fun stuff. Paint leaves, use cat tails as paint brushes, gather small sticks and use them to make houses, stack them up, or paint them to use another time.


Essential Oils: Taking care of yourself naturally (and a review)

Having spent a few years as an esthetician, I’ve seen and heard of people using all kinds of weird things on their skin (like the lady who scrubbed her face with Comet and used Listerine as toner), but the one thing I’ve always recommended for most people is using Essential Oils in their homes for skin and body care.

Unfamiliar with Essential oils? Wikipedia defines them as, “An essential oil is a concentrated hydrophobic liquid containing volatile aroma compounds from plants.”

Very few oils are ok to use neat (straight out of the bottle), most need to be diluted with another compound to be safety used on the skin. I like essential oils because not only do they smell great, but many can help with health issues.

I wanted to highlight a few essential oils and give you a few ideas on how you can incorporate them into your life. Because you don’t need many drops for most uses, one bottle will last you a while. And most of the other ingredients for the recipes below include items that you may already have in your home! Thanks to InstaNatural and Tomoson, I was able to try Lavender and Peppermint  essential oils for free recently.

Screen Shot 2015-03-01 at 7.53.40 AMLavender: It is great for helping you relax, and to lull you to sleep.

Linen spray is awesome for helping you unwind after a long day. Spray your pillows and bedclothes about 20 minutes before bed. Take a few deep breaths when you get into bed and you’ll be sleeping like a teenager (we all know that babies don’t sleep well) in no time. I like mixing 20 drops Lavender oil with 1 part vodka (the cheap stuff or rubbing alcohol), and 2 parts distilled water. Pour into a spray top bottle (like these).

Relaxing body moisturizer is wonderful way to calm down a child that doesn’t want to go to bed. Just mix 3 T. of room temp. coconut oil with 10-20 drops of Lavender oil. Let the mixture sit overnight. Scoop out a little bit and work it between your hands until it’s melted and massage it onto your clean kiddo. I do this for Lil’ Man on those days when he just won’t go to sleep. I rub it onto his back, shoulders, and chest. By that time, he’s pretty calm and ready for bed!

The InstaNatural Lavender oil was very mild- Perfect for use right after a bath on Lil’ Man’s back and feet. He slept for 13 hours, I think that might be a new record!

After Lavender, my next favorite essential oil is Peppermint.  It’s very invigorating, and clean smelling.

Screen Shot 2015-03-01 at 7.53.50 AM
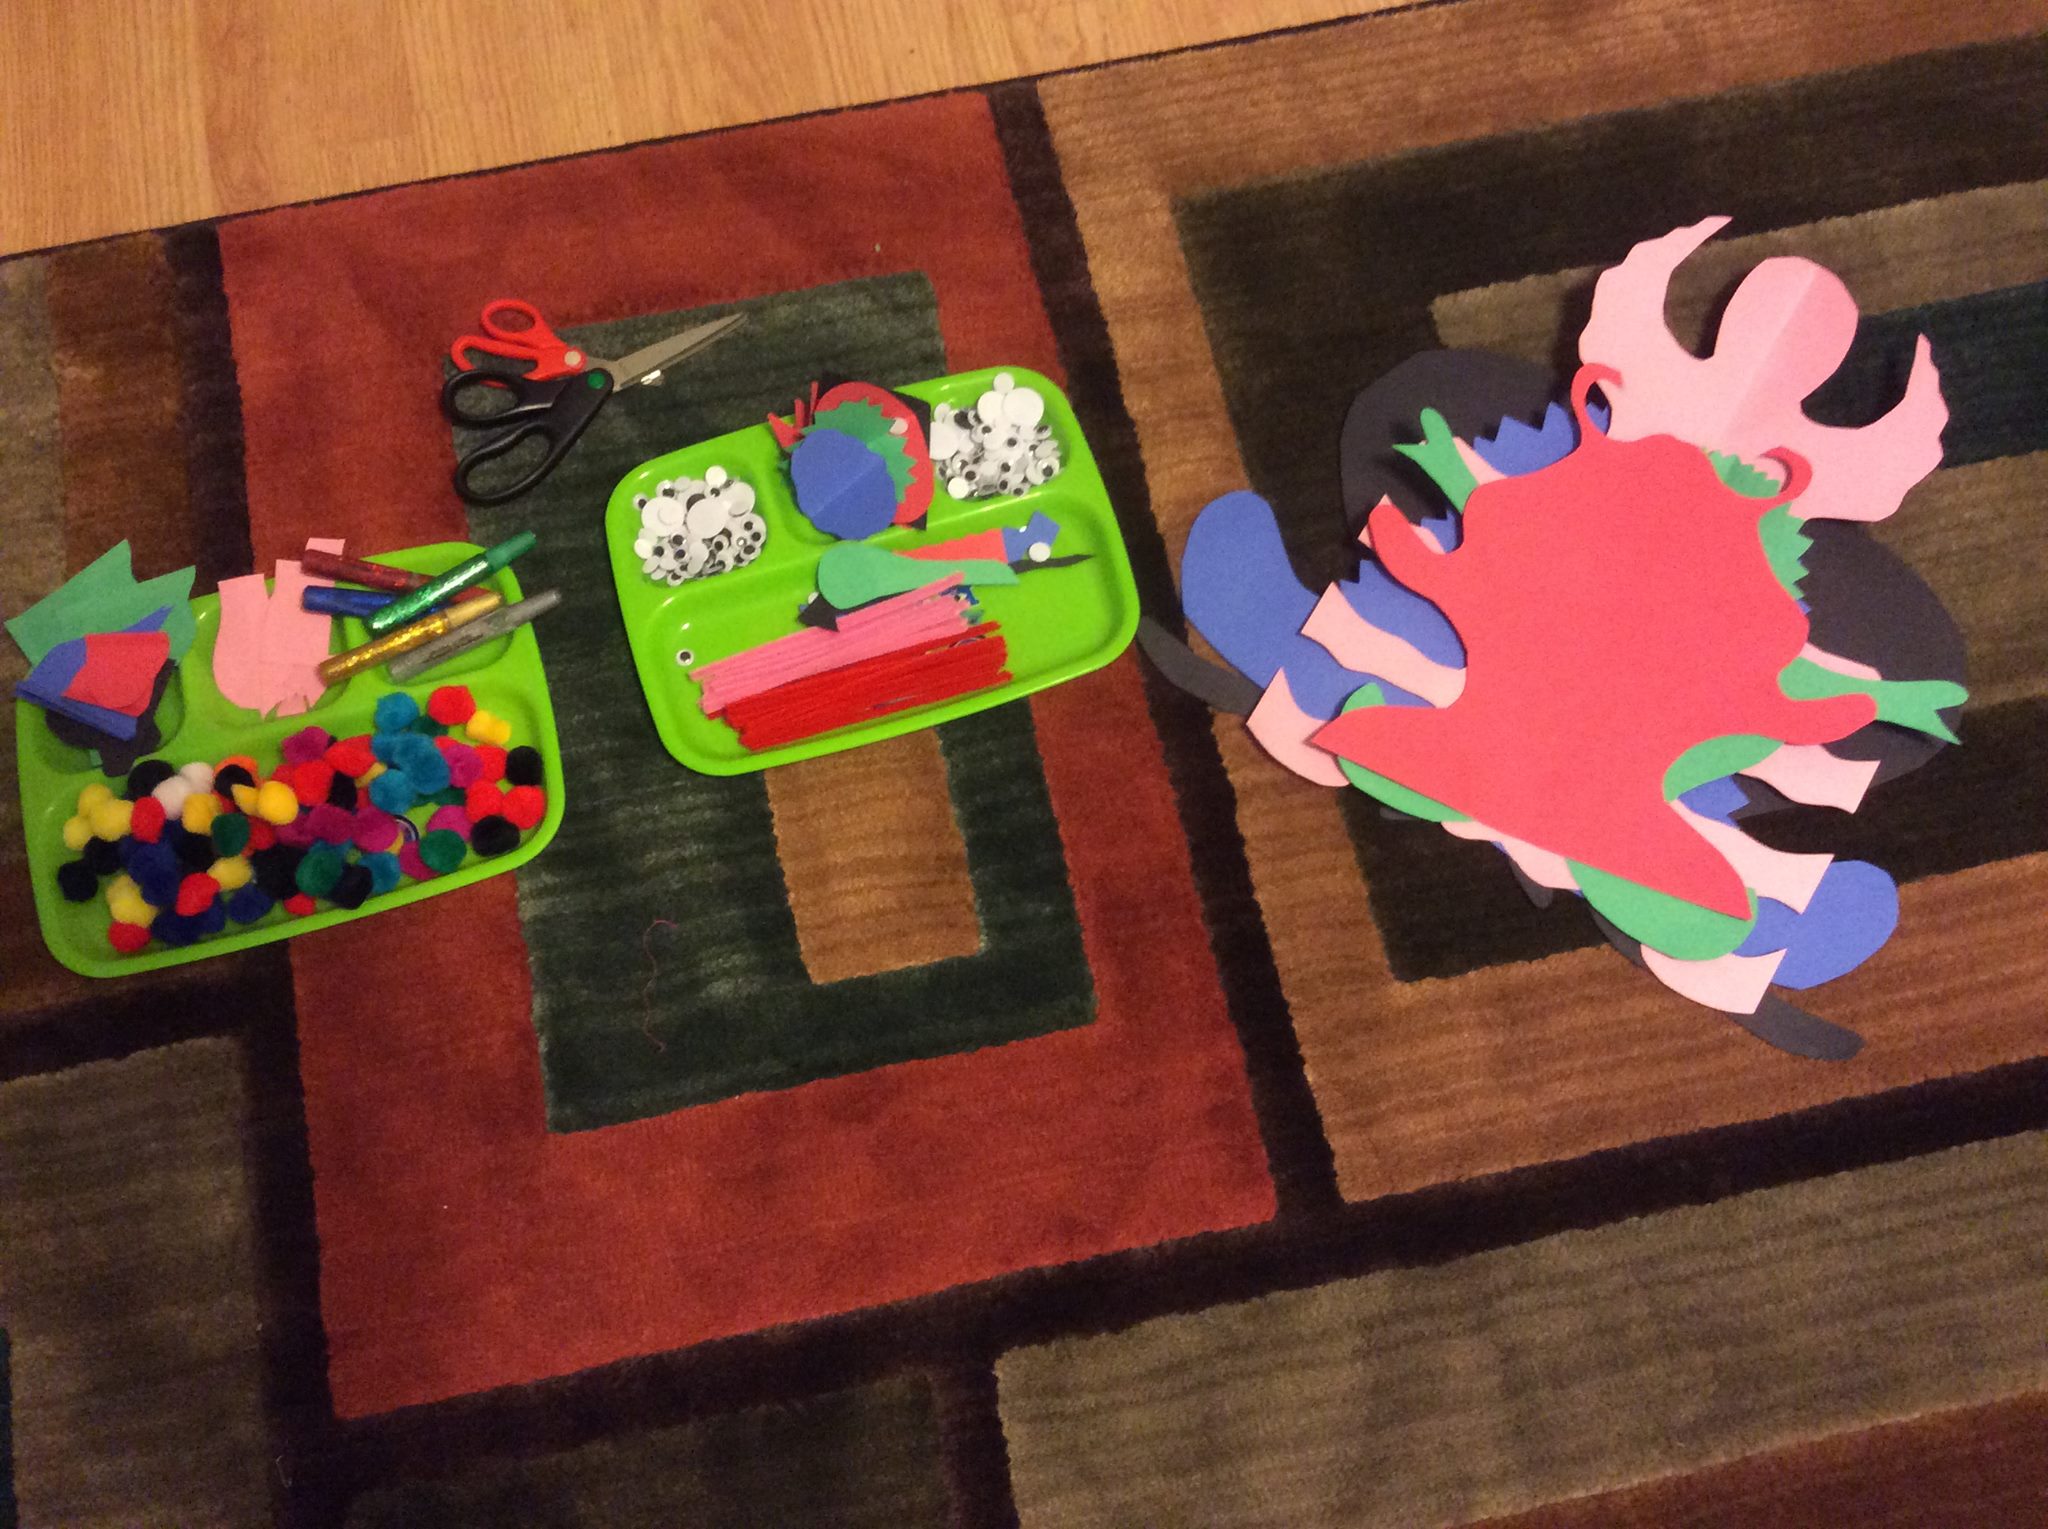
Body Scrub can be made with any Essential Oil, but I love using Peppermint oil. Mix 1 cup sugar (white or brown, your choice), with 1/4 c up of room temperature shea butter or coconut oil, and 20 drops of essential oil. Mix together and store in a jar with a tight fitting lid.  You can also use salt, but it’s a lot more abrasive.

Decongestant A simple DIY trick to help release that awful stuffy nose you or the kiddos have is to drop a few drops of Peppermint Oil into a diffuser (like this one) and breathe deeply. Peppermint oil really helps you breathe when you are all congested. You can also drop a few drops into a basin of very hot (steaming) water, put a towel over your head, lean over the bowl (using the towel as a tent) and breathe in the steam. You’ll be feeling better in no time! If you have very sensitive eyes or skin, I’d avoid the “steam tent”.

I used theThe InstaNatural Peppermint oil this morning! I whipped up a batch of peppermint scrub this morning, using kosher salt and coconut oil in a repurposed cream cheese tub. I’ll be using it to give my self a pedicure tonight. The abrasiveness of the kosher salt will really help exfoliate the dry, rough spots on my heels. I’m breathing clearly just from smelling the oil while mixing up my batch. I’ll report back with an update after my pedicure tonight!

I want to thank the great people over at  InstaNatural and Tomoson for the chance to review these essential oils. I was not financially compensated to review these products, however I received a bottle of each oil free to facilitate my review. I only recommend products and services that I feel may be a good fit for my readers.

When being frugal isn’t easy…

"Hot Diggity Dog! .25 off a 48 pack of Toilet Paper!" Courtesy : thegraphicsfairy.com
“Hot Diggity Dog! .25 off a 48 pack of Toilet Paper!” Courtesy : thegraphicsfairy.com

Being Frugal ain’t easy sometimes, kids. I won’t lie.

It’s not always carts of free groceries, double coupons, and mail boxes fulla rebate checks.

Sometimes it’s getting stuck with a cart full of free food that’s yucky (once I bought a bunch of dinner kits that were free after coupon, but they tasted like what I imagine dog food resembles), a newspaper full of .35 off a huge package of already very expensive toilet paper, and an empty mail box (or a mailbox full of bills-Even Worse!).

These are all experiences that every couponer and frugal person goes through.

How do I keep my head up during the hard times were it seems like no matter how I try, money is just pouring out of my hands, and I can’t get a handle on it?

  1. This too shall pass! It’s hard to believe, but everyone goes through it. Even frugal folks like me!
  2. Count your blessings. And while you’re at it, inventory your pantry, fridge, and other stockpiles. Know what you’ve got on hand, and find ways to use up what you’ve got- That will help you get spending under control.
  3. Make a plan. How can you: Repair, upcycle, use up or do without? Don’t forget local community resources like freecycle, Craigslist free section, and your local branch of the Buy Nothing Project to help you find what you need.
  4. Forget about the Joneses.  Everyone wants what’s new, bigger, better, faster. Get out of that mindset. Forget about what your friends and neighbors have, and focus on what matters. Family, friends, and being a good person (seriously!). If you ever find yourself thinking “What kind of dining set defines me as a person?” maybe it’s time to re-assess priorities.
  5. Don’t spend money. For some people, shopping is catharsis. Buying new things makes you feel new, but at the end of the day, how did all this stuff get paid for? If you gotta get out and shop, check out a local thrift store. Support a charity and save some money.

How do you keep your head above water when living the frugal life gets hard?


DIY: Stuff Animal Bean Bag Chair

Lil’ Man has a lot of stuffed animals. He’s got some in a hammock like this one, but it’s not enough space.

IMG_1812-1024x757Witness the 45 gallon Sterilite tote on wheel crammed full. Now We’ve weeded out the ones he doesn’t play with or like, but there are still a lot.

I’ve been looking online for better storage methods, and I came upon a few sites suggesting a “bean bag” chair.  You can buy a bean bag chair cover for about $20, or if you’ve got a little craftiness in you, you can make one of your own for a lot less.

Basically you are making a large drawstring pouch.

All you need is:

  • 3 yards of 60 inch wide fabric or a twin sized duvet cover (scour thrift shops)
  • 3 yards 1 inch wide(or wider) grossgrain ribbon
  • Pins, scissors, sewing machine, thread

IMG_1809-1024x764I used a queen  sized duvet cover that I found at Amvets. I washed it and turned it inside out. I trimmed it down to 86(width) x60 (length). I kept the top with the snaps (the 86 inch side), and one adjoining side.


Screen-Shot-2014-09-26-at-11.44.17-AM1

IMG_1823

If you are using fabric, fold the fabric in half, the long skinny way, so the selvedges (that’s the edges that are already finished-sometimes they have writing on them) are at the top  and  bottom of what will become the bag.

Now the the bag is sewn together, fold over the top and stitch it down. This is called a casing. You’ll need to leave a gap of about 1 inch, so that you can thread the ribbon through the casing.

Here is what the casing looks like on the other one I made:

Because my duvet already had a finished top, I snipped little holes in the top casing and threaded my ribbon through, using the safety pin. Attach the ribbon to your safety pin and guide through the casing.

Then, I turned it right side out, stuffed it full of friends,  pulled the drawstring tight, and it was ready to be enjoyed as a bean bag chair in Lil’Man’s room in a corner with some books.

IMG_1817-1024x764
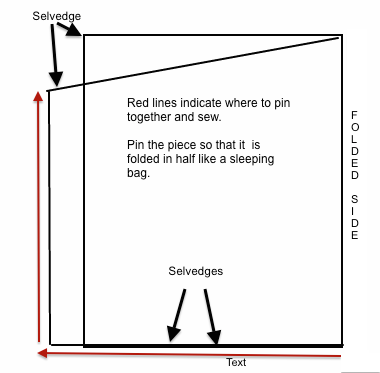
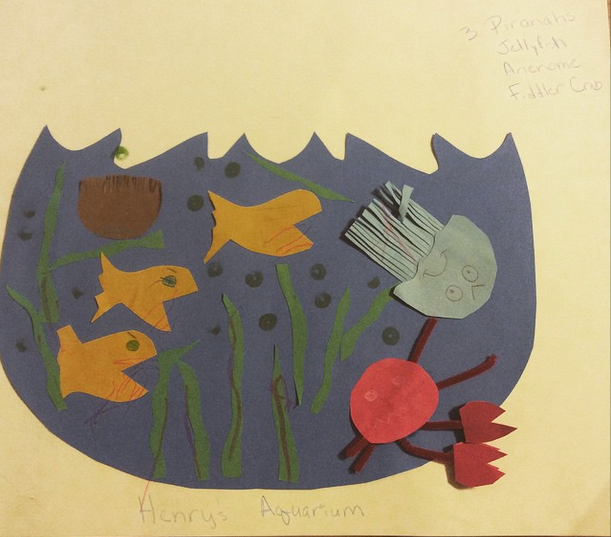
As you can see, Woody and Salmon Fish are kicking back.

There are tons of tutorials. Many call for a piece of mesh to be sewn in, but it’s a PITA to sew down (it moves even when pinned down), so I opted not to do that. and really, if you need to get into it, just open the drawstring and start fishing for toys!

You can also use an old top sheet in whatever size you have, just cut it down to fit. Our toy bag chair is large because of all of the toys Lil’ Man has, but if you’ve got less, feel free to make the bag smaller. Conversely, if you have more, make it bigger!