Family fun at The San Diego Kids Expo & Fair (and a giveaway)

KIDS fESTSummer means tons of family fun all over San Diego! One of our favorite is the The San Diego Kids Expo & Fair and it’s right around the corner! It’s a
fun springtime fair complete with music, dance, sports demos, games, cooking classes, plus a NEWLY added Playland that kids will LOVE!

The spring San Diego Kids Expo & Fair is happening at the Del Mar Fairgrounds on Saturday April 25 and Sunday April 26 from 10am to 5pm.

I took kiddo last year and we had a blast. There is tons of fun stuff to see and do, including two of our favorite things: The play area sponsored by Playtown and Free Kids Workshop by Home Depot. If you’ve got a kiddo that loves princesses, you’re in luck, there will be character photo ops too!

Kidsfest 1 Kidsfest 2In addition to fun activities indoors, there are all kinds of fun activities and rides outdoors, including a zip line, Human Hamster Ball, Water Rollers, Laser Tag, Xorbing Balls, Body Bubbles.

You can learn all about The San Diego Kids Expo & Fair on their website, including hours and ticket prices.

Giveaway Time!! The awesome peeps over at the The San Diego Kids Expo & Fair have generously offered a family pack which includes two adults tickets and unlimited children under age 12, valid for either Saturday April 25 or Sunday April 26. It’s easy to enter! Just leave a comment letting me know why you are excited to win this giveaway. I’ll choose a winner on April 18th in the evening!

Getting Crafty at Home: Play Dough!

This is another “Don’t eat this” recipe, but it’s oodles of fun to make and play with!

Play doh can get expensive, especially when the kids mix the colors or leave the lid off, and you are constantly having to replenish the supply.  The following recipe is super easy to make, and most of you have the ingredients in the house. I don’t recommend having the kids help you make this recipe.

Play Dough/Doh

Ingredients:

  • 1c flour
  • 1c warm water
  • 1/2c salt
  • 1 Tablespoon vegetable oil (you can also use melted coconut oil)
  • 1 Tablespoon cream of tartar (optional, but it makes the dough last longer)
  • Food Coloring (I use Wilton Gel Food Coloring– it’s less messy)

Directions:

  1. Mix dry ingredients together, set aside.
  2. In a sauce pan, combine water, oil, and food coloring, stir over low heat.
  3. Add dry ingredients and stir until combined. cook for 4-5 minutes, stirring continuously.
  4. Turn dough onto cutting board, and when warm to the touch, knead for 2-3 minutes until dough is elastic.
  5. Store in zip-loc bags or air tight containers.

I made 5 batches last week, each one a different color for Lil’ Man and his buddies to play with!

Screen Shot 2015-04-10 at 10.59.00 AMI’ve made other recipes, including one with conditioner and corn starch (smells nice, but it’s super sticky and gets stuck to EVERYTHING), and by far, this is my favorite recipe. It lasts a long time, doesn’t get moldy (that’s important), and doesn’t dry out INSTANTLY if you leave it out.


Screen Shot 2015-04-10 at 10.59.06 AMYes, the brown Play Dough looks like poop! But the kids don’t care- they were mostly concerned with having brown, so they could have dirt play dough for their cars.

You can also add glitter if you’d like. Some recipes recommend that you add essential oil or scent, but with littler kids, I do not recommend that, it will just encourage them to eat it.

Here are a few of the Play Dough toy sets that Lil’ Man loves:

We also use cookie cutters, a garlic press, potato masher, and whatever fun looking kitchen gadgets we find at the thrift stores or the 99 Cents Store.

3 Ingredient Chocolate Cake!

I love this cake recipe. It’s quick, easy, and it disappears so quickly! And the best part, it’s loaded with pumpkin, so you don’t have to feel bad about serving it to your family. It’s easy enough that you can let even the littlest chef help you prepare it without risking a total cake failure!

Chocolate Chocolate Chip Pumpkin Cake

Screen Shot 2015-04-10 at 10.50.18 AMIngredients:

  • 1 Cake Mix (chocolate or Devil’s Food) I prefer the mix with pudding it it- the cake is moister
  • 1 small (approx 15 oz.) can of pumpkin
  • 1/2-1c chocolate chips (I use semi-sweet)


Directions:

  1. In a large mixing bowl combine cake mix and pumpkin. I used an electric mixer, but you can always mix it by hand.
  2. Add chocolate chips, stir to combine.
  3. Bake as directed on cake mix packaging. If making cupcakes, do not use cupcake liners, use spray release. Remember, there is no added fat in the recipe, so you’ll need the spray release, or you’ll be picking muffin-y goodness off the cupcake liners!

Screen Shot 2015-04-10 at 10.50.28 AMThis is the yummiest, fudgiest cake you’ll ever have. This is a great cake to take to potlucks!

  • Vegan Option: Use a vegan Cake Mix, and Vegan Chocolate chips
  • GF option: Use a GF cake mix

It was so good that we snuck some cupcakes for breakfast!Screen Shot 2015-04-10 at 10.50.41 AM

We also shared it with our friends at a play date! Even our pickiest eaters gobbled up the cupcakes!

Beer Bread: Quick, Yummy Food!

Lil’ Man and I love to cook together.  Recently I was fortunate enough to receive a Danish Dough Hook from the nice folks over at Kitchen Simple and Tomoson. Since it’s been pretty warm recently, we decided to skip making a complicated recipe that would have us in the kitchen for a long time. We opted to make beer bread!
Screen Shot 2015-03-31 at 8.56.32 AM

Beer bread is an amazing, easy to make, versatile food. It can be made to go with any meal, or it can be a meal itself! For this batch, we used Butterscotch Beer (it’s actually soda), butterscotch chips, and semi-sweet chocolate chips,  in addition to the basic ingredients below.

It was a very sweet, light dessert bread. Lil’ Man ate 3 pieces before the bread cooled!

If you’ve never used a dough hook before, it’s a kitchen tool that’s great for mixing up bread, cookies, even batters! It has a long, sturdy handle, and a wire loop that helps incorporate the ingredients. It’s a great addition to any kitchen, whether you are an every day baker, or only bake during the holidays. If you’ve got a cook in your family, they make a great gift too!

The basic recipe is as follows:

Ingredients

  • 3 cups self rising flour (sifted) (Or if you don’t have self rising flour, mix together: 3 cups flour (sifted), 3 teaspoons baking powder,1 teaspoon salt)
  • 1/4 cup white or brown sugar
  • 1 (12 ounce) can beer or other carbonated beverage- See below*
  • ½ stick melted butter

Directions

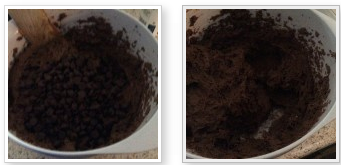
  1. Sift the flour and sugar together.
  2. Slowly pour the liquid over the dry mixture and mix until combined. We used the dough hook, but you can use a strong wooden spoon.
  3. Pour dough into a greased Dutch oven or a greased bread pan and bake at 350 degrees for 45 minutes-1 hour or until when inserted, a knife comes out clean.

You can add any one of the following before your mix it together:

½ cup of the any of the following (feel free to mix and match).  If you want more “stuff” in your bread, feel free to add more than 1/2 cup:

  • Dried fruits (make sure it’s bite sized!)
  • nuts
  • chocolate chips or any other kind of chips (white chocolate, cinnamon, butterscotch)
  • shredded or cubed cheese
  • chopped onions (raw or carmelized)
  • shallots
  • green onions
  • chives
  • To make it a main dish, pour 1/2 of the bread dough into the pan, pour in a layer of cooked meat (I like taco seasoned beef, or cut up/shredded cooked chicken breast cooked with ranch dressing powder or herbs), then top with the remaining bread dough. Bake as directed.

Any of the following spices are delicious (add to your taste):

Cinnamon, nutmeg, apple pie spice, Pumpkin pie spice, Italian seasoning, Mural of Flavor, garlic powder, onion powder. Add the herbs/spices into the flour before you add the liquids.

If you want to make a sweet dessert bread, make a crumble to top the bread with prior to baking:

  • ½ C. flour
  • ½ c. brown sugar
  • ½ c. softenened butter
  • Spices (I like Apple Pie or Pumpkin pie spice)
  1. Combine all of the ingredients together.
  2. Top the uncooked bread with this mixture.
  3. Bake as directed as directed above.


*For a different texture, try different varieties of soda (fruit or cream sodas are great), soda water, light beer, Guinness or other dark beer. Match the type of beer with the other added items.  When using soda, add 2 teaspoons of yeast so you get the correct rise (beer contains yeast!).  Feel free to use whatever beer or soda you have in your house!  I don’t recommend using Root Beer- it makes the bread bitter.  Don’t use diet soda!  Baking with artificial sweeteners other than Splenda can make the bread bitter.

Yummy combos:

  • Orange soda goes great with chocolate chips and orange zest.
  • Light beer, sharp cheddar cheese, Mural of Flavor and caramelized onions are great together.
  • Lighter beer (I like Stella Artois), Italian Seasoning, shredded mozzarella cheese or string cheese cut into cubes, and chopped dried tomatoes.
  • Chocolate stout beer, dark chocolate chips, dried cranberries.
  • Sam Adams Summer blend with apple or pumpkin pie spice, chopped dried apples, and dried cranberries.


I want to thank the great people over at Kitchen Simple and Tomoson for the chance to review this product. I was not financially compensated to review these products, however I received a Danish Dough Hook for free to facilitate my review. I only recommend products and services that I feel may be a good fit for my readers.

Clothing Swaps: Family Frugality at it’s best!

VRj6VzFtGot piles of clothes stashed in a closet that the family has outgrown or are no longer worn? Have you thought about participating in a clothing swap? For those who aren’t familiar with clothing swaps, it’s a pretty cool concept:

Gather friends, family, co-workers and everyone brings their unwanted clothes, shoes, and accessories. For each item you bring, you receive 1 ticket. Each ticket is exchangeable to another piece of clothing, accessory, or pair of shoes. You bring ten items, you get ten tickets, you leave with ten items.

You can do kids clothing, women’s, men’s, whatever your group of friends is interested in doing.

There are a bunch of already established clothing swaps in San Diego.

Kinders Keepers is a fun clothing swap group in San Diego that meets quarterly.  You can learn more on their Facebook page here.

The Sonrise Church in Santee has a clothing swap too! One for kids clothes, and another for women’s clothing. Miss Charity’s Closet & Little Blessings Boutique 2nd Saturday of every month at 9:00 am
Contact Charity Murphy for more info clmurphy71@gmail.com

Not strictly clothing related, there is the San Diego Really, Really Free Market. They also meet about once a quarter in various areas around town.

Also not strictly Clothing Related, but one of my favorite give back orgs is the Buy Nothing Project. There are chapters all over the US, and we have a few here in San Diego.  I’ve been able to share clothes, panty staples we no longer needed, Lil’ Man’s outgrown toys and clothes.

If you don’t want to wait for an upcoming swap, check out consignment or resale shops! Just last week, I took some items over to Conceptions Children’s Resale. It’s a nice resale shop in Santee, I take a lot of Lil’ Man’s outgrown clothes and toys. In exchange I get 50% of the price they will sell the items for when I chose to receive Store Credit. Since #2 is on the way, I’ll usually take store credit. You can keep credit on file too. I’m saving mine up! There are tons of kid’s resale shops across the US, I bet there is one close to you. There are consignment or resale shops for adults too!

And of course… don’t forget Freecycle. Do a quick google search for Clothing swap + the name of your city.

What are some of your favorite money saving strategies when it comes to keeping the family clothed?

Review: Baby Nautical Month Stickers!


If you’ve got friends with babies, then I’m sure you’ve seen these. Baby Month Stickers are the latest and greatest in photo props for your little.

Screen Shot 2015-03-24 at 7.49.24 AMEach month, you peel one of the stickers off and affix them to your little friend, snap some photos and viola-  more super cute photos for the baby book! They are tear proof and water proof too, so a drooly, active baby won’t cause any damage!

iCustomLabel sent me a set of the Nautical Baby Month Stickers and I can’t wait to try them out when Lil’ Miss is born.  iCustom Label also sells pregnancy stickers if you are photographing
your “bump” each month as well.

iCustomLabel sells over 100 different types of stickers from sweet and simple to superhero stickers, so there is sure to be something for everyone! And they start at just $10/set!

I want to thank the great people over at iCustomLabel and Tomoson for the chance to review this product. I was not financially compensated to review these products, however I received a four pack of Baby Nautical Month Stickers free to facilitate my review. I only recommend products and services that I feel may be a good fit for my readers.


Getting Crafty at Home: Frugally!

Screen Shot 2015-03-07 at 8.04.54 AMHenry loves Animals- All Kinds. So a few months ago we decided to do a craft that focused on his love of sea life. I try to do a craft with him 3-4 days a week in the morning after breakfast. And we do it on a budget. I spend no more than $10/month of craft supplies. I’ve posted my money saving tips for crafting at the bottom of this post.
Making our Aquarium took a few steps.
  1. Gather supplies: Construction paper, glue sticks, scissors, pipe cleaners, and googly eyes. We also use a lot of glitter glue.
  2. Cut out “water” and glue/paste it to large piece of craft paper.
  3. Then we selected 4-5 sea animals the he likes, made them out of construction paper (and pipe cleaners for the crab!), drew faces on each animal based on what the animals do (mean face for crab because he pinches, big open mouth for the hungry piranhas). We made a few of the sea animals 3-d (anemones and jellyfish and crabs legs and pinchers).
  4. If you aren’t sure what kinds of sea creatures to make, check out Octonauts (they are on YouTube), or other nature shows for kids (we also like Wild Kratts). There are tons of cool books about undersea creatures aimed at kids at your local library.
 If your kids aren’t into undersea animals, here are a few other fun crafts with animals:
Make a goldfish bowl: Start by pasting goldfish to fishbowl shaped paper and use water colors to paint the water in the fish bowl.
We also love to make what Henry calls “Going to the zoo”: Draw animal cages on paper or make them out of pipe cleaners or stick pretzels and put different animal crackers in the cages. We do this before a zoo trip. I try to keep 2-3 zoo maps with our craft stuff too, so we try to find the animal cracker animals on the zoo map too.
10918948_10153024113906061_2463789217471650233_o
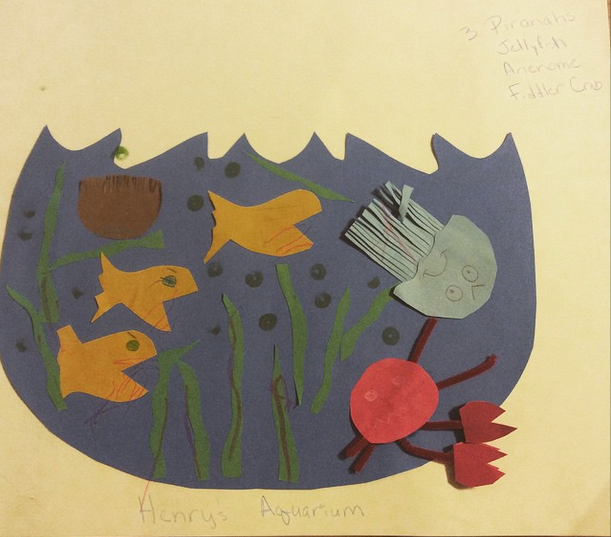
Caterpillars: I cut out wiggly caterpillars from green construction paper. Then we glue pom poms to his body (because caterpillars are fuzzy), add googily eyes and draw a mouth. Sometimes we add antennae.
To make our crafts more educations, during our craft time, we talk about the sounds that the animals make, where they live (habitat), what do they eat (meat, plants, both?).
Sometimes we make Monsters. This is a great opportunity to talk about different body parts, and how people and animals are all different. Here is a photo of out Monster assembly line:
10857190_10153014987651061_2298967290518812755_o
We try to do a craft each day: drawing, painting, cutting paper into shapes. These activities help foster his creativity and imagination, and they help hone his motor skills. To keep Henry engaged, I select crafts and activities based on subjects that are of his interest.
Tips to keep daily/weekly crafting frugal: 
  • We re-use all kinds of stuff: paper towel or toilet paper rolls for kaleidoscopes or pirate spyglasses, magazines for pictures in collages, cardboard egg cartons make caterpillars, clamshells, baby chickens, or spiders.
  • Dollar tree and 99 cents only have great selection of craft supplies like construction paper, glue and glue sticks, googly eyes, jingle bells, pipe cleaners.
  • I try to make a batch of playdoh each month. I use glitter and food coloring to make the playdoh a little more fun. We use playdoh to crafts and creative play. I’ll post my Fool Proof Play dough recipe later this weekend.
  • Stuff around the house that isn’t strictly a craft supply can be used: cupcake liners make flowers or butterfly wings, q-tips, sponges (cut them up to paint), potatoes (stamping or painting).
  • Using stuff from nature: Henry loves the little “pokey balls” from the Chinese elms. Right now they are porcupine puffer fish, but in the past they’ve been all kinds of fun stuff. Paint leaves, use cat tails as paint brushes, gather small sticks and use them to make houses, stack them up, or paint them to use another time.


Driscoll’s Advisory Panel- Save money on fruit!

Original File Name: 20_waterfall_ 42433.tif
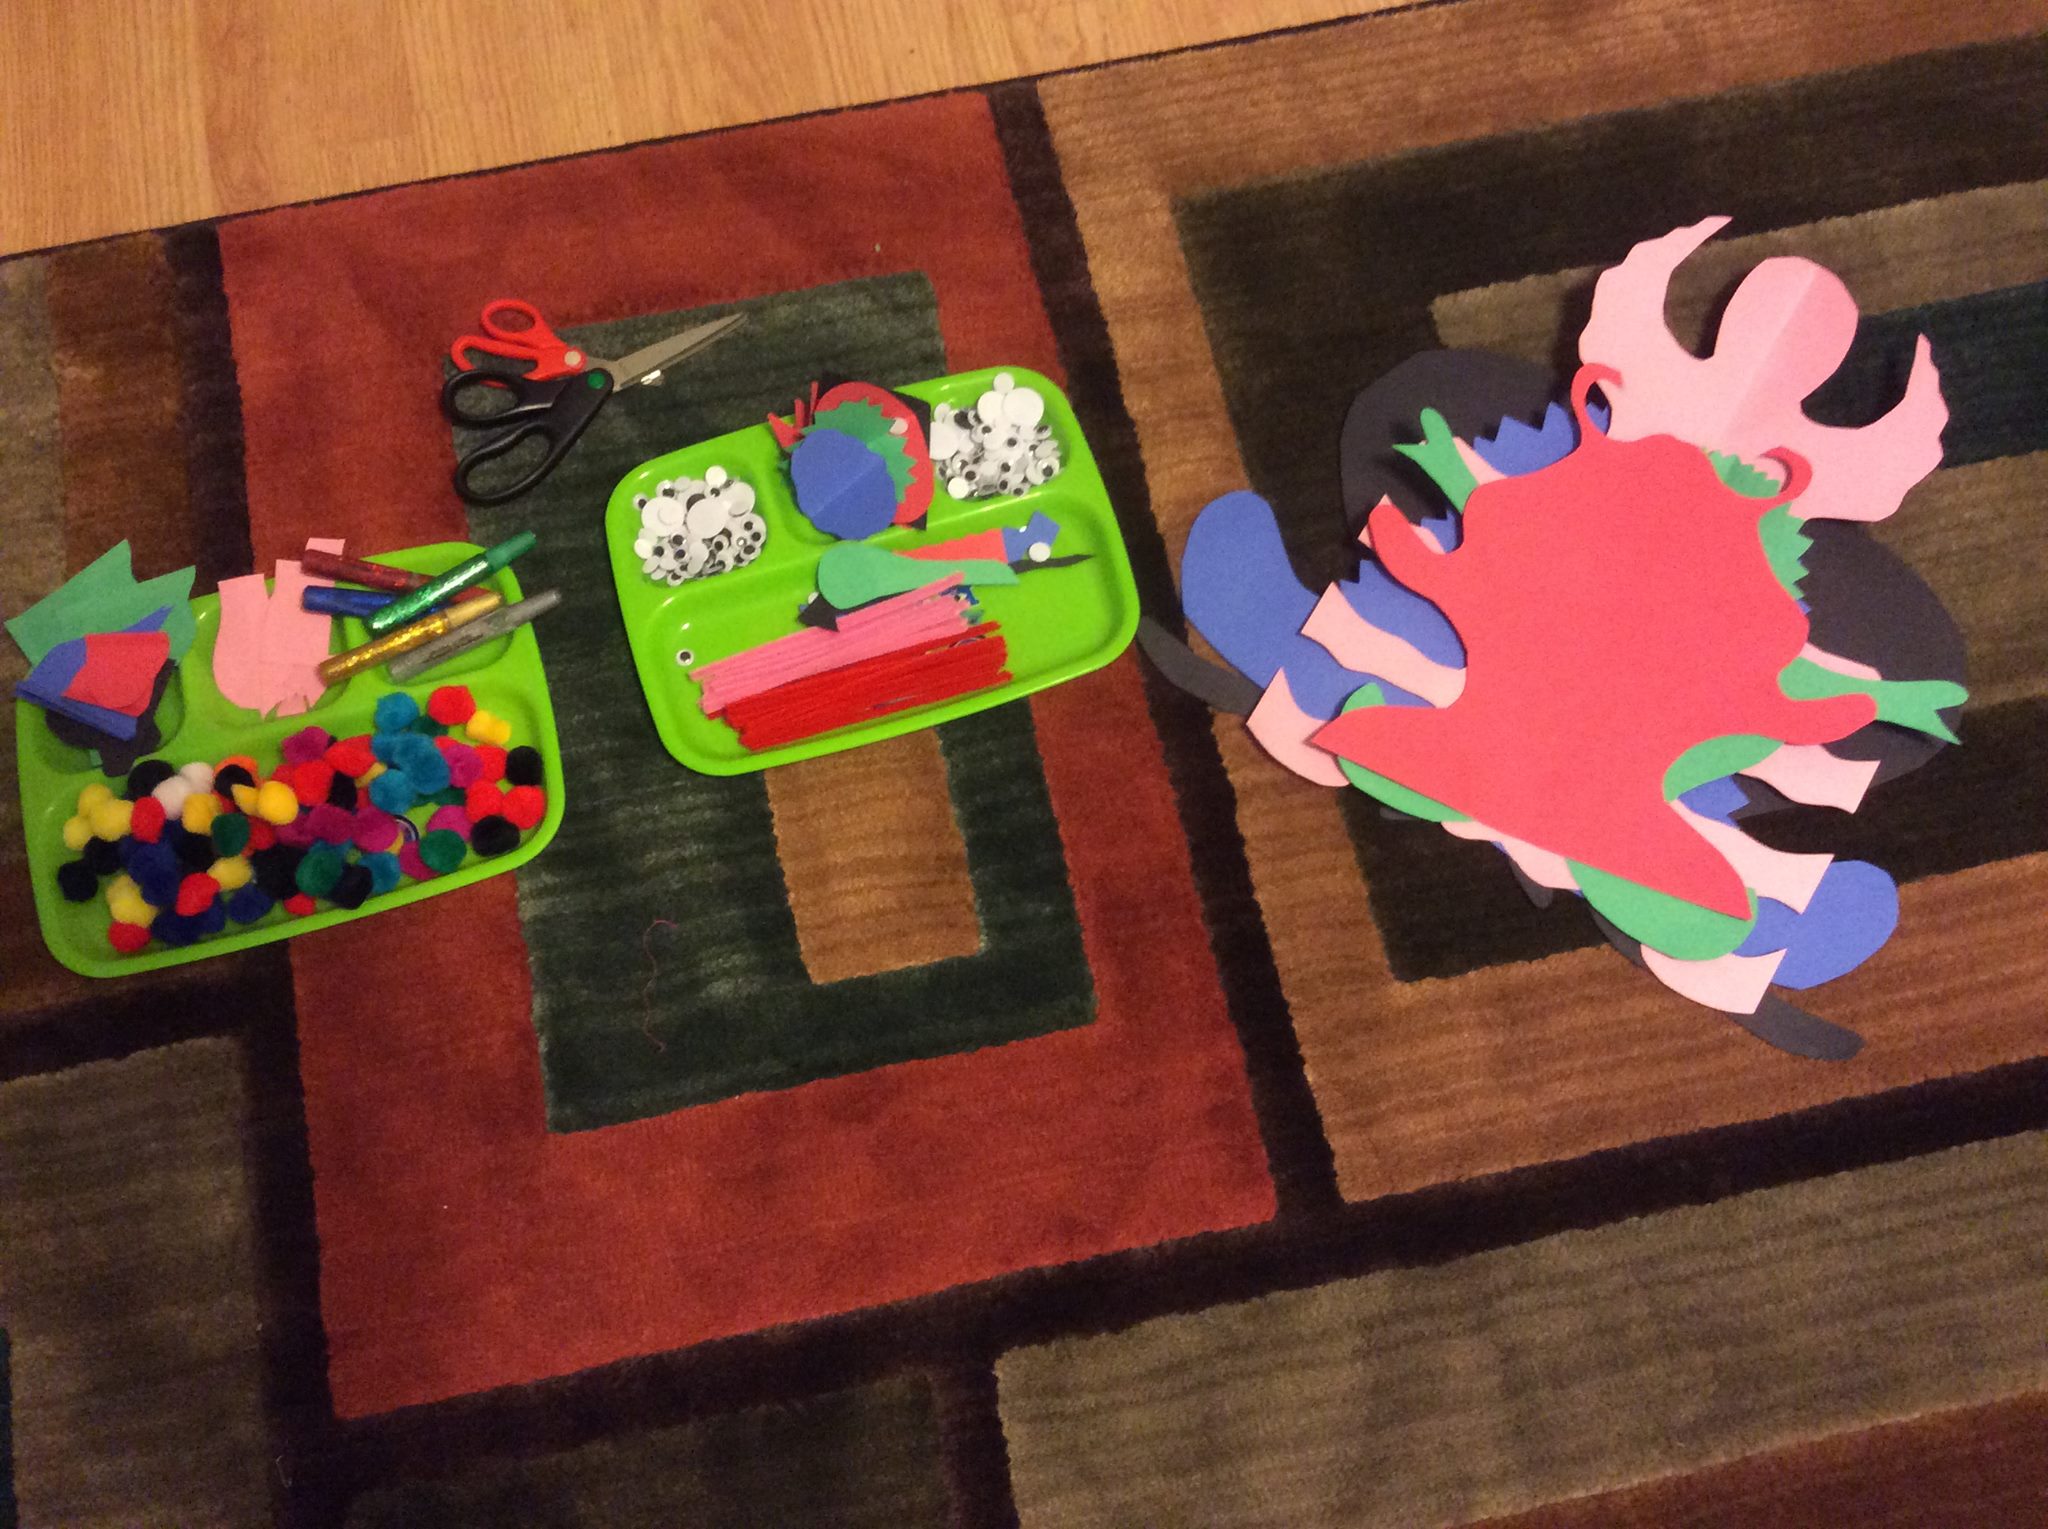
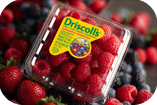
We eat a lot of berries, especially when they are on sale. So, imagine my surprise when I discovered the Driscoll Advisory Panel!

It’s quick and easy to join. Sign up here, and after you enjoy a package of Driscoll berries, just visit the website and enter the traceability code or scan the QR code at the bottom on the carton to take the survey.

Screen Shot 2015-02-27 at 5.13.58 PMYou’ll earn coupon with each survey you take! Sign up and you’ll automatically score a .50/1 coupon!

Rewards Club members enjoy:
-Special offers & a birthday gift
-Get access to sweepstakes & contests
-New & exclusive recipes, health & wellness tips, and more
-A monthly e-newsletter


Screen Shot 2015-02-27 at 5.19.19 PM

With all of the berry sales coming up, you’ll find tons of chances to buy Driscoll Berries! You’ll be taking surveys and earning coupons in no time!

This week, Ralphs has Strawberries for $1.88- after the .50/1 coupon you can print after you sign up that’s only $1.38 per pound- that’s a good deal. And if you are an ORGANIC eater- Rejoice! These codes are on Driscoll’s Organic berries too! I’ll be posting a recipe featuring berries this weekend!

DIY: Stuff Animal Bean Bag Chair

Lil’ Man has a lot of stuffed animals. He’s got some in a hammock like this one, but it’s not enough space.

IMG_1812-1024x757Witness the 45 gallon Sterilite tote on wheel crammed full. Now We’ve weeded out the ones he doesn’t play with or like, but there are still a lot.

I’ve been looking online for better storage methods, and I came upon a few sites suggesting a “bean bag” chair.  You can buy a bean bag chair cover for about $20, or if you’ve got a little craftiness in you, you can make one of your own for a lot less.

Basically you are making a large drawstring pouch.

All you need is:

  • 3 yards of 60 inch wide fabric or a twin sized duvet cover (scour thrift shops)
  • 3 yards 1 inch wide(or wider) grossgrain ribbon
  • Pins, scissors, sewing machine, thread

IMG_1809-1024x764I used a queen  sized duvet cover that I found at Amvets. I washed it and turned it inside out. I trimmed it down to 86(width) x60 (length). I kept the top with the snaps (the 86 inch side), and one adjoining side.


Screen-Shot-2014-09-26-at-11.44.17-AM1

IMG_1823

If you are using fabric, fold the fabric in half, the long skinny way, so the selvedges (that’s the edges that are already finished-sometimes they have writing on them) are at the top  and  bottom of what will become the bag.

Now the the bag is sewn together, fold over the top and stitch it down. This is called a casing. You’ll need to leave a gap of about 1 inch, so that you can thread the ribbon through the casing.

Here is what the casing looks like on the other one I made:

Because my duvet already had a finished top, I snipped little holes in the top casing and threaded my ribbon through, using the safety pin. Attach the ribbon to your safety pin and guide through the casing.

Then, I turned it right side out, stuffed it full of friends,  pulled the drawstring tight, and it was ready to be enjoyed as a bean bag chair in Lil’Man’s room in a corner with some books.

IMG_1817-1024x764
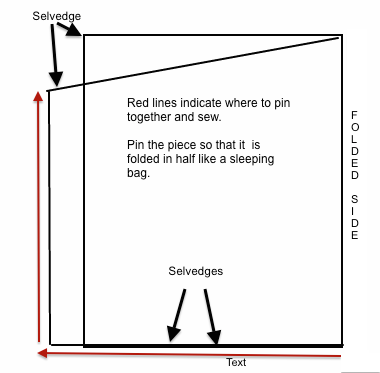
As you can see, Woody and Salmon Fish are kicking back.

There are tons of tutorials. Many call for a piece of mesh to be sewn in, but it’s a PITA to sew down (it moves even when pinned down), so I opted not to do that. and really, if you need to get into it, just open the drawstring and start fishing for toys!

You can also use an old top sheet in whatever size you have, just cut it down to fit. Our toy bag chair is large because of all of the toys Lil’ Man has, but if you’ve got less, feel free to make the bag smaller. Conversely, if you have more, make it bigger!